 USA + International
 OWC Canda
 OWC Europe
What is RAID? How it Works and How to Choose the Best Array for Your Needs
If you're wondering whether your work calls for a RAID, you're in the right place. We dig into how RAID storage solutions work, how they're not a backup, and how to choose the best array for you.
Wayne Grayson • Jul 21, 2026
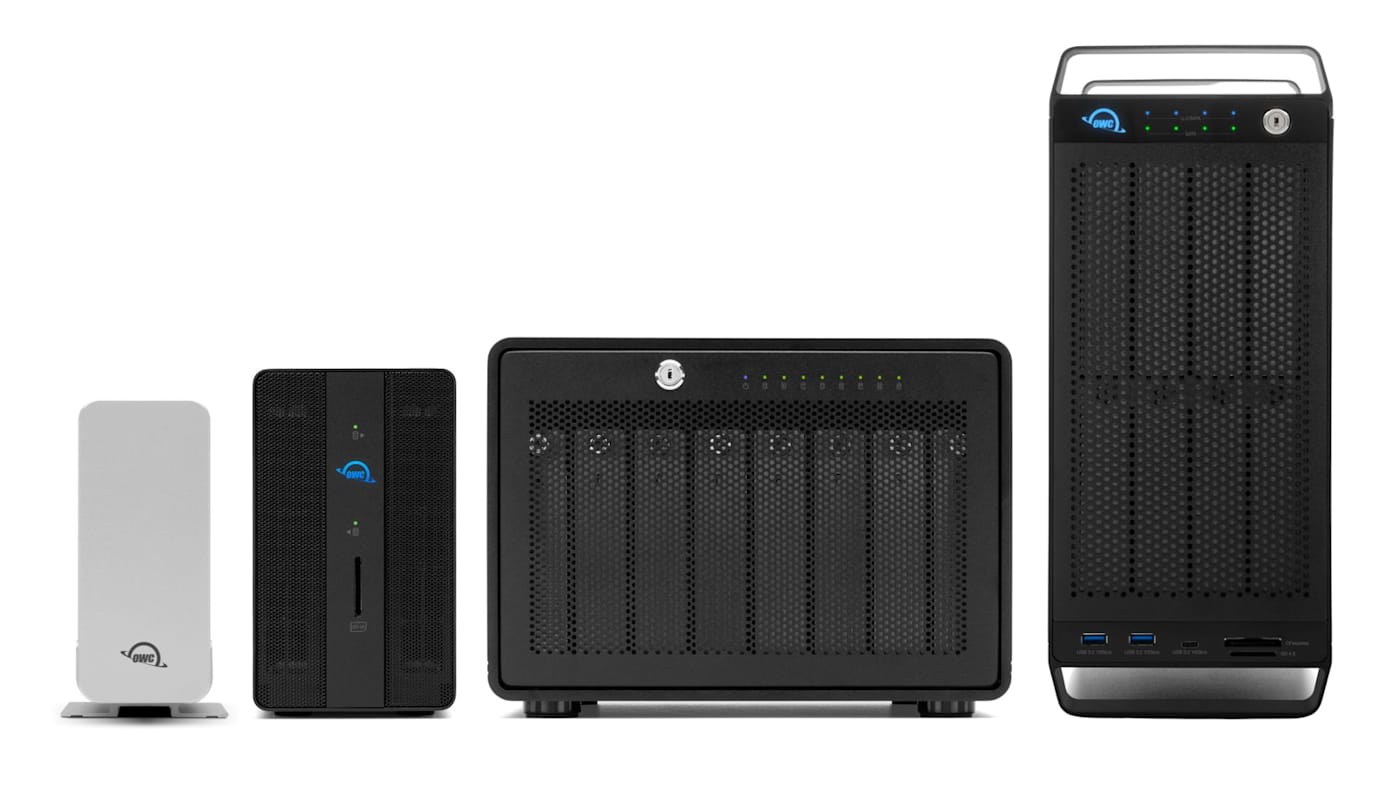
RAID is one of those terms that gets thrown around constantly in creative and technical circles and is misunderstood just about as often. Those that have heard about RAID often delay buying a RAID system because they assume it’s complicated, or they buy one without understanding what it actually protects against. As a result, many who invest in one of these storage solutions end up disappointed or, worse, unprotected when a drive fails.
So, we created this guide to explain what RAID is, what problem it solves, what each level (yes, there are different levels!) actually protects you against and how to think about which configuration is right for your work.
The Basic Idea
RAID stands for Redundant Array of Independent Disks. The key word there is “array.” Instead of storing your data on one drive, a RAID solution spreads it across multiple drives working together as a single system. Depending on how a RAID is configured, that arrangement can make your storage faster, safer, or larger — sometimes more than one of those at once, though rarely all three simultaneously. When it comes to choosing the right RAID for your needs, that’s really the key: deciding which combination of faster, safer, or larger fits you best.
And before we go any deeper, a RAID can play an absolutely vital role in the workflow of creative professionals. Project files, camera footage, and client deliverables tend to be both large and irreplaceable. Storing this type of data on a single drive means exposing your work to the risk of a single point of failure.
Drives fail all. the. time. The primary benefit of RAID is providing your data with better protection and removing the risk of a single point of failure. A RAID basically acts as a super beefy and super hardy drive; one that is really hard to bring down.
There is a “But”: RAID Is Not a Backup
This is the single most important thing to understand before going any further, and it’s where a lot of people get into trouble. While RAID includes the word “redundant” in its name and while it protects your data from the risk of single drive failure, a RAID still functions the same as a single drive. That means a RAID does not protect against accidental deletion, ransomware, fire, theft, etc. If you delete a file by mistake on a RAID array, it’s gone from every drive in that array simultaneously. That’s because RAID doesn’t create a second, independent copy of your data elsewhere; it distributes one copy of your data across multiple disks.
It bears repeating: a RAID is not a backup. It’s simply a way to create a drive that is resistant to mechanical failure.
A properly protected workflow uses RAID for uptime and drive-failure protection on your working storage, plus a separate backup, ideally following a 3-2-1 approach with a copy in a different location. RAID and backup solve different problems. You need both.
RAID Levels
There are several RAID configurations, but in practice, these five are the most common:
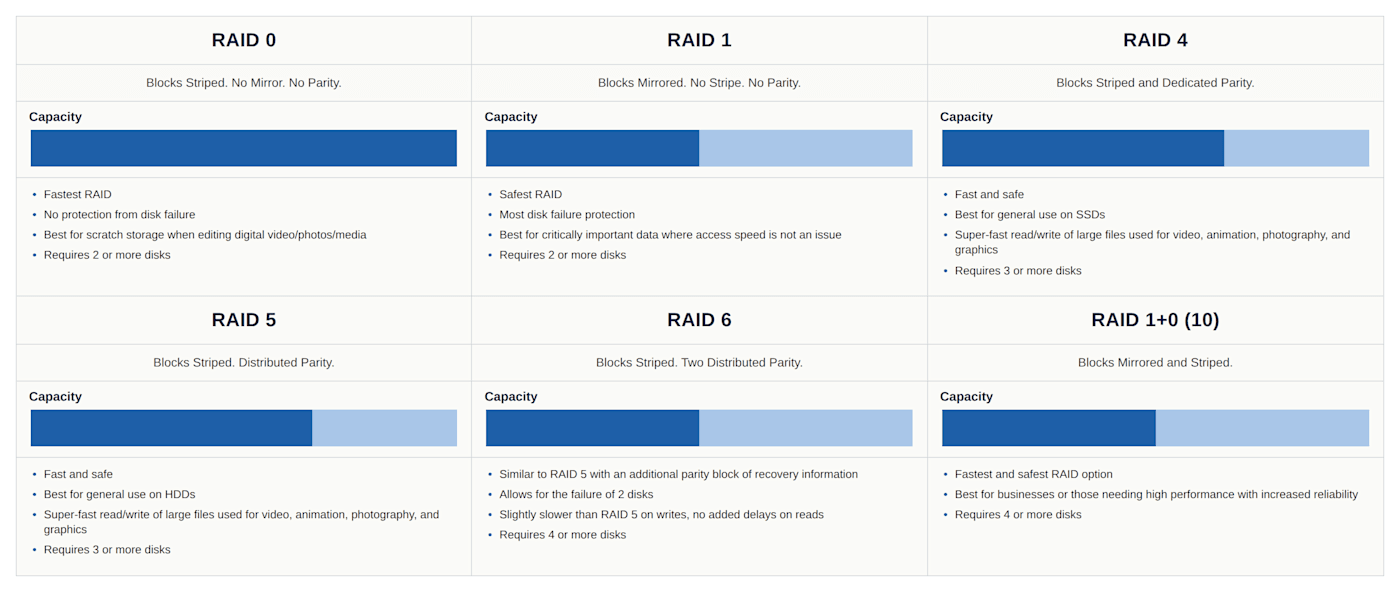
RAID 0
Stripes or splits data across drives to maximize HDD speed and combine their capacity into one large volume. The entire point of RAID 0 is getting more speed out of traditional spinning HDDs. It offers zero redundancy. If one drive fails, the entire array is lost. RAID 0 is appropriate only for temporary, high-speed scratch storage where the data exists elsewhere, never for anything irreplaceable.
RAID 1
Mirrors data identically across two drives. If one fails, the other has a complete, current copy and your workflow continues without interruption. This is the simplest form of real protection, at the cost of losing half your total capacity to the mirror.
RAID 4 and RAID 5
Both configurations stripe data across three or more drives and use parity to reconstruct data if a drive fails, and both give you the same usable capacity: the equivalent of all your drives minus one. The difference is where that parity lives. RAID 4 stores all of its parity data on a single dedicated drive, while RAID 5 spreads parity evenly across every drive in the array. As a result, RAID 4 funnels every write operation through that one parity drive. That leads to a bottleneck under heavy or sustained write activity, along with faster wear on that drive than the others over time. RAID 5 avoids this by design, which is why it has become the far more common standard of the two. RAID 5 handles mixed read and write workflows more gracefully and doesn’t concentrate stress on a single drive. RAID 4 still shows up in specific cases, typically read-heavy setups where a dedicated parity drive simplifies expanding the array later, but for most professional creative workflows with a mix of ingesting new footage, editing, and exporting, RAID 5 is the more versatile and more commonly recommended choice of the two.
RAID 1+0 (RAID 10)
Combines mirroring and striping across four or more drives, offering both strong redundancy and strong performance. It requires more physical drives for the same usable capacity as RAID 5, but it rebuilds faster after a drive failure and handles the load of ongoing use more gracefully during that rebuild.
JBOD
There’s also JBOD or “Just a Bunch of Disks.” JBOD isn’t technically RAID at all. It simply treats multiple drives as independent volumes or combines them into one larger volume without any redundancy or performance benefit. It has its place for pure additional capacity, but it offers none of RAID’s protective benefits.
What About RAID 6?
OWC drives and enclosures do not support RAID 6. However, it is a widely requested feature because it provides dual parity protection, allowing a volume to survive two simultaneous drive failures (compared to RAID 4/5 which can only survive one drive failure). RAID 6 is particularly popular with users who have more, larger capacity drives (such as in an 8-drive enclosure), who can afford to dedicate two drives to parity for maximum data protection. We are actively developing RAID 6 for a future SoftRAID release and RAID 6 and RAID 6+ are currently in early beta testing. RAID 6+ is a SoftRAID-unique feature, similar to RAID 4, that uses dedicated parity drives for improved performance.
If you are interested in trying RAID 6 on your OWC enclosure, we have a restricted beta SoftRAID beta available. Click here to apply for the beta program.
How RAID Protects Your Data
To help you understand how RAID spreads your data across multiple drives we’ll need to cover a small handful of underlying techniques. Once you understand these techniques why one level is fast, why another is protected, and why some require more drives than others will make more sense.
First up is Striping. Striping is what makes RAID fast. Instead of writing an entire file to a single drive, RAID splits it into smaller chunks and writes those chunks to multiple drives at the same time. Picture four people each writing one paragraph of a report simultaneously, rather than one person writing the whole thing alone. The job gets done in a fraction of the time because the work is happening in parallel. That’s striping, and it’s the mechanism behind every performance gain RAID offers. It’s also why striping alone, with nothing else, is risky: if a file is split across four drives and just one of those drives fails, that file is incomplete on every remaining drive too. The speed comes from spreading the work out; the risk comes from the same thing.
Mirroring is what makes RAID 1 protected, and it’s the simplest concept of the three. Instead of splitting data up, mirroring simply writes the exact same data to two drives at the same time. It then constantly updates that duplicate as a live copy. If one drive fails, the other already has a complete, current copy, and nothing needs to be reconstructed or calculated. As you’d expect with a method that creates two copies of all your data, the tradeoff is capacity. Since every byte is written twice, a mirrored pair only gives you the usable storage of one drive, even though your RAID array has two.
Parity is really a combination of the previous two concepts and it’s what allows RAID 4, 5, 6, and 1+0 to survive a drive failure without the cost of a full mirror, and it’s the piece most people find hardest to picture. Imagine you have two numbers: 1 and 2. In addition to storing both digits, you also store their sum, 3. If you lose one of the two original numbers, you can still figure out what it was, because you know the other number and the total. Parity works the same way. As RAID stripes data across multiple drives, it also calculates a checksum — the parity — and stores it alongside the data. If any single drive in the array fails, RAID uses the surviving data plus the parity to mathematically reconstruct exactly what was on the missing drive, on the fly, without you losing anything. This is what lets RAID 5 and similar levels offer real protection while sacrificing far less capacity than a full mirror would.
The reason RAID 5 needs at least three drives, while RAID 1 only needs two, comes directly from this: mirroring only ever needs a duplicate, but parity needs enough drives to stripe data across and still have room to store the parity calculation itself.
Hardware RAID vs. Software RAID
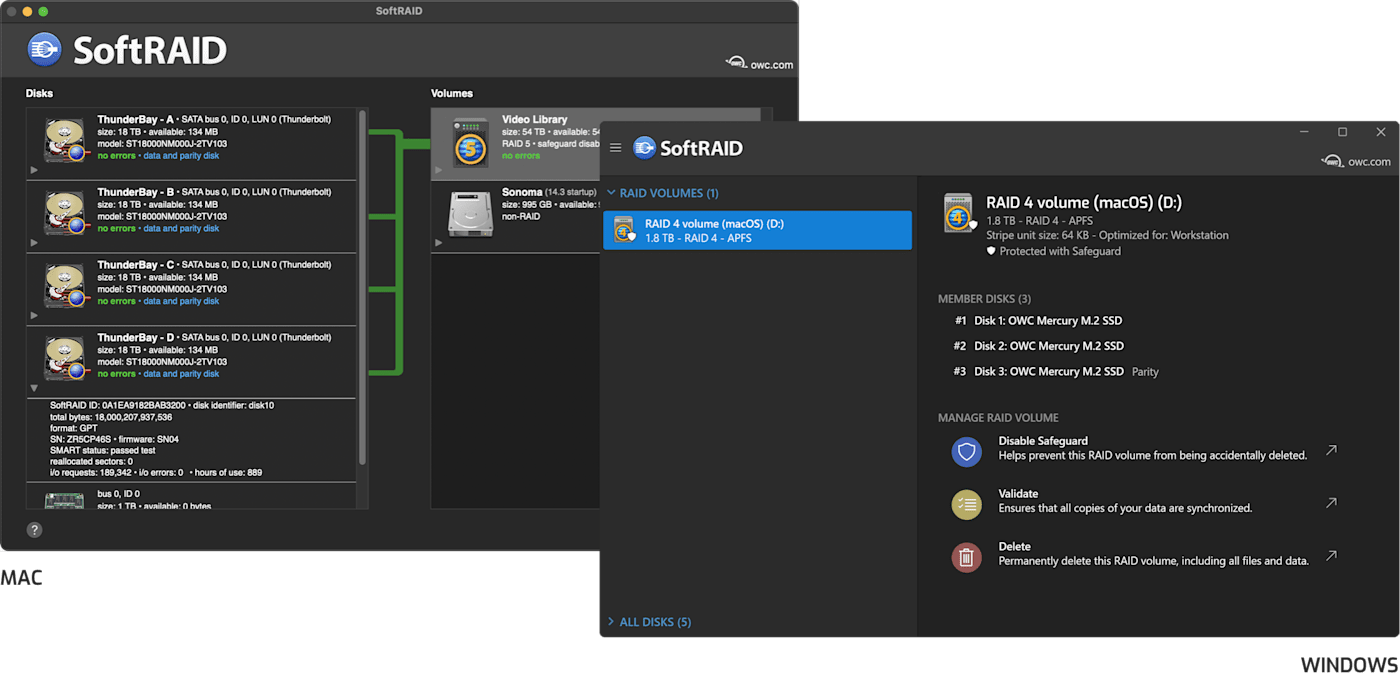
RAID can be managed by dedicated hardware inside an enclosure, or by software running on your computer. OWC’s enclosures are designed for full integration with SoftRAID, OWC’s proprietary RAID management software. SoftRAID takes the work out of RAID management, handling the configuration, health monitoring, and volume management from your Mac or PC rather than from dedicated hardware inside the enclosure.
Beyond just making managing your RAID easier, SoftRAID also provides predictive health monitoring that can flag a failing drive before it actually fails, cross-platform volume support between Mac and Windows, and more transparency into what’s actually happening with your array than a black-box hardware controller typically provides.
SoftRAID offers more visibility and flexibility than traditional hardware RAID, without a meaningful performance penalty on modern computers.
How Many Drives Do You Need When Setting up a RAID?
The number of drive bays in your enclosure directly determines which RAID levels are available to you:
- Two-bay enclosures support RAID 0 or RAID 1 — speed or protection, not both simultaneously.
- Four-bay enclosures open up RAID 4, RAID 5 and RAID 1+0, which is where most professional creative workflows land — enough drives to get real redundancy and real performance at the same time.
- Eight-bay enclosures support the same configurations at larger scale, useful for studios managing large media libraries or long-term project archives that need both speed and capacity.
OWC’s Full Lineup of RAID-Ready Solutions
Here at OWC we make a wide selection of RAID solutions to fit every need. This includes RAID solutions for traditional spinning HDDs and those built atop blazing-fast SSDs. Let’s talk about these options and how to pick the best RAID solution for your workflow.
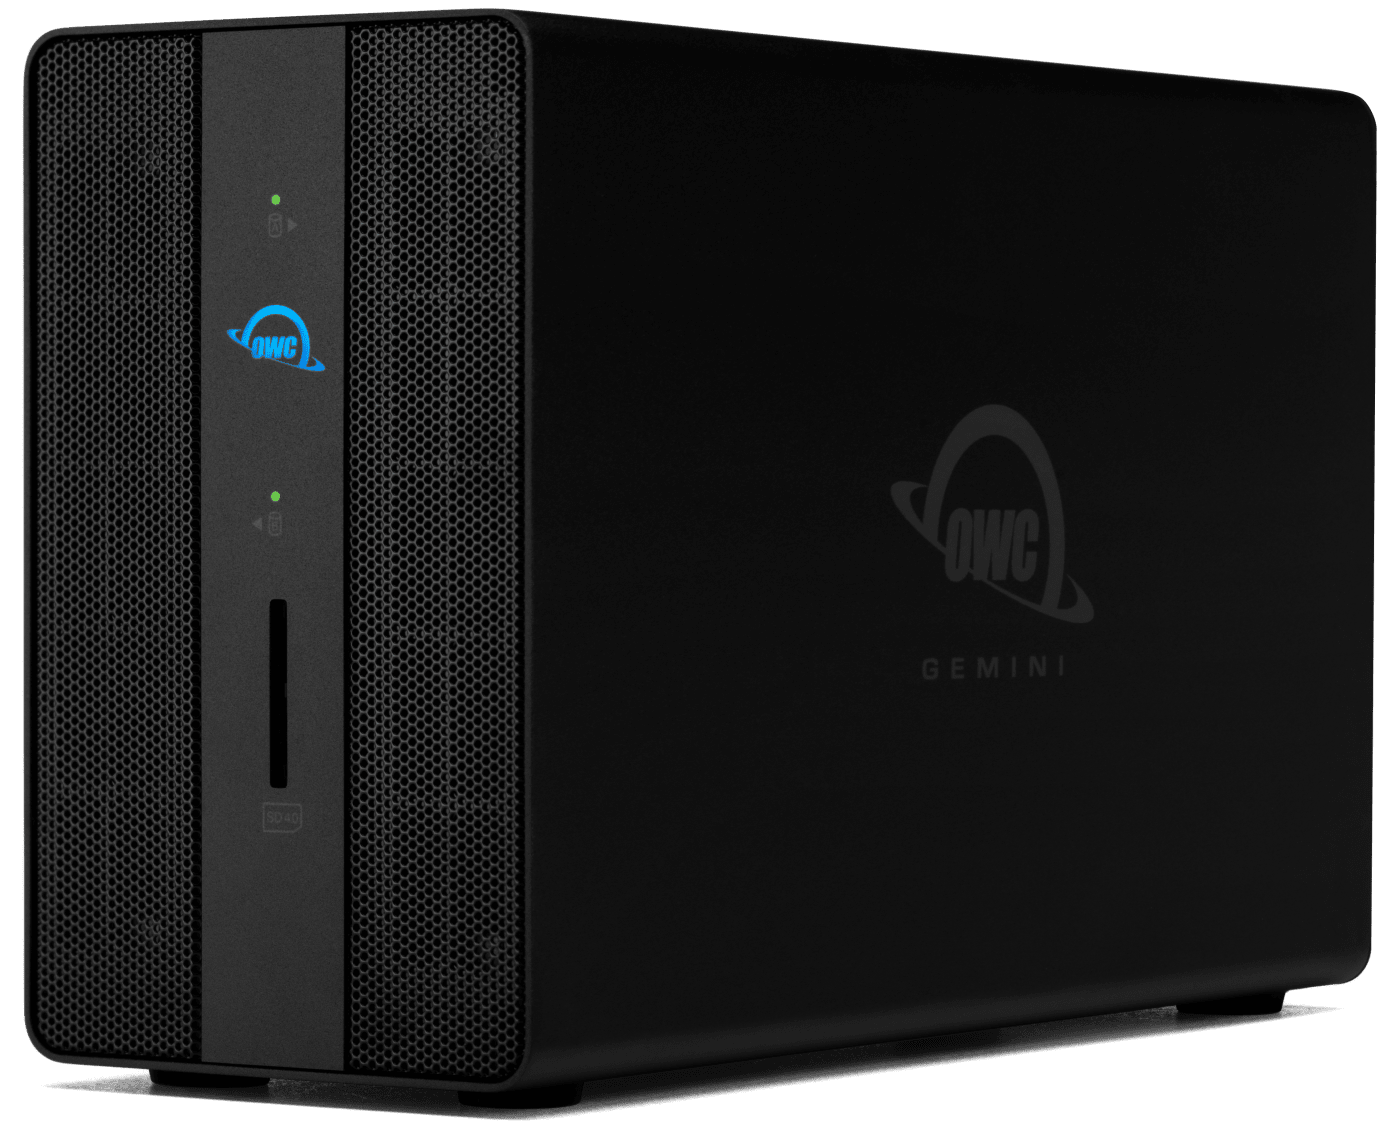
Two-Bay RAID with a Dock Built In: OWC Gemini
Gemini takes the storage-plus-connectivity idea and scales it into a compact two-bay RAID solution. It accepts two 3.5” or 2.5” SATA or U.2 drives, supports RAID 0 or RAID 1, and pairs that storage with helpful Thunderbolt dock functionality: two Thunderbolt ports, two USB 3.2 Gen 2 ports, 2.5 Gigabit Ethernet, and HDMI output, all from a single cable to your computer. For anyone who wants basic mirrored or striped protection without a four- or eight-bay footprint, and who also wants the enclosure to double as their dock, Gemini is the only OWC RAID solution built around that specific combination.
HDD-Based RAID: ThunderBay 4 and ThunderBay 8
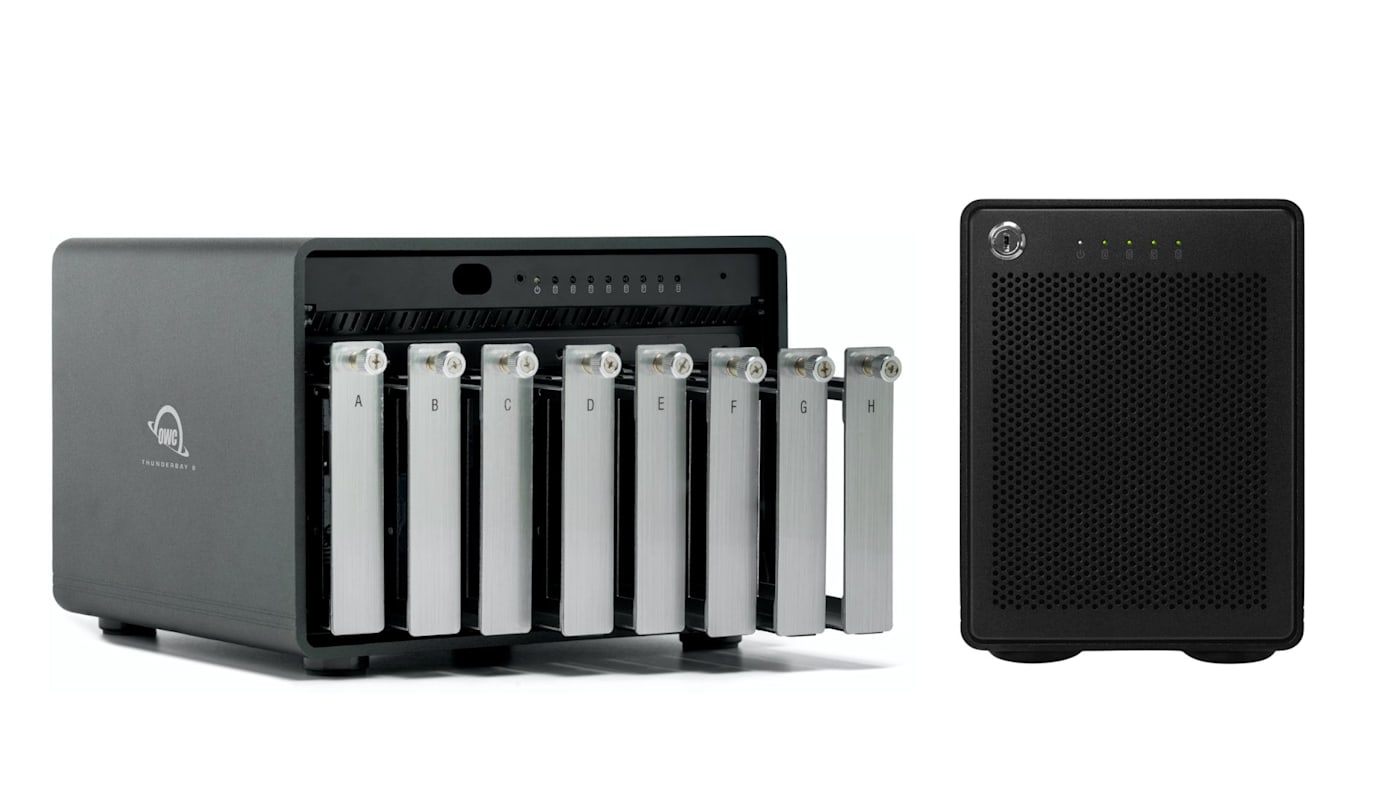
These enclosures use traditional 3.5” hard drives, and they remain the most cost-effective way to get large amounts of RAID-protected capacity. ThunderBay 4 and ThunderBay 8 support RAID 0, 1, 4, 5, and 1+0 via SoftRAID, with capacities scaling into the tens of terabytes depending on the drives installed. HDDs cost dramatically less per terabyte than any flash-based option, which makes these the natural choice for archives, backups, and large media libraries where raw capacity matters more than peak speed.
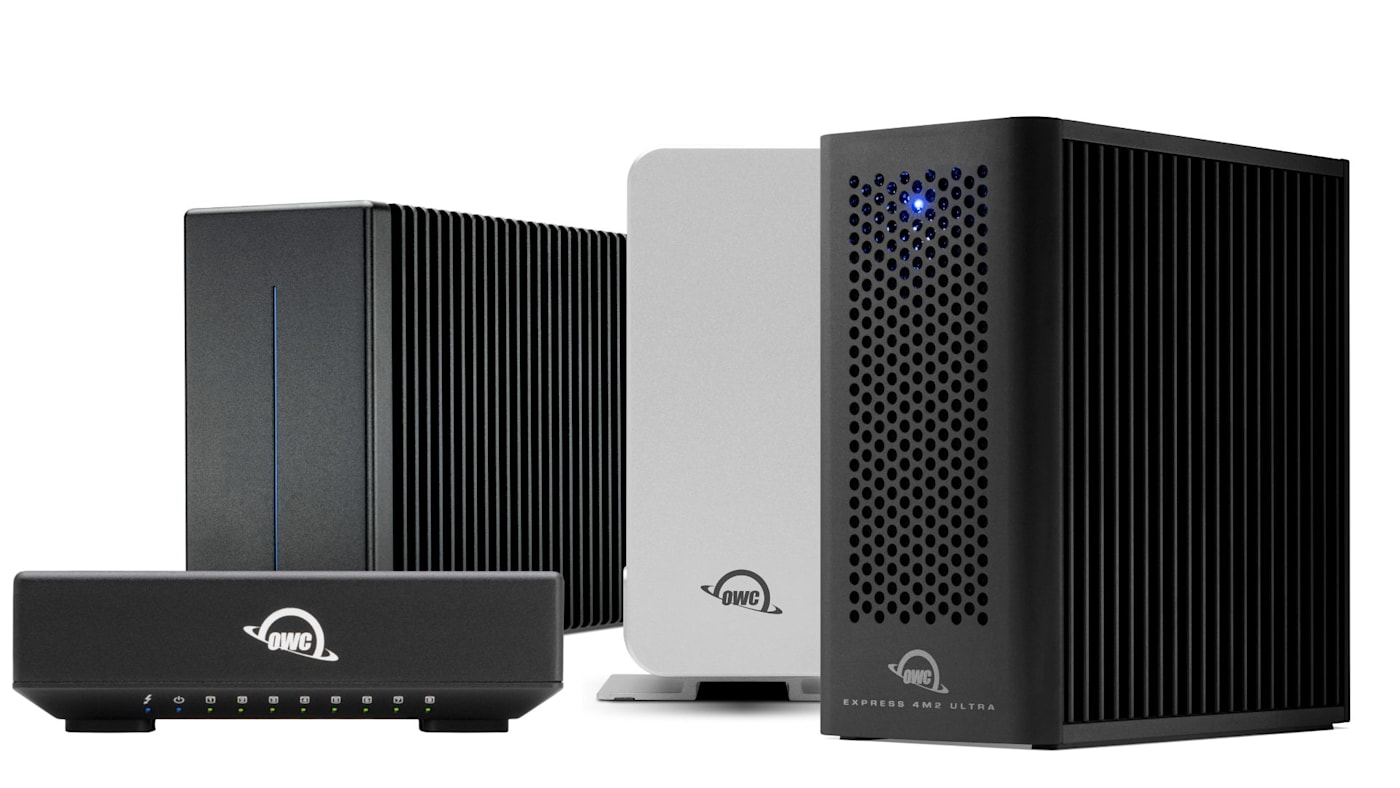
SSD-Based RAID: Express 4M2, Express 4M2 Ultra, and ThunderBlade
For workflows where speed is paramount, OWC’s all-NVMe RAID enclosures replace spinning disks with M.2 SSDs for a huge jump in performance.
The Express 4M2 is the original DIY four-slot NVMe enclosure, letting you bring your own M.2 drives and configure RAID 0, 1, 4, 5, or 1+0 over a Thunderbolt 3/4 connection.
The Express 4M2 Ultra is the newer, faster evolution of that idea, built around Thunderbolt 5. It accepts up to four user-supplied NVMe SSDs, supports the same RAID 0/1/4/5/10/JBOD options, and delivers real-world speeds up to 6,622MB/s. A second Thunderbolt 5 port allows daisy-chaining additional units into one large combined volume, and the enclosure remains backward compatible with Thunderbolt 4, Thunderbolt 3, and USB4 hosts.
The ThunderBlade is OWC’s original ready-to-run shuttle RAID, a compact 4-bay NVMe array connecting over Thunderbolt 3, supporting RAID 0, 1, 4, 5, and 1+0. Like the rest of the ThunderBlade line, it ships pre-configured and preformatted rather than requiring you to supply your own drives, and its small, rugged, paperback-book-sized form factor is built to travel in a bag between set and studio.
The ThunderBlade X12 is the current flagship of the ThunderBlade line and the fastest RAID shuttle OWC makes. Built around Thunderbolt 5, it houses 12 NVMe M.2 SSDs, reaching up to 192TB in its largest configuration, with peak speeds up to 6,600MB/s and sustained write speeds around 5,990MB/s. That’s fast enough to edit multicam 8K or even 12K RAW sequences directly off the array. It supports RAID 0, 1, 4, 5, and 10, ships preconfigured in RAID 0, and includes a second Thunderbolt 5 port for daisy-chaining up to five additional devices. Like the rest of the ThunderBlade family, it’s built for on-set and on-location use: a fanless aluminum chassis, non-skid feet, a locking power connector, and a hard-shell carrying case designed for the realities of production work rather than a studio desk.
Hybrid Flexible RAID: OWC ThunderBay Flex 8
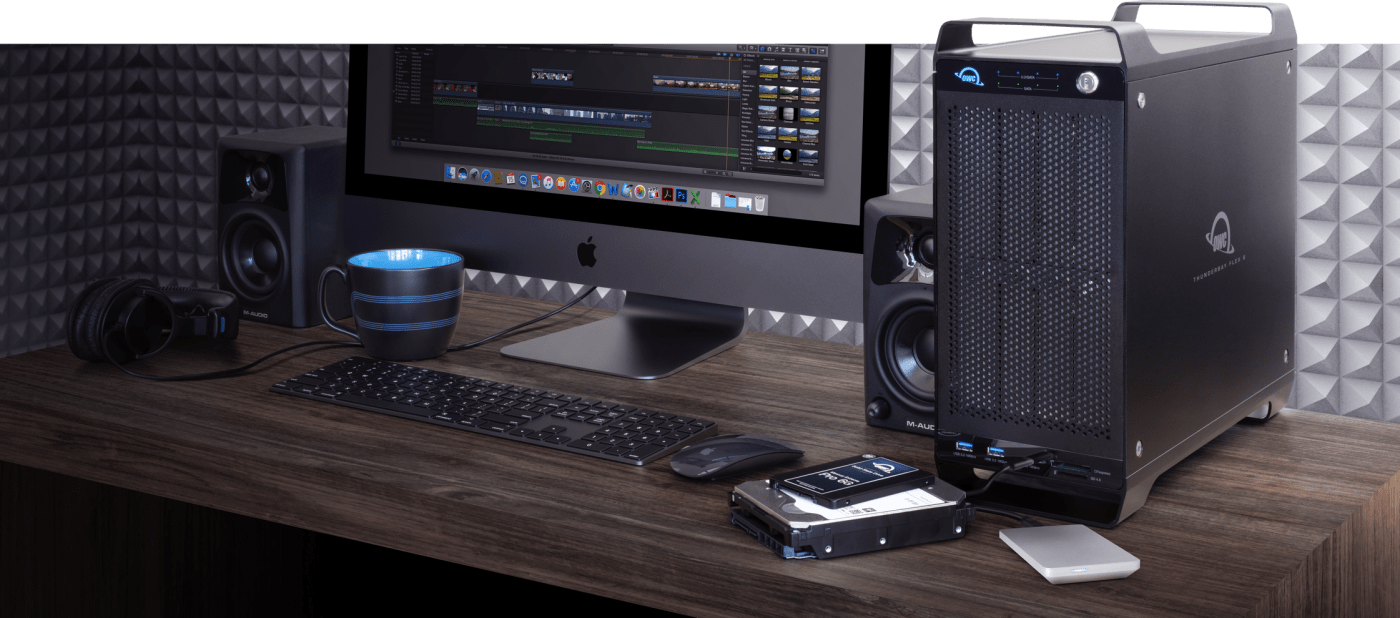
ThunderBay Flex 8 is the most configurable option in the lineup. Its eight bays accept any mix of 3.5”/2.5” SATA HDDs and SSDs, and the top four bays are also U.2 NVMe-ready — meaning you can run a fast NVMe RAID 0 for active ingest and editing while a separate HDD RAID 5 array on the same unit handles bulk project storage and backup, all in one enclosure. It supports RAID 0, 1, 4, 5, and 1+0 via SoftRAID, with fully loaded configurations reaching up to 200TB and real-world speeds up to 2,750MB/s. It also functions as a dock and expansion hub: front-mounted SD and CFexpress card readers, DisplayPort output for up to 8K, and an open PCIe slot for capture cards, networking, or a hardware RAID controller. Flex 8 is built specifically for workflows that need both a fast working tier and a massive capacity tier without splitting them across two separate boxes.
Choosing Between SSD and HDD RAID
The decision comes down to what your workflow actually demands:
• Choose HDD-based RAID if your priority is capacity per dollar: long-term archives, finished project storage, backup targets, or any use case where you need many terabytes and don’t need to edit directly off the array at high speed.
• Choose SSD-based RAID if your priority is speed: editing multicam or high-resolution footage directly from the array, VFX work, or any workflow where waiting on a spinning disk would slow down the work itself. You’ll pay more per terabyte, but the performance ceiling is in a different class entirely.
How to Choose the Right OWC RAID for Your Needs
Upon choosing HDD or SSD, the choice narrows further based on how you work:
• Gemini is a great solution for enthusiasts or content creators whose needs have scaled into needing large amounts of space for archival or backup but don’t need or want a larger 4- or 8-bay RAID solution. And its docking capabilities are a huge bonus. The workflow here would be editing off your Mac or PC’s internal drive or a speedy external drive like the OWC Express 1M2 and then backing up or archiving to the Gemini in RAID 0 for maximum speed or RAID 1 for redundancy.
• ThunderBay 4 is the right starting point for most professional RAID needs that have outgrown a two-bay, two level RAID solutions like Gemini. ThunderBay 4 offers four bays, full RAID level support, and a lower cost of entry than the 8-bay version.
• ThunderBay 8 makes sense when you need more raw capacity than four drives can provide, or when you specifically want RAID 5 or 1+0 with more usable capacity remaining after redundancy is accounted for.
• Express 4M2 suits anyone who wants DIY flexibility with their own NVMe drives on a Thunderbolt 3/4 setup, without paying for Thunderbolt 5 speed they won’t use.
• Express 4M2 Ultra is the choice for a Thunderbolt 5 Mac or PC where you want to push NVMe RAID to its practical limit, and want the option to scale further by daisy-chaining additional units.
• ThunderBlade is the pick for productions that need ready-to-run, on-location NVMe RAID at a moderate capacity and price point.
• ThunderBlade X12 is built for the most demanding mobile production workflows: massive multicam and high-resolution RAID footage, the highest capacity and speed ceiling in the shuttle category, and true grab-and-go durability for set-to-studio moves.
• ThunderBay Flex 8 is the choice for professional workflows that need capacity and speed from their RAID array. Its combination of SSD- and HDD-based storage allow for a lot of...well...flexibility. And it fits in perfectly for DITs, VFX artists, and professional video editors thanks to its bult-in Thunderbolt docking, PCIe expansion, and daisy chaining capability.
How to Choose the Right RAID Level
Once you’ve decided on your specific RAID solution, here’s a simple framework for helping decide which RAID level configuration will suit your workflow best:
- If you need maximum speed for temporary work and the data exists safely elsewhere, go with RAID 0.
- If you need simple, reliable protection and don’t mind losing half your capacity to get it, go with RAID 1.
- If you want a practical balance of capacity, speed, and protection for ongoing professional work, go with RAID 5.
- If your workflow can’t tolerate downtime during a drive failure and you have the bays to spare go with RAID 1+0.
Whichever level you choose, remember the earlier point: RAID protects your working storage from drive failure. It is not your backup. Pair it with a true 3-2-1 backup strategy, and you have a storage setup that will withstand the kind of failure that, sooner or later, happens to everyone.
Other topics you might like
How to Maximize Your New M5 Max and M5 Ultra Mac Studio: Storage, Docking, and Connectivity
Updated on Sep 16, 2026

Get the Most Out of the New M6 and M5 Pro Mac mini with These Docks and Drives
Updated on Sep 3, 2026
How to Choose the Right Desktop Storage: Capacity, Speed, and Interface Explained
Updated on Sep 2, 2026