 USA + International
 OWC Canda
 OWC Europe
Setting Up Your First RAID With SoftRAID: What to Expect
What you'll need and what you'll need to know going into your first RAID setup with the easy-to-use SoftRAID management software.
Wayne Grayson • Jul 29, 2026
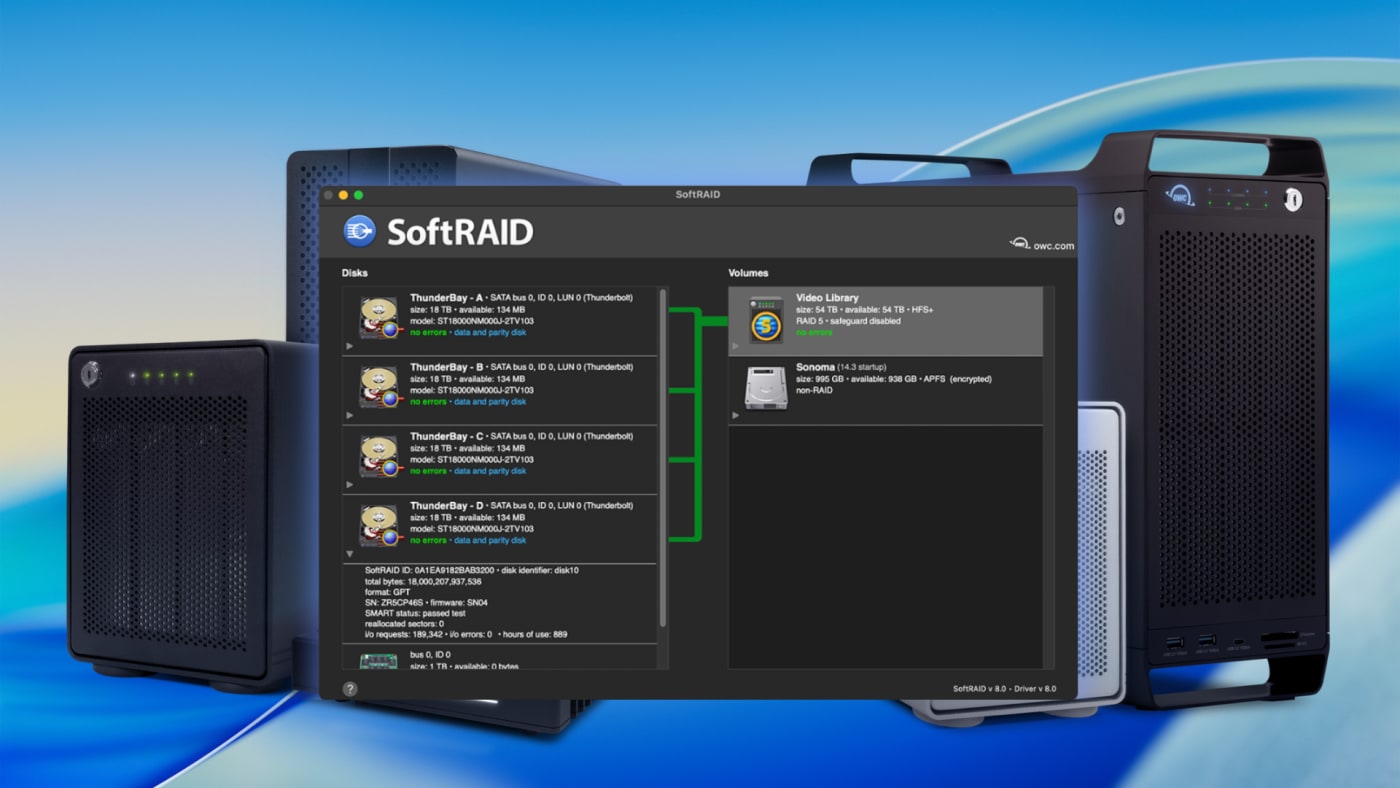
So, you did the research, you understand what RAID is, and you’ve decided on which enclosure and RAID level is the right fit for your workflow…and now you’re curious what you’ve gotten yourself into when it comes to setting it all up. After all, as our full guide to RAID shows, all the details of RAID storage can get pretty overwhelming and the last you thing you want to do is invest in a RAID array and then mess something up before you even get started.
Thankfully, you don’t have to be worried. In fact, these are the sort of concerns that we created our SoftRAID management software to address. Creating your first SoftRAID volume is an easy, straightforward process. We even created a thorough, step-by-step walkthrough to lead you through setup on both Mac and Windows.
Once you’ve got your RAID array and disks in hand and you’re ready to get going with setup, you’ll head over to that official walkthrough to start setup. This guide, on the other hand, is meant to serve as a primer for what to expect from that process, what to have ready before you start, and which parts trip up first-timers the most. By the time you open the official walkthrough, none of it will feel unfamiliar or scary.
How Long Does Setup With SoftRAID Typically Take?
Installing the SoftRAID software, initializing your disks, and creating your volume typically takes under 30 minutes, even the first time through.
However, parity-based arrays like RAID 4 or RAID 5, require SoftRAID to sync all the disks to ensure parity is accurate once the volume is created. For large mechanical hard drive arrays (32TB–64TB+ for example), this initial synchronization can take anywhere from 12 to 30+ hours depending on drive speeds. The good news is you don’t need to sit and watch it happen. SoftRAID is designed to manage all of this in the background.
What to Have Ready Before You Start
- Your enclosure connected to power and to your computer, with drives already installed according to the enclosure’s assembly instructions.
- Your SoftRAID license and serial number:
- If you purchased your software on the OWC software store, you can locate your serial number by logging in to your customer account and selecting “Show Previous Orders” and then “Order Details”. The serial number will be near the bottom of the page. It is also listed on your order confirmation email from OWC.
- If your license was included with your OWC enclosure purchase, your serial number will be on a sticker located on the bottom of your unit or, depending on storage solution, may be located inside the front drive door.
- A decision on which RAID level you’re using. If you haven’t settled this yet, our companion guide, “What Is RAID?” walks through how to choose.
- A backup of anything currently stored on the drives you’re about to use. Initializing a disk for RAID erases what’s on it so make sure you’ve backed up your data.
Initializing Disks
Disk initialization is the point of the process where existing data on a drive gets erased to prepare it for RAID use. If you are repurposing drives for use in your RAID, we don't want you to accidentally erase any data from those drives before you've had a chance to back them up.
For that reason, SoftRAID doesn’t let this happen accidentally: you explicitly select the disks you intend to use and then confirm the action before anything is erased. As long as you’ve backed up anything you need beforehand, there’s no ambiguity about what’s about to happen or a risk of it happening by mistake.
Choosing a RAID Level During Setup
SoftRAID will show you which RAID levels are available based on how many disks you’ve selected. This takes a lot of the guesswork out of selecting a RAID level because you won’t be offered an option your hardware can’t support.
Setting Up Health Monitoring
Once your volume is created, SoftRAID can monitor your disks in the background and alert you if one shows early signs of failure. It’s worth taking the extra couple of minutes during setup to configure this while you’re already in the software. Predictive health monitoring is what gives you time to replace a drive before it actually fails, rather than finding out after the fact.
If You Get Stuck
SoftRAID’s official documentation covers the complete setup process for both Mac and Windows in detail, including current screenshots that match the actual interface. If anything about your specific enclosure or drive configuration doesn’t match what you expected, OWC’s support team is also available directly. When it comes to RAID, getting a second opinion before proceeding is always the right call instead of guessing.
One thing worth knowing upfront: if a drive ever fails after your RAID is running, the recovery process is different for hard drives than it is for NVMe SSDs, and the correct steps depend on which RAID level you’re using. Rather than guess in the moment, OWC’s support documentation covers drive failure and replacement in detail. Be sure to bookmark the SoftRAID support page alongside the setup guide so it’s easy to find if you ever need it.
You’ve Totally Got This
With your backup done, your RAID level decided, and your license in hand, the setup process itself is very straightforward. Follow our official SoftRAID Quick Start and Install Guide for the exact steps for your platform, and you’ll have a working, protected volume running in under an hour.
And if you encounter in issues or questions during or after setup, be sure to check out our SoftRAID knowledge base where you can find the answers.
Once you’re done with setup setup, make sure your RAID is part of a full 3-2-1 backup strategy. While RAID provides extra protection against drive failure, it is not a backup. For more information on building a proper backup strategy check out our 3-2-1 backup guide here.
Other topics you might like
How to Maximize Your New M5 Max and M5 Ultra Mac Studio: Storage, Docking, and Connectivity
Updated on Sep 16, 2026

Get the Most Out of the New M6 and M5 Pro Mac mini with These Docks and Drives
Updated on Sep 3, 2026
How to Choose the Right Desktop Storage: Capacity, Speed, and Interface Explained
Updated on Sep 2, 2026