With the introduction of Jellyfish Integrations, everyone now has the ability to backup directly from the Jellyfish to Backblaze B2 Cloud Storage. This integration is one of many that simplifies and automates backups to the cloud, giving your team peace of mind that there is an offsite backup in case something tragic happens to your on-site storage.
Below is a quick step-by-step guide on how to set up your B2 Cloud Bucket with your Jellyfish.
Step 1: Connect your Jellyfish to the Network
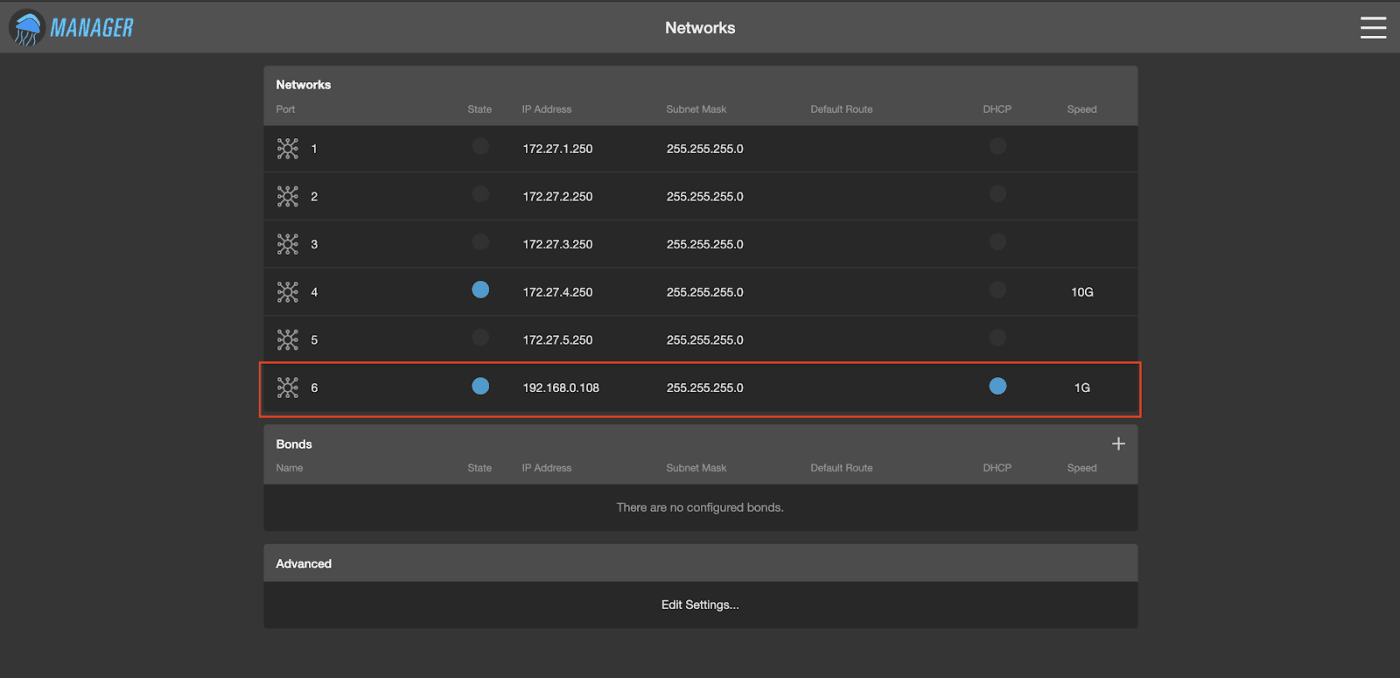
Choose the port on the back of the Jellyfish you are going to connect to your router and plug in your Ethernet cable. You can log into your Jellyfish Manager and go to the network module to set that port as DHCP and plug the other end of the cable into your internet router. Once the connection has been established, your Jellyfish will be able to communicate with the Backblaze Cloud Service.
Step 2: Install and Configure Backblaze
Once you have a connection out to the network, you can now install Backblaze.
Log into the Jellyfish Manager and go to the Advanced Module.

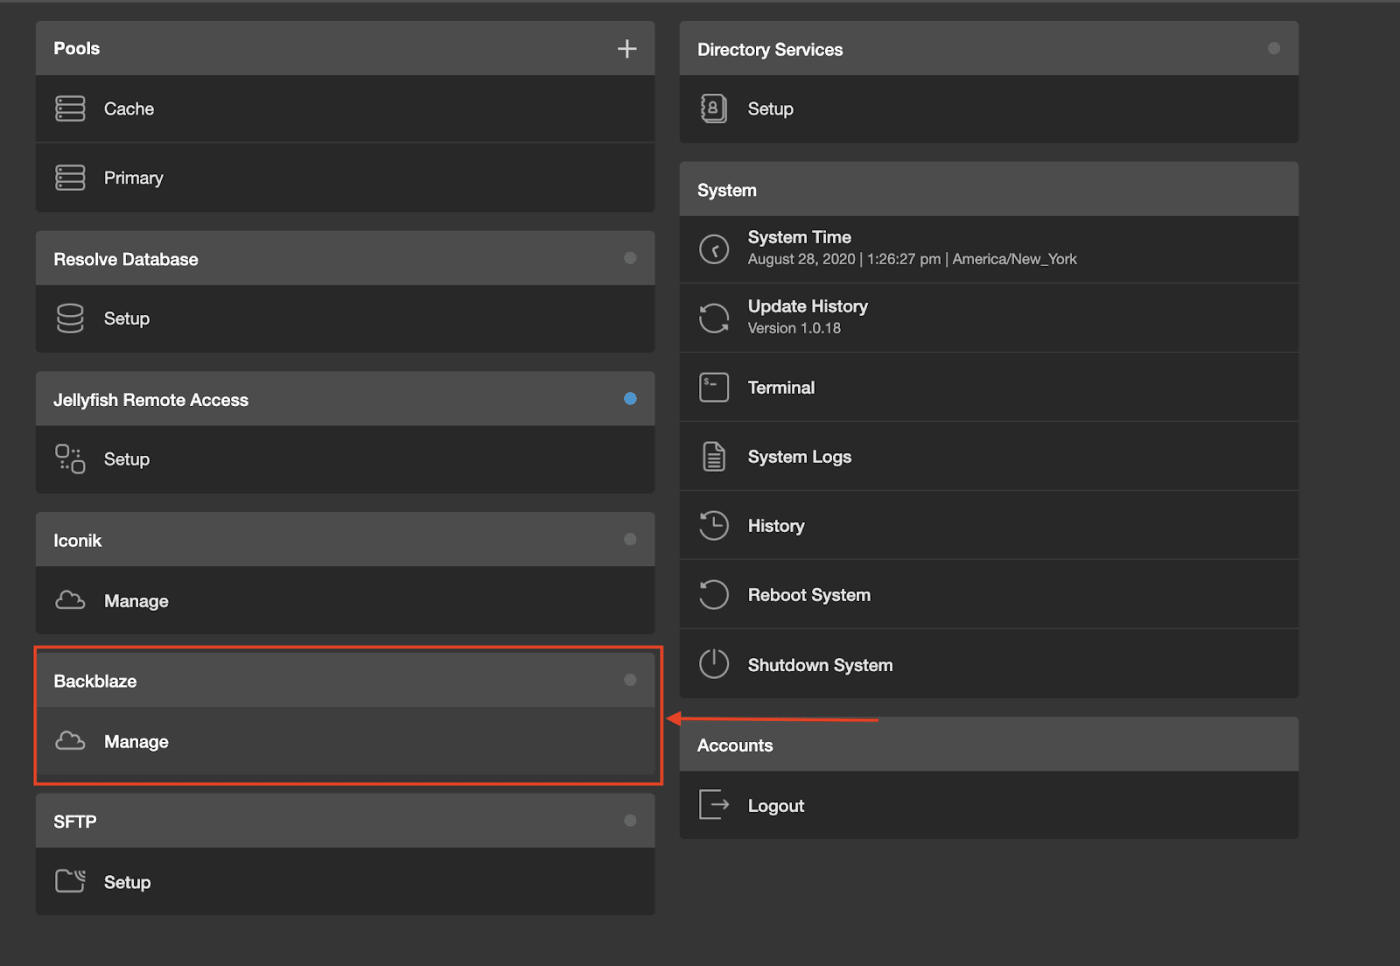
You will see a menu item for Backblaze. Click on it.

Click install to get B2 installed on to your Jellyfish.
If the networking isn’t set up correctly (refer to Step 1), the Jellyfish will not be able to reach out to the outside world. This step will fail and you will need to go back and ensure you are able to reach the internet from your Jellyfish.
Step 3: Login into Backblaze.
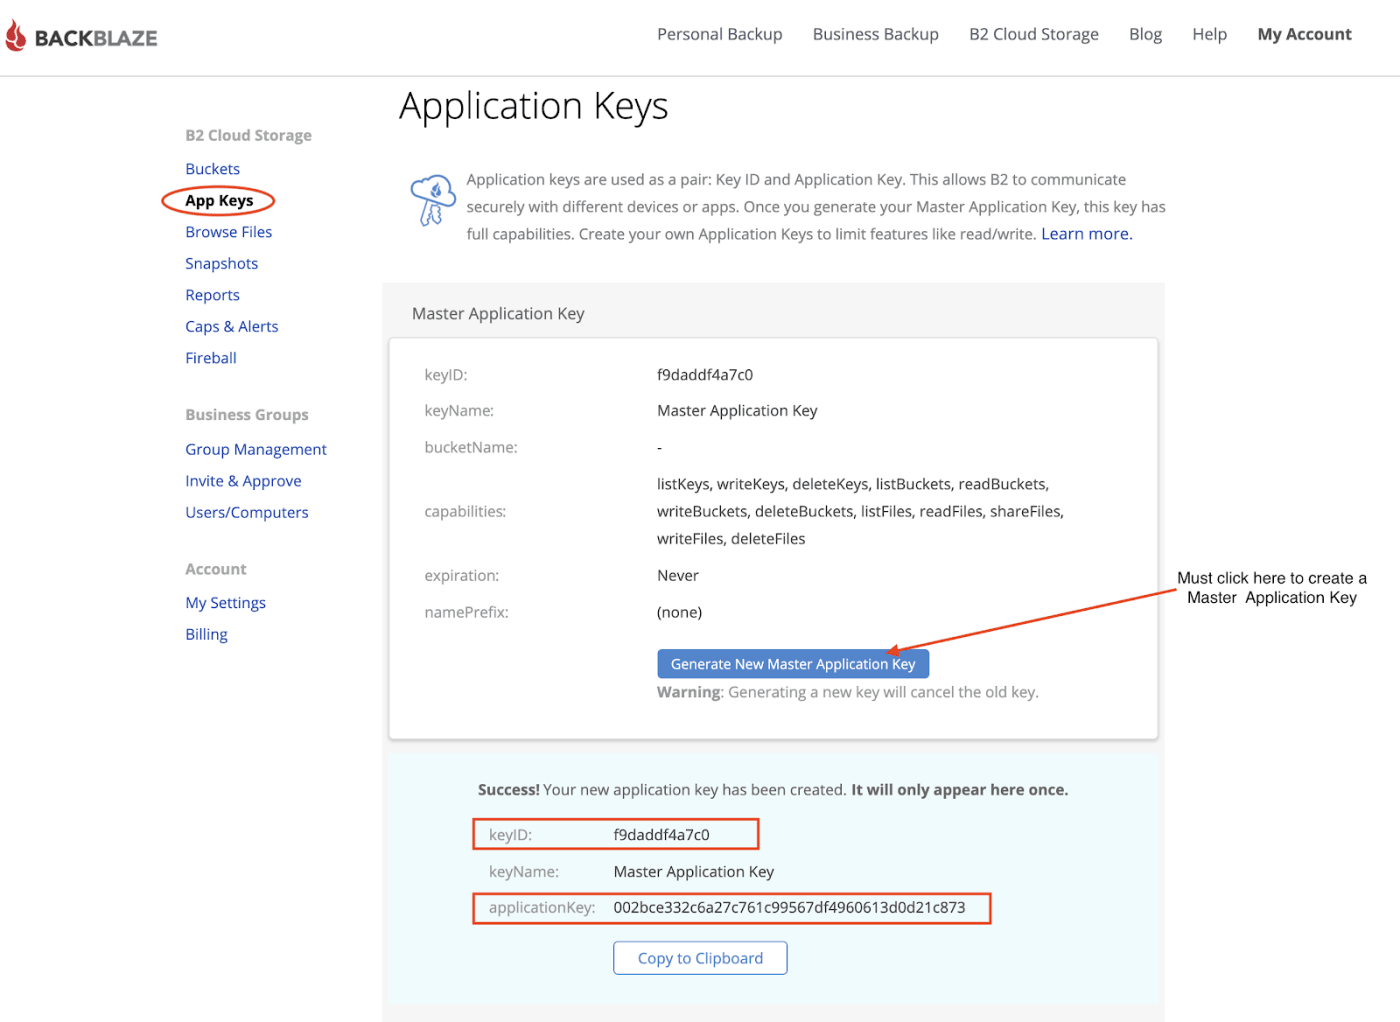
You will need to login to your Backblaze account to authenticate your account on your Jellyfish. From there, you will need to retrieve a KeyID and application key.
Step 4: Activate the Connection

To activate the connection, simply click the check mark icon and the setup process will be complete!
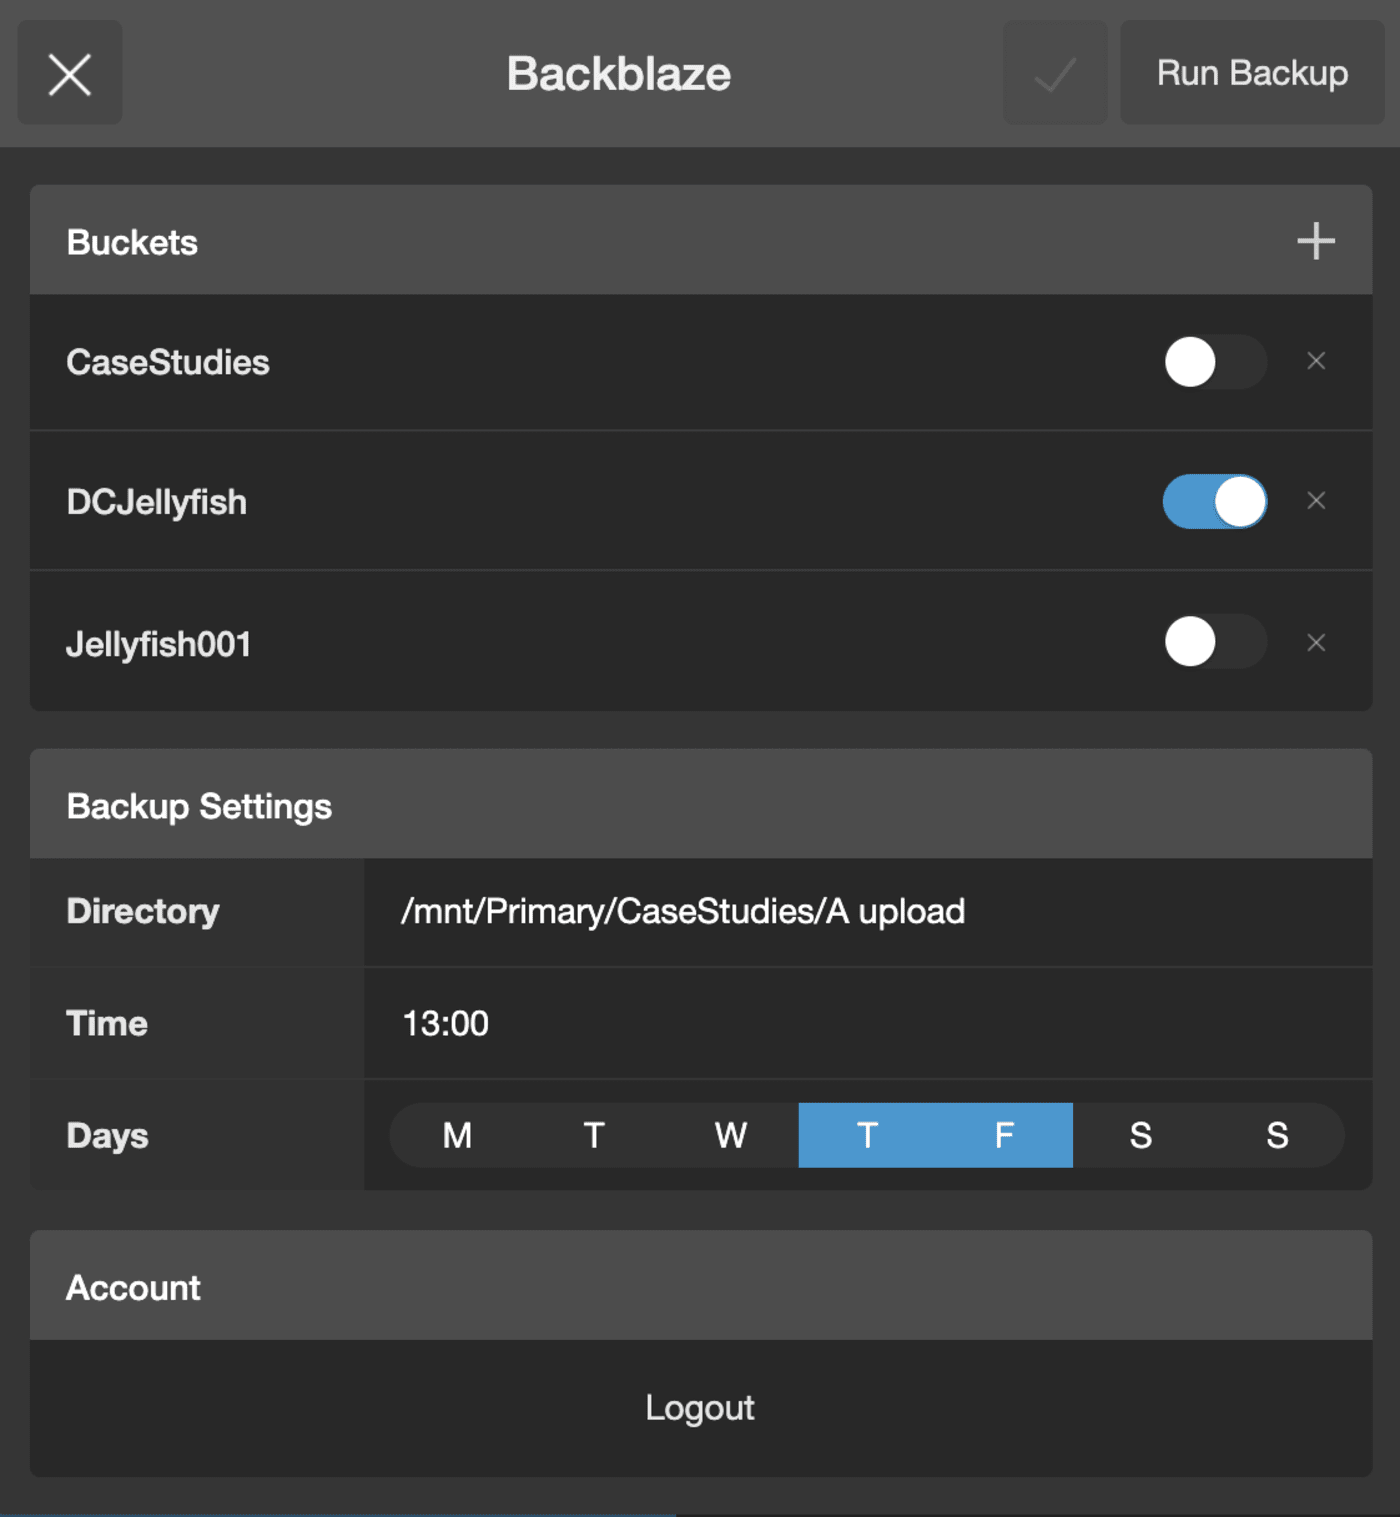
Once Backblaze has activated, you can now create a B2 Bucket directly from the Jellyfish Manager, or the Backblaze website, and control the backup settings such as which directory you would like to backup, what time of the day, what days, etc. We've outlined how to do each option below.
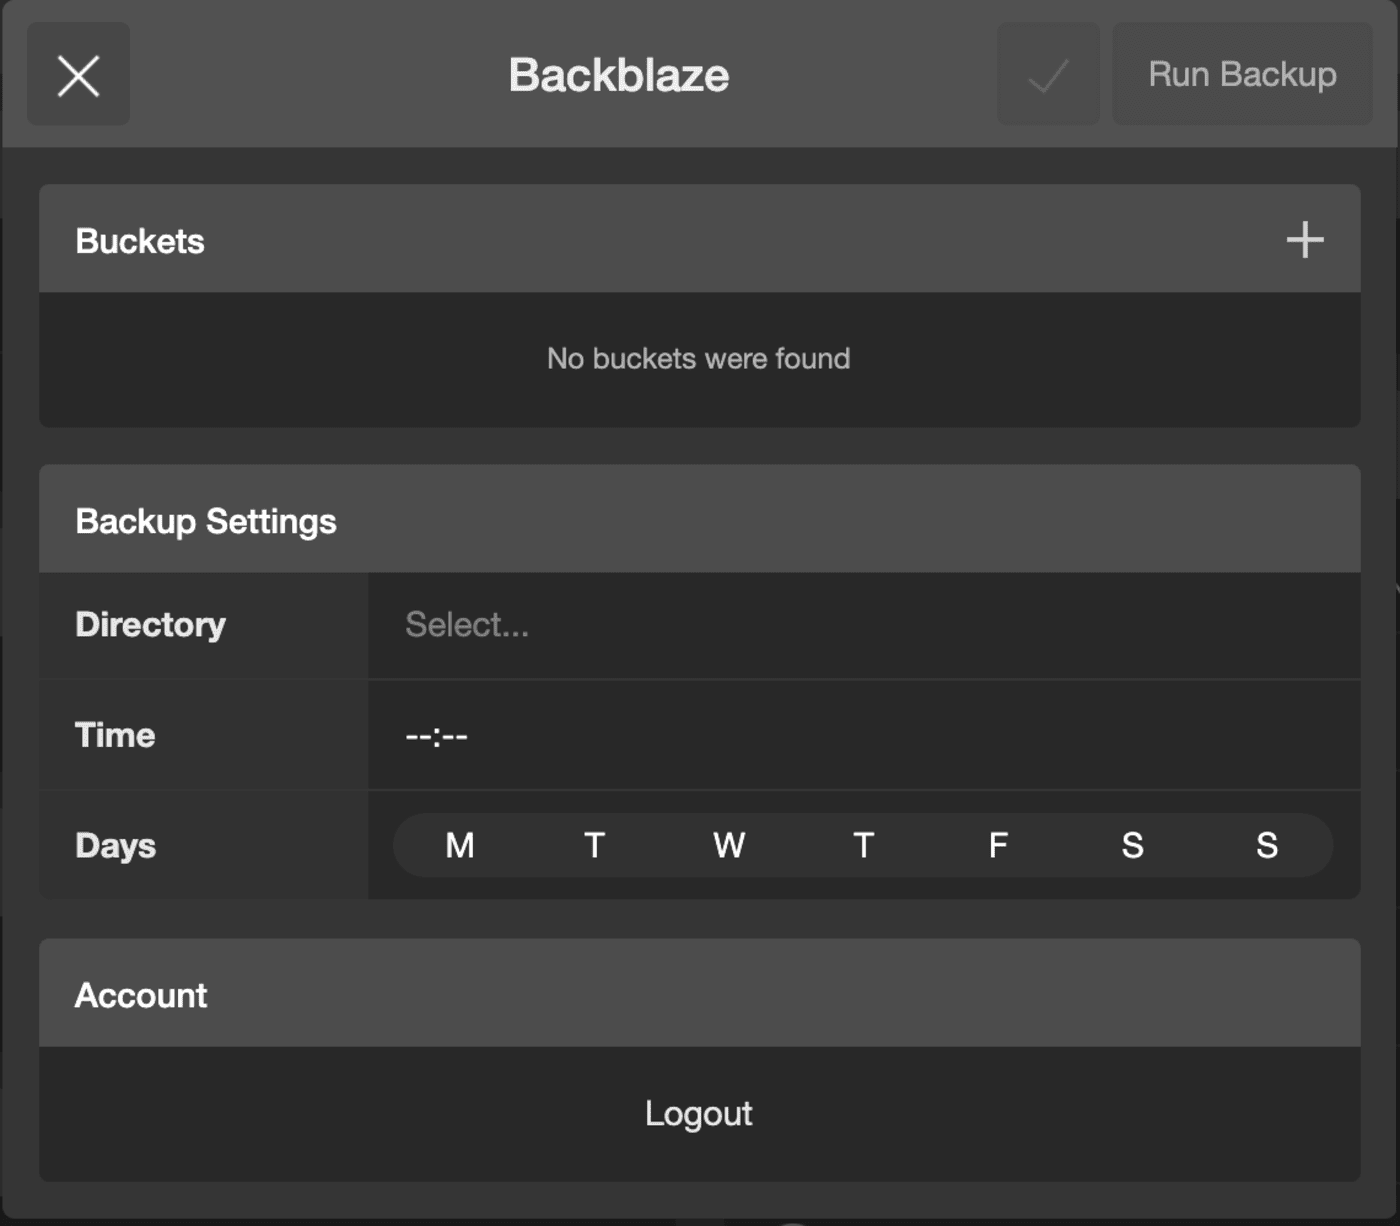
Create a B2 Bucket from Jellyfish Manager
Step 1: Click on the “+”.

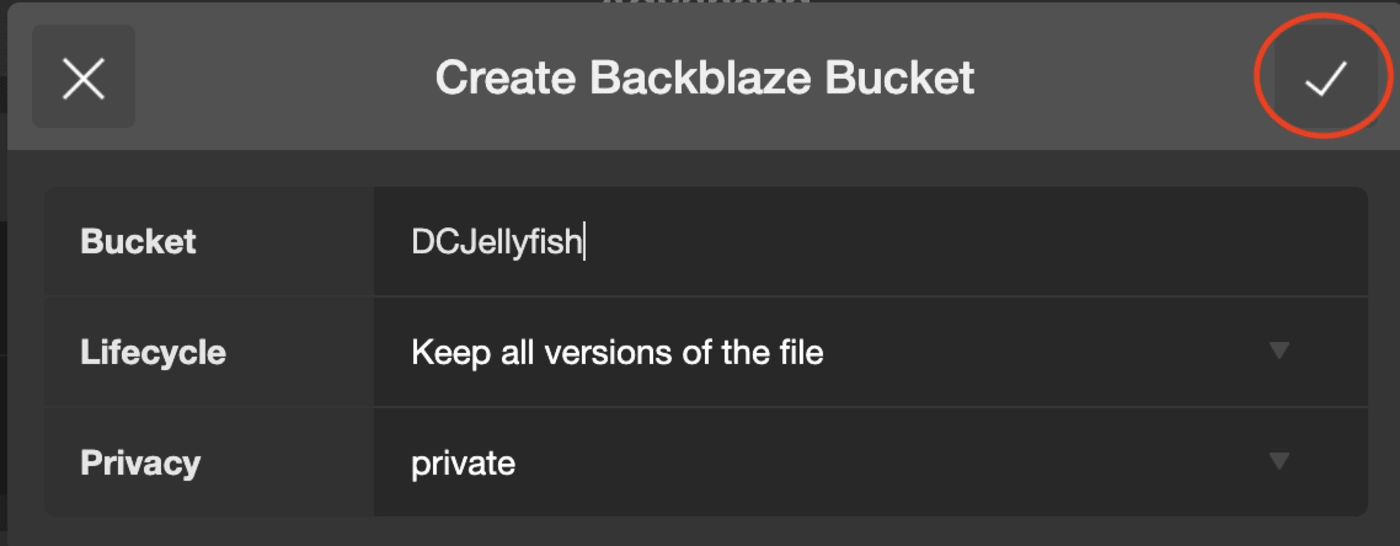
Step 2: Give the bucket a name, pick the lifecycle, and if the bucket is public or private.
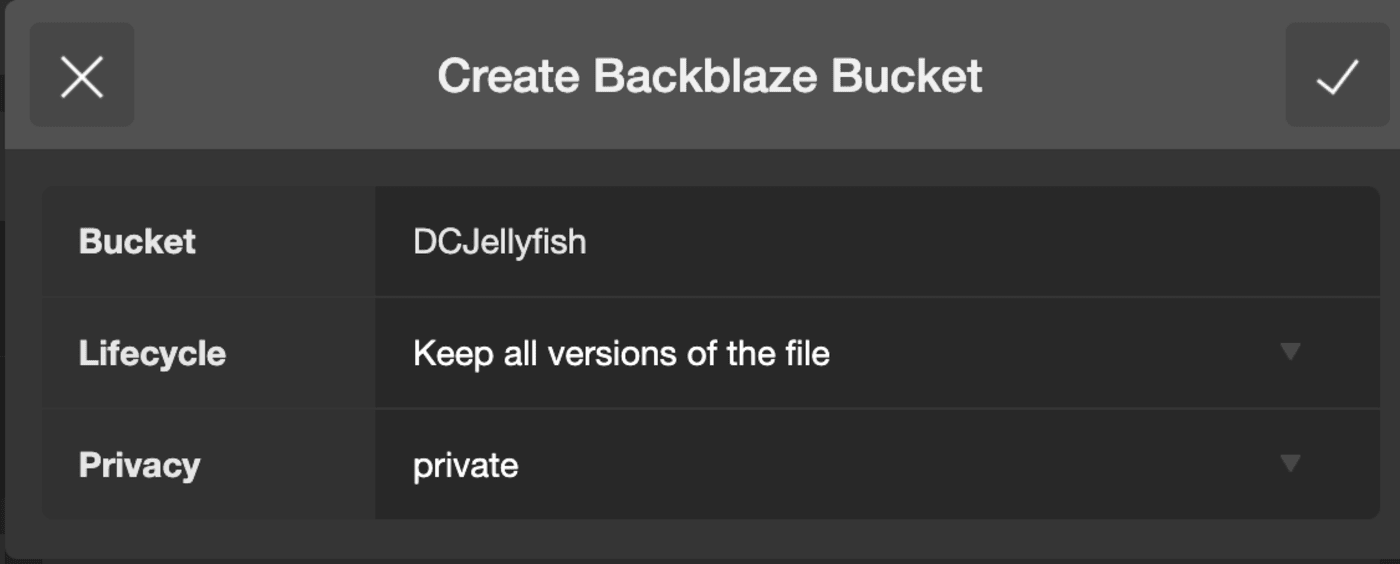

Step 3: Click the checkmark at the top right corner.
Step 4: You will decide what Jellyfish share or directory you will want to back up to the B2 bucket that you just created.
Pick the directory by clicking on the empty field next to Directory.
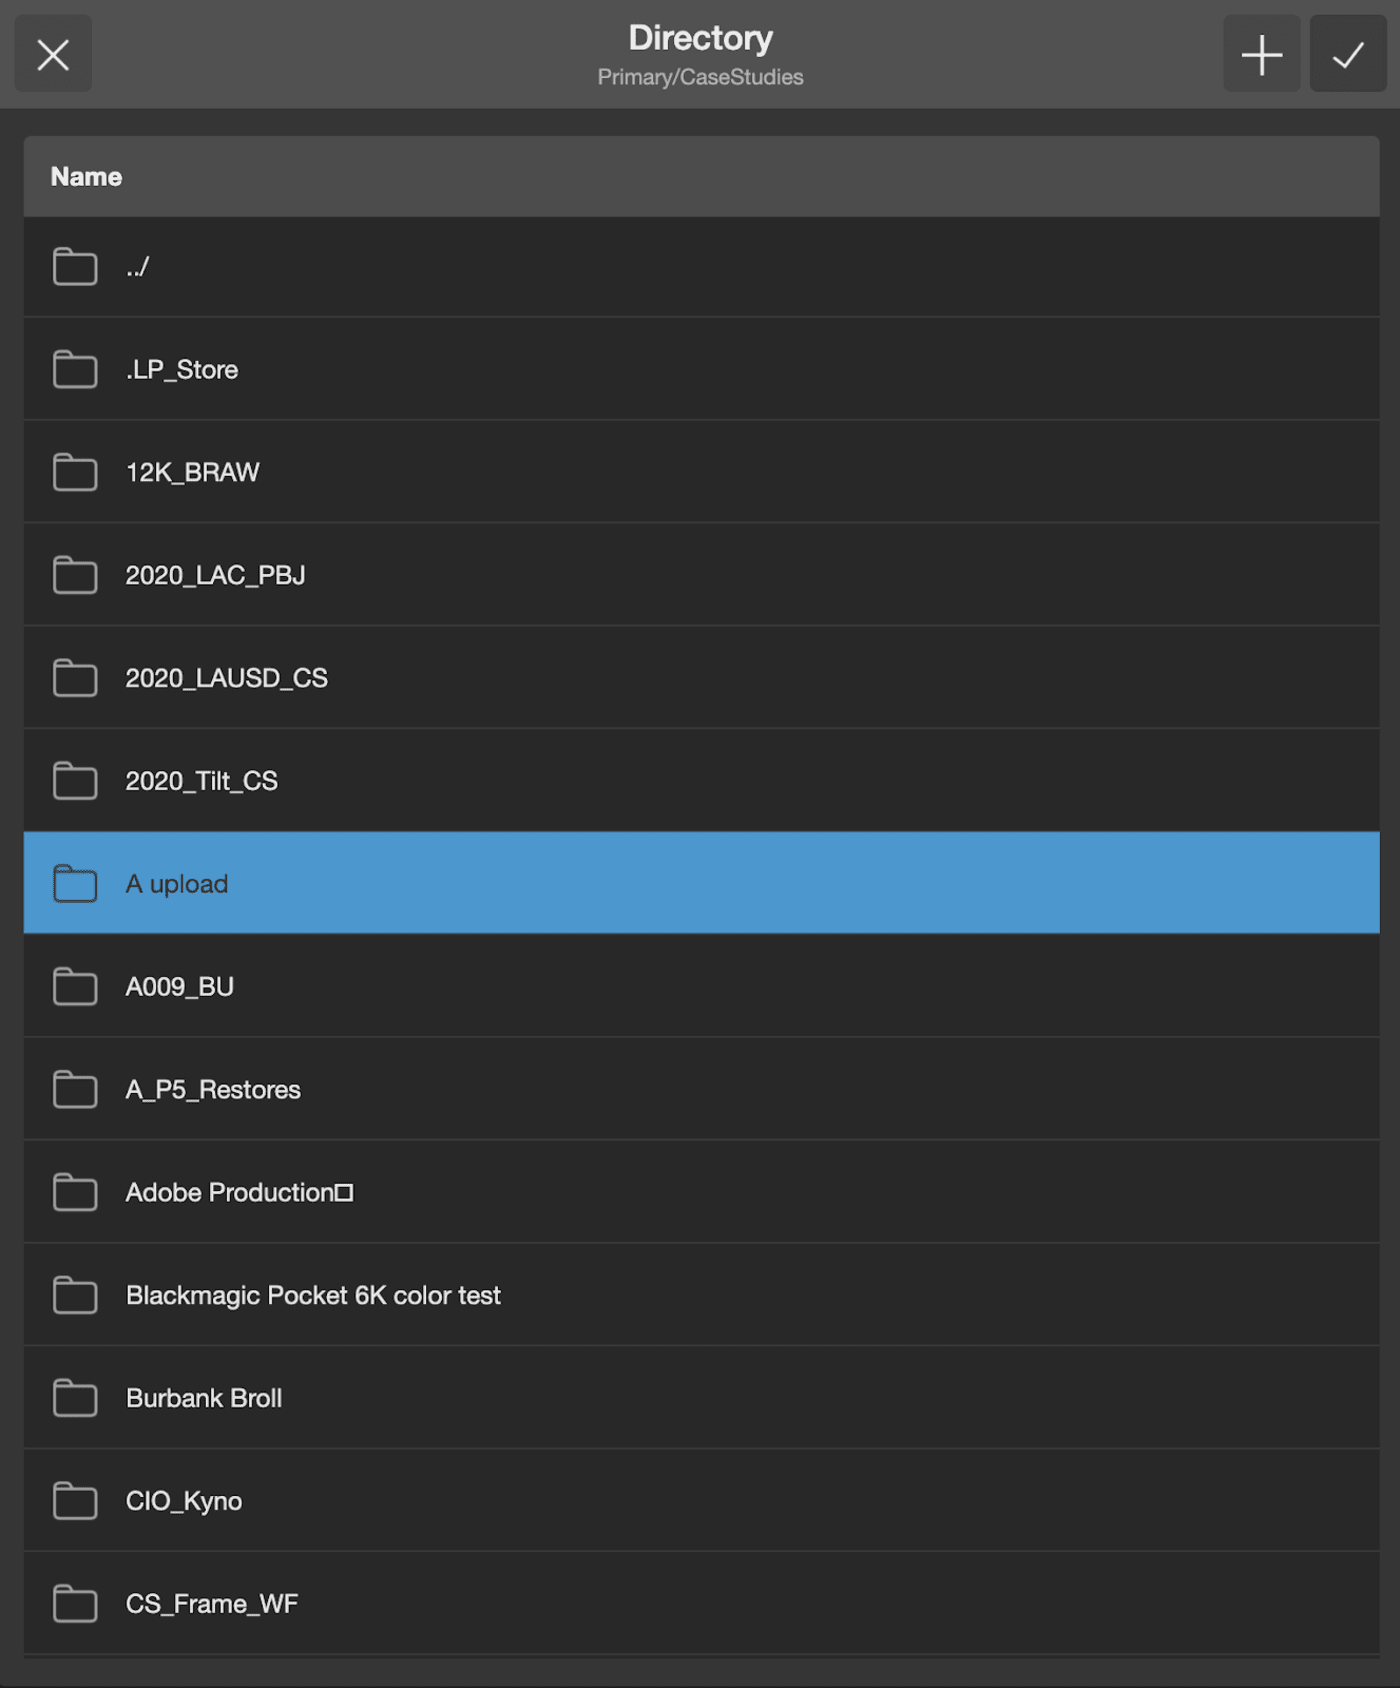
Once you pick the directory, enable the bucket by toggling the switch until it turns blue.
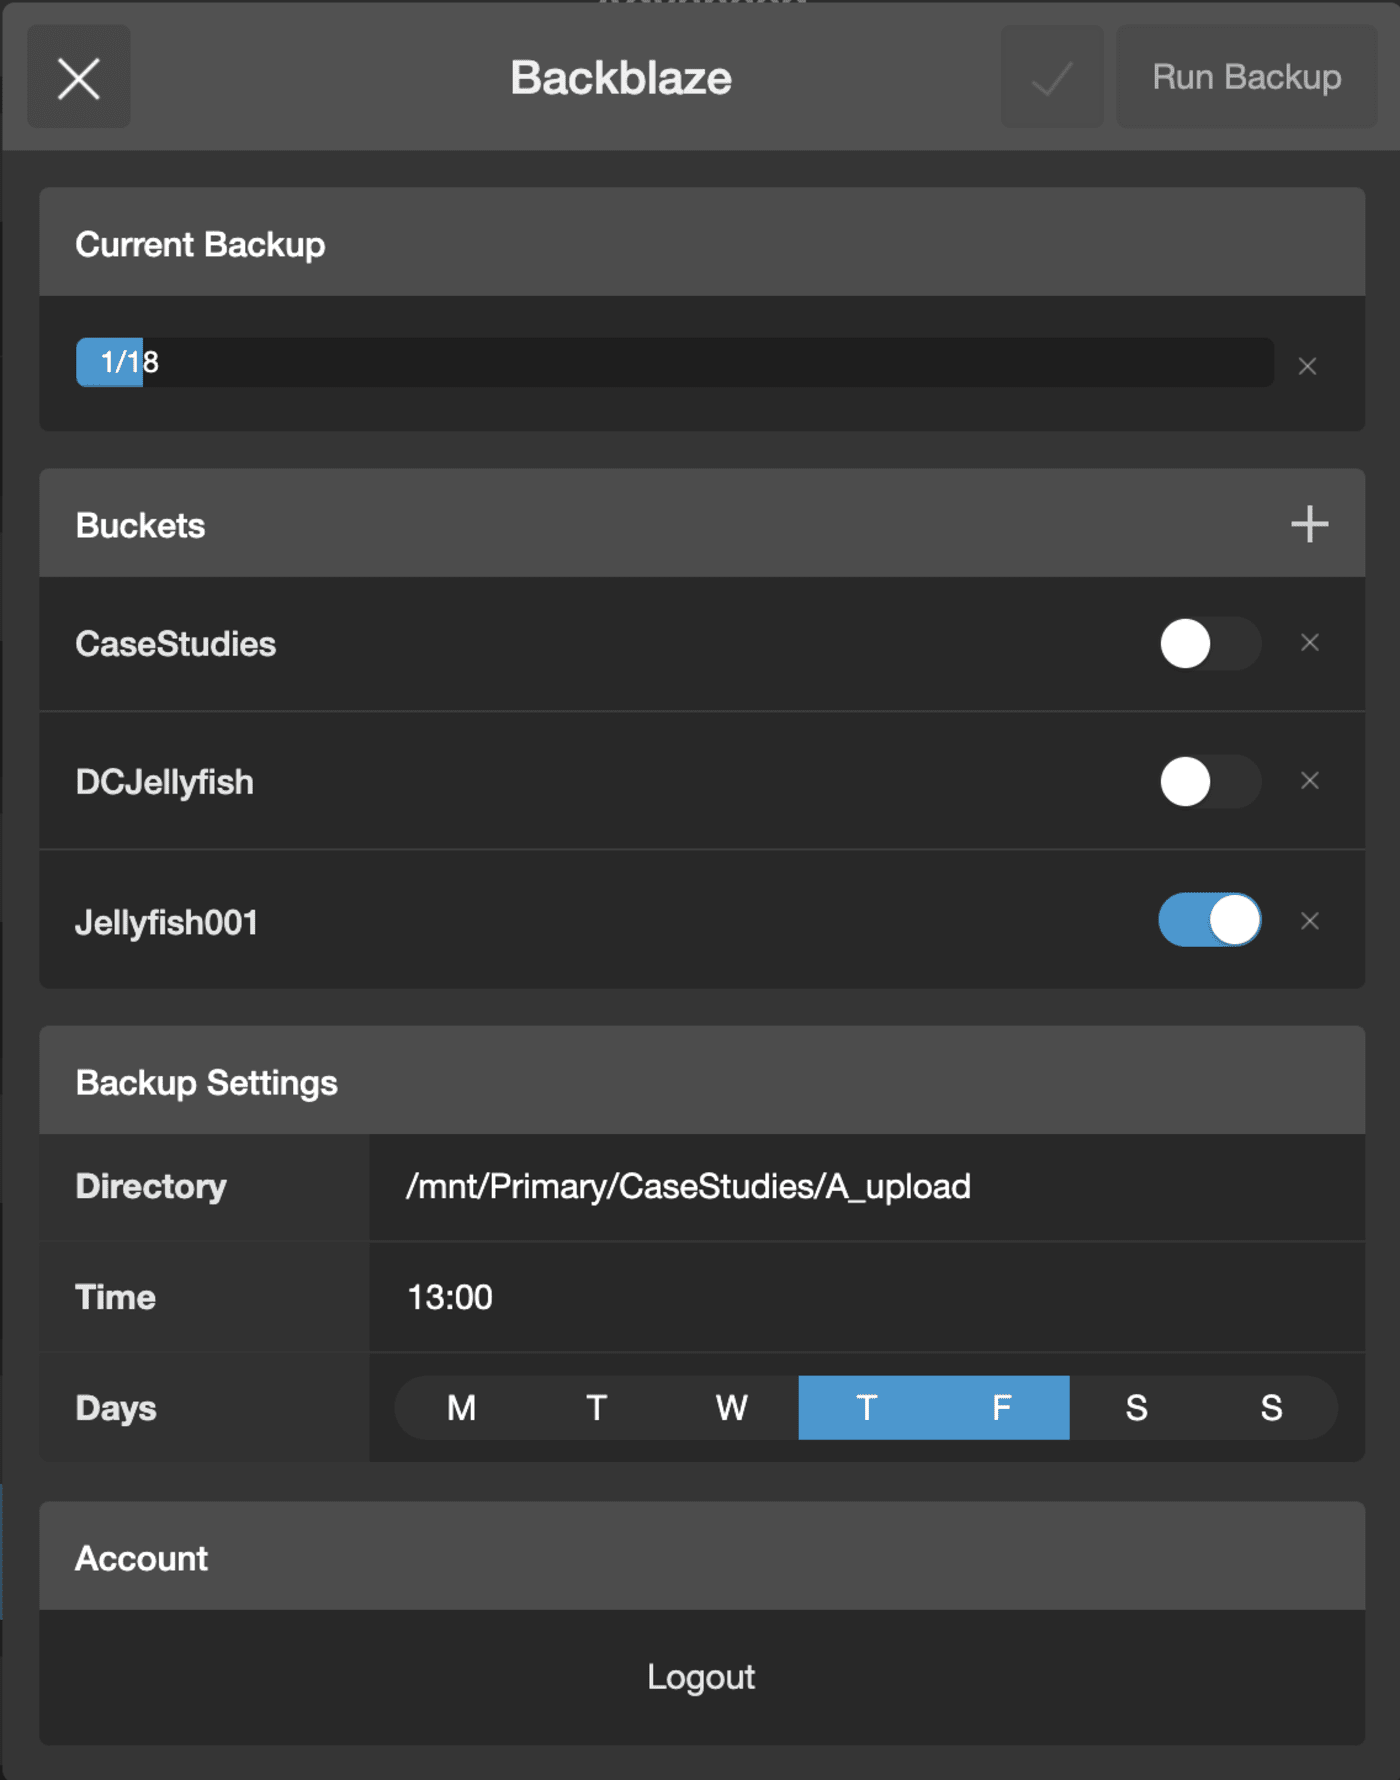
Click the check mark and then click 'Run Backup'.
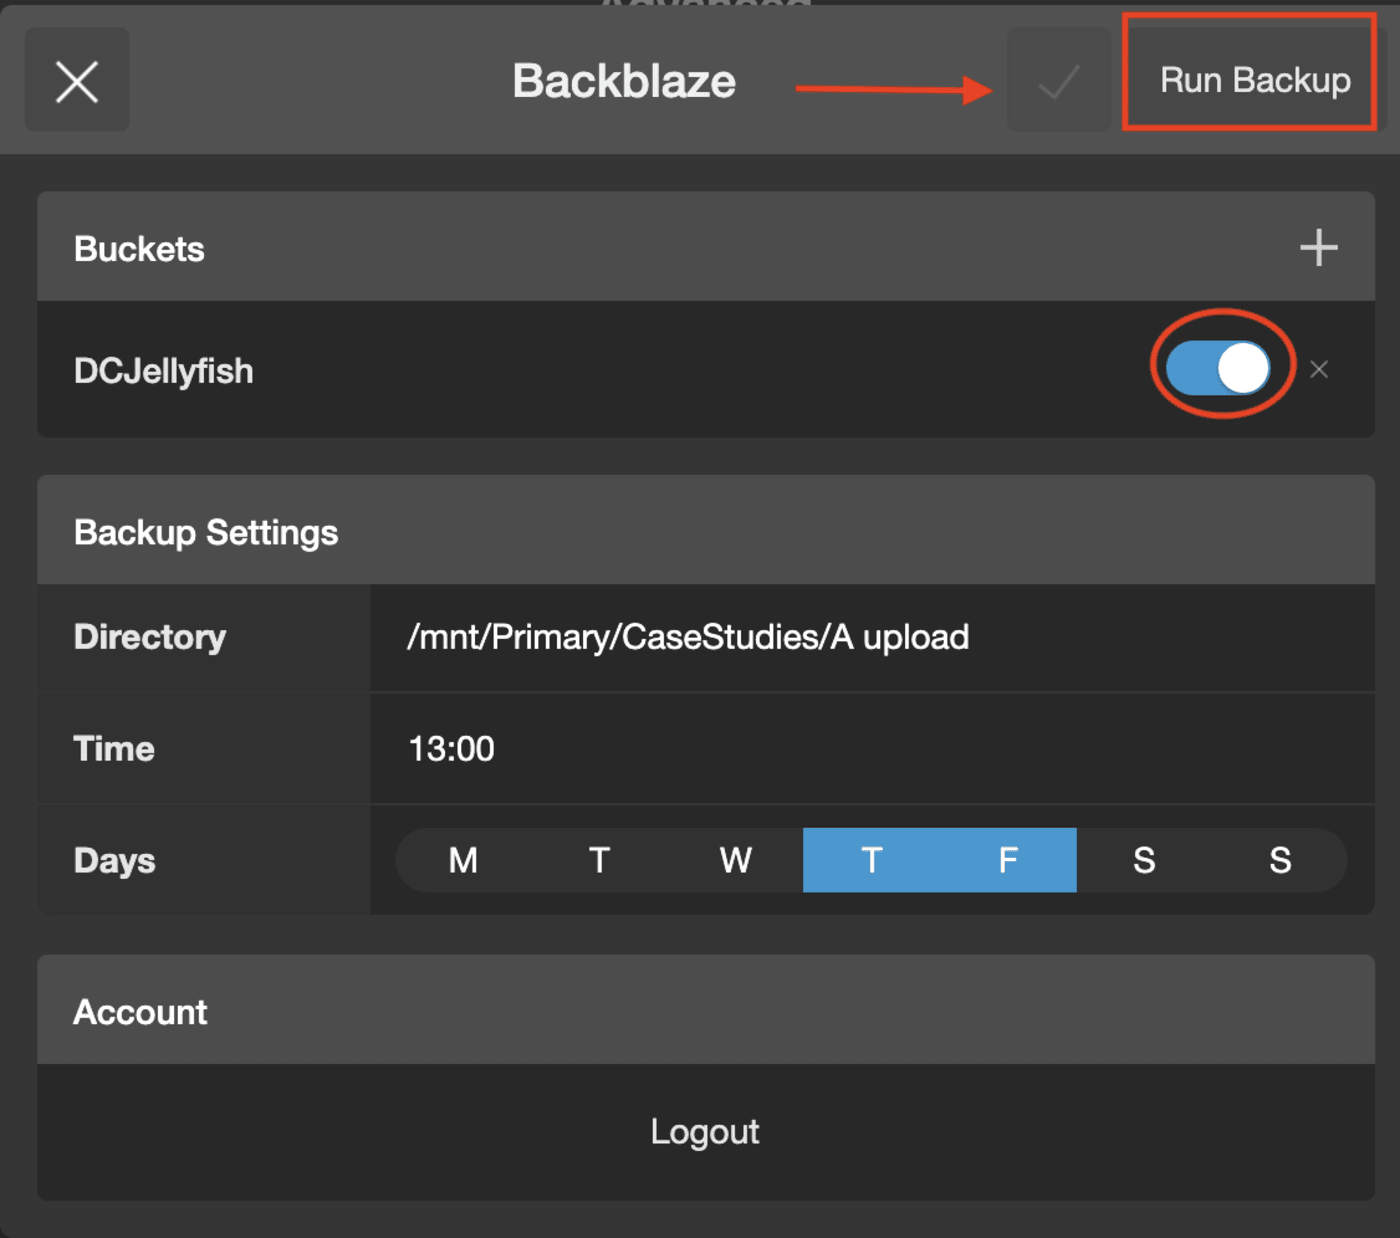
You are now set up to back up directly from your Jellyfish to a B2 Bucket on a schedule. No need to have a team member manually back up files!
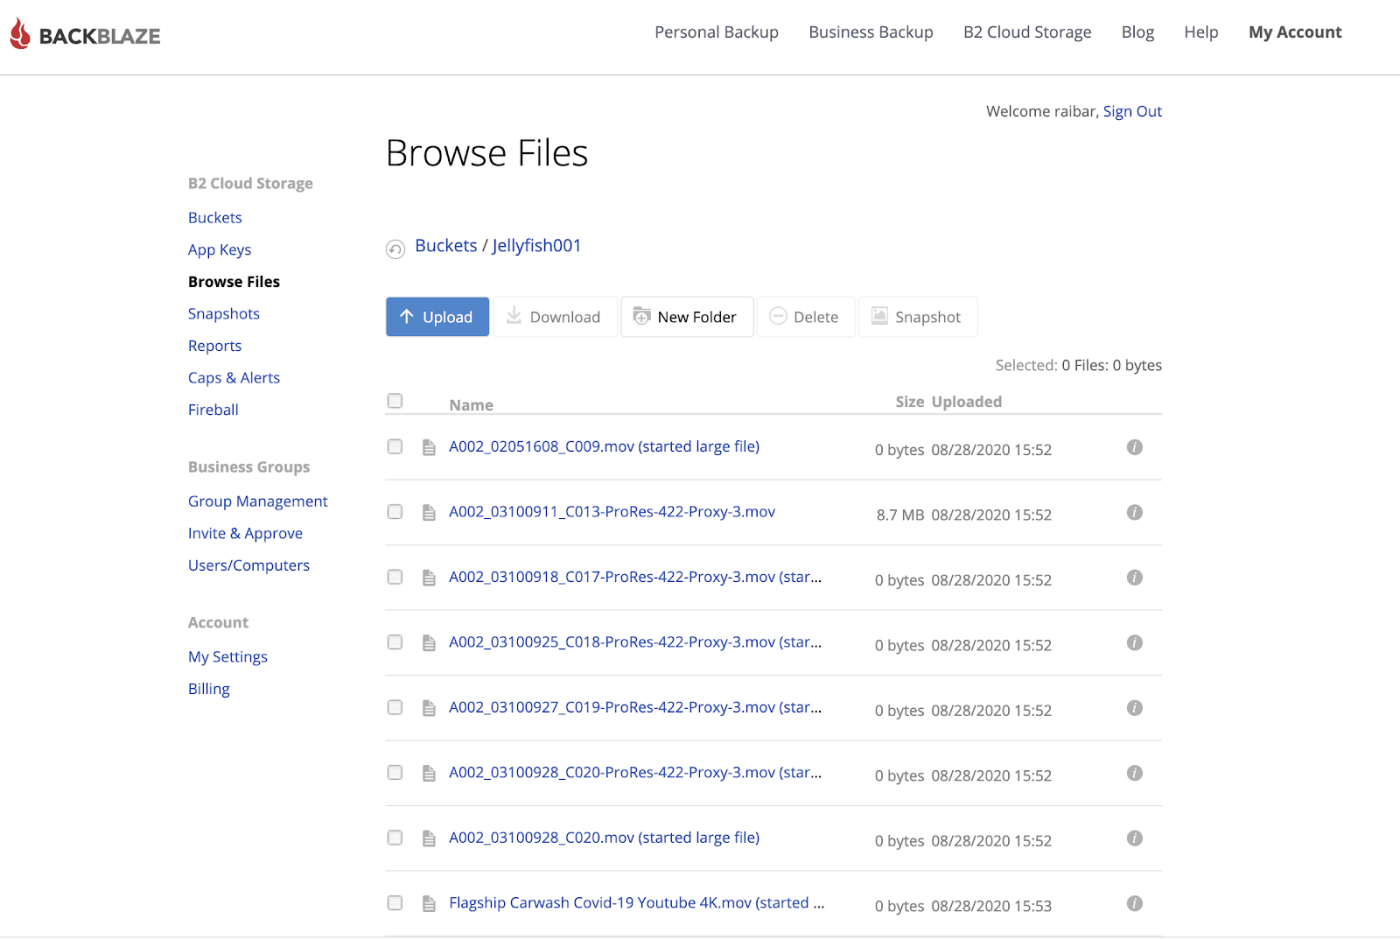
You can log back into your Backblaze account to see the bucket you created from your Jellyfish.
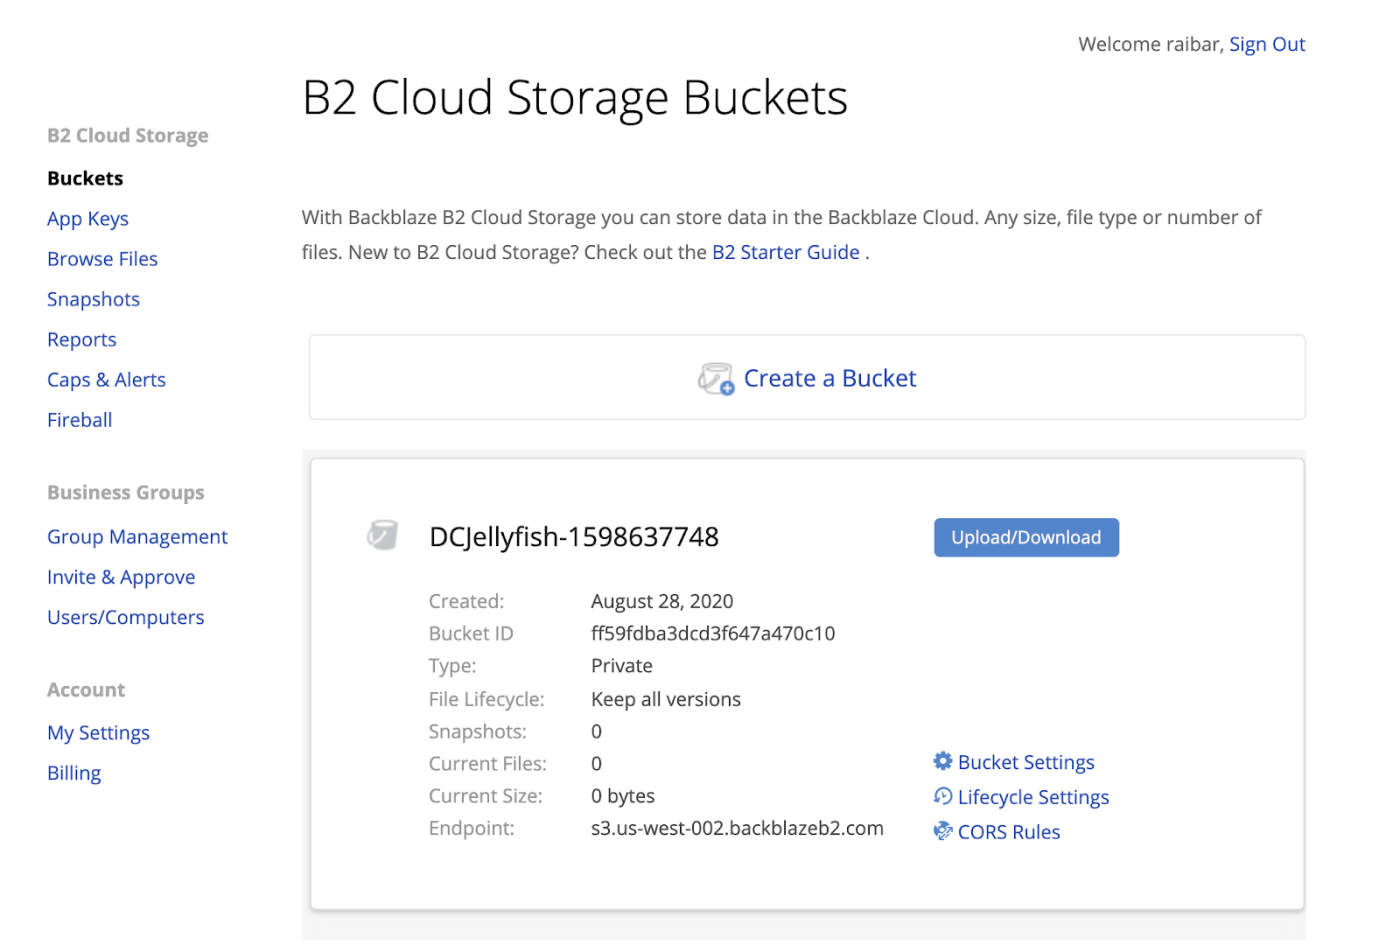
As your scheduler kicks off, you will start to see the files populate in your B2 Bucket.
Create a B2 Bucket from Backblaze
The LumaForge team has given you a powerful tool where you can create B2 Buckets within the Jellyfish Manager, but if you prefer to create a bucket directly in B2, it will still show up in the manager.
Once you log into Backblaze, on the left-hand side you will see various menu options. Click on Buckets.
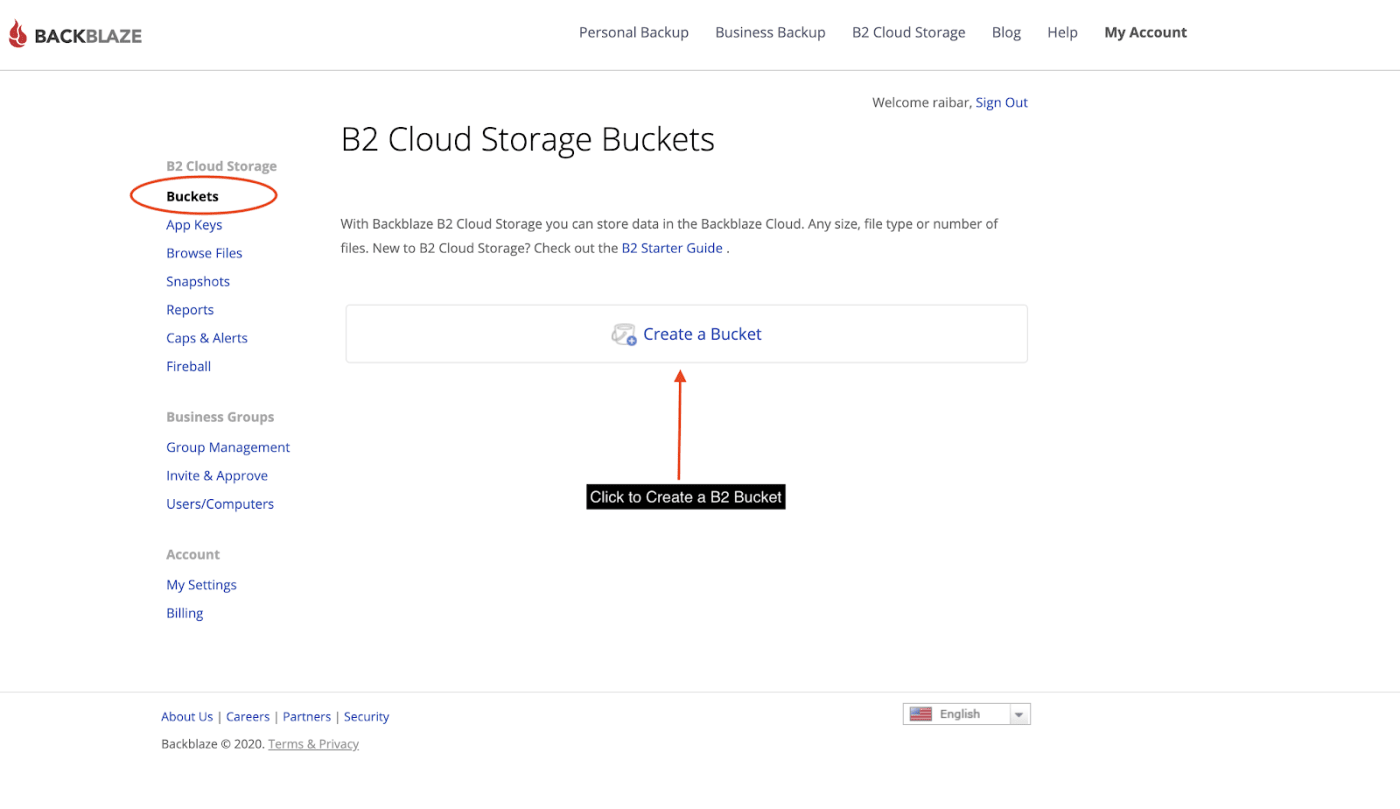
It will take you to a B2 Cloud Storage Bucket page with the option to Create a Bucket. Click on it and follow the step-by-step instructions.
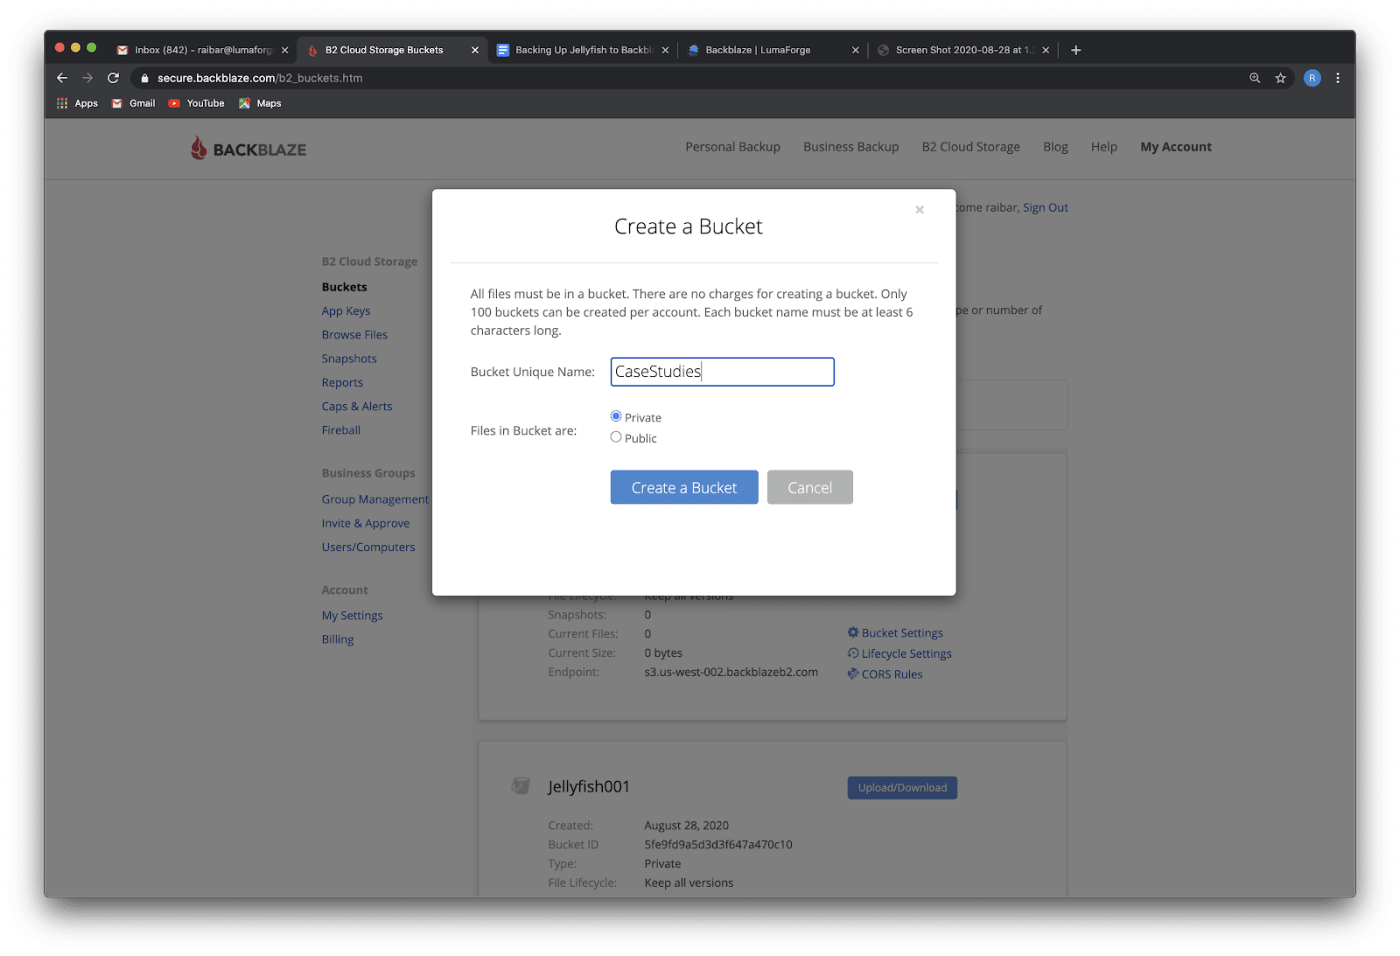
Once your bucket is created in Backblaze, go back to the Jellyfish Manager you’ll now see your newly created bucket under the Backblaze Buckets.
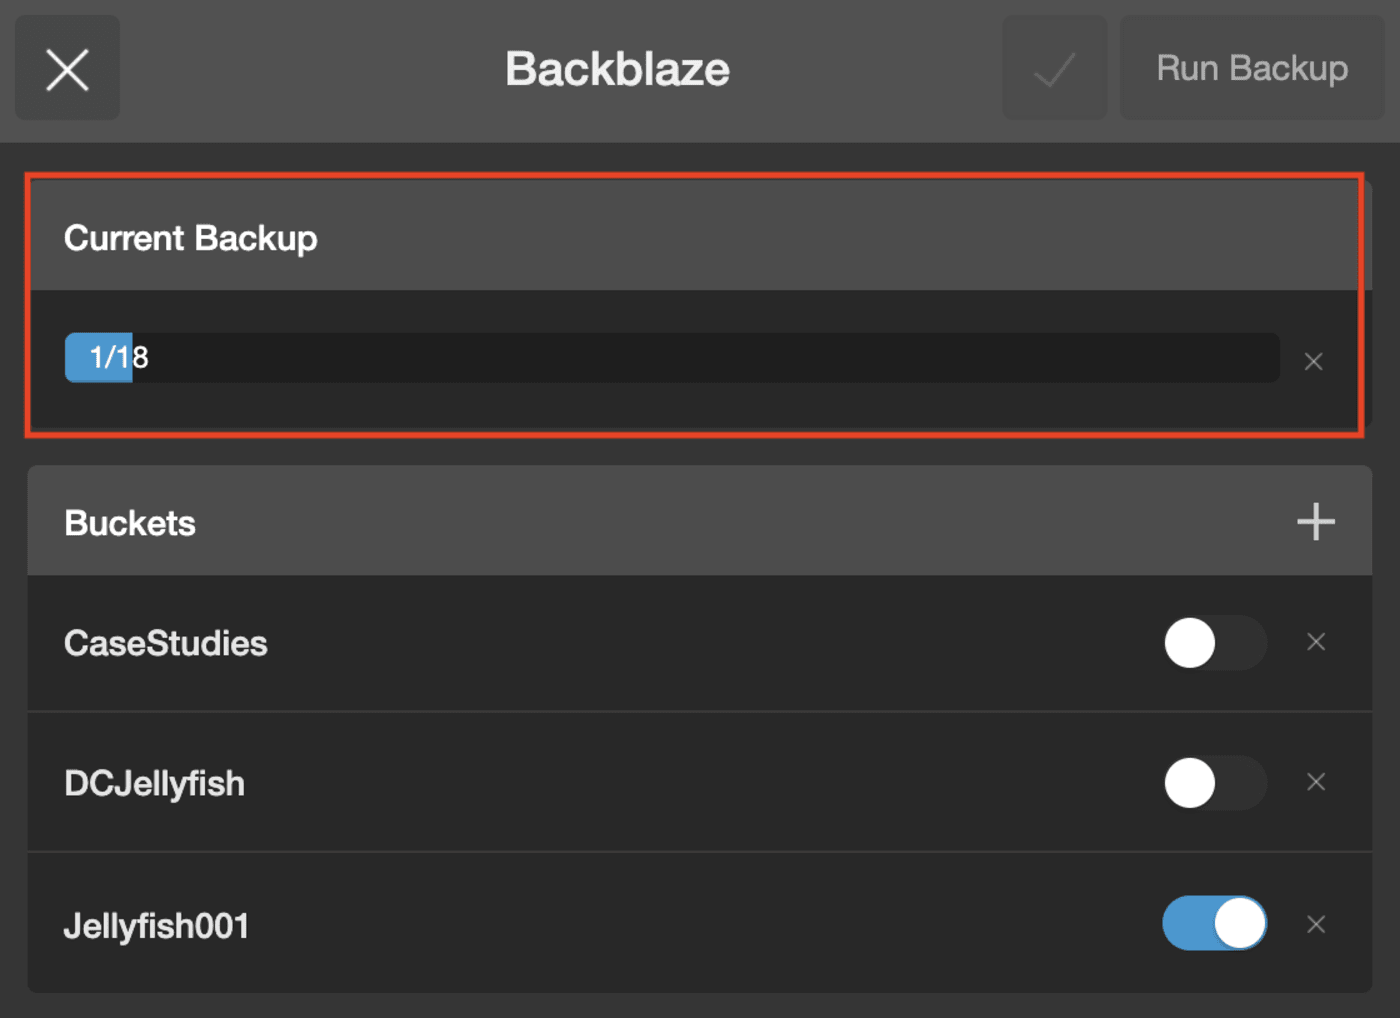
You can now be able to back up to those newly created buckets. Once you select ‘Run Backup’ or your scheduled backup begins, you'll see a ‘Current Backup’ status bar appear with the number of files being backed up to your B2 Bucket.
If you have any more questions about the Jellyfish or want to see if this integration would be a good fit for your team, please reach out to our workflow consultation team and we’ll get you everything you need to get started!
Other topics you might like
LumaForge is now an OWC company!
Updated on Jan 14, 2021
What is Jellyfish Media Engine?
Updated on Dec 15, 2020
Kyno for Jellyfish - Better than Finder
Updated on Dec 15, 2020
Save time and money by future-proofing your video editing workflow
Updated on Dec 10, 2020
Is Final Cut Pro X for Hollywood?
Updated on Oct 27, 2020
Meet Your New Pre-Editing Process
Updated on Oct 19, 2020
Video Workflow: A Quickstart Guide
Updated on Oct 13, 2020
Video Marketing 101
Updated on Oct 7, 2020
Video in Education
Updated on Sep 29, 2020
 USA + International
 OWC Canda
 OWC Europe


