 USA + International
 OWC Canda
 OWC Europe
Save Tons of Editing Time by Adding Notes to Footage Markers in Premiere Pro
Looking to speed up your video editing? Navigate your timeline faster by adding notes to Premiere Pro footage markers. Here's how.
Josh Edwards • Jul 26, 2022
Adding notes to your footage is an extremely useful way to speed up your editing process. There are several great examples with which this helps.
- In an interview with someone, you may want to start breaking down the clip into the different answers. For example, your subject is talking about the mode of transport they use to get to work. This part of the clip should be labeled accordingly. Then, when you come back to the interview and need to pull out that specific answer quickly to insert into your edit, you know exactly where it is.
- When you have a larger long-form project on your timeline in Premiere Pro, it can be hard to know which piece of footage is which without zooming in and playing through each individual clip. That’s annoying and takes time. By adding notes above the timeline and the corresponding clips, you can quickly remind yourself what the clip is, without having to play back through it.
- In some cases, I’ve also used notes to remind me of what I still need to shoot. For example, in the tutorial video you’ll see a sequence I’m currently working on. There are a few “blank spots” on the timeline because I don’t yet have that footage. By using the markers, I’m able to A) remind myself what’s left to shoot and B) when it comes to adding that footage in, I know exactly where to put it and where to cut.
Once you’ve started using markers, I guarantee you won’t go back. It’s a really simple little hack that can save you a lot of time! Here’s how to do it:
- With the playhead on the timeline, identify where you’d like the marker to begin. Press M on your keyboard.
- A marker window will open. Here, you can add in a title. For example, “GoPro roll back” – a note I used to remind myself to add in footage of me rolling back off the boat at the start of a dive, using my GoPro.
- You can then change the duration of the marker so that it covers the right amount on the timeline, as well as picking a color.
- Click OK and then click and drag each end of the marker to ensure it fits the correct space above the timeline. Easy as that!
I tend to think of these markers as virtual sticky notes. With just a quick glance, you can navigate larger sequences on your timeline so much quicker, making you a more effective editor. Give it a go and see what you think.
Other topics you might like
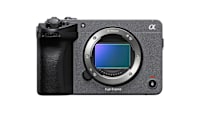
Sony’s New FX5 Brings New Sensor, Open Gate, VENICE-level Features to a Compact Cinema Camera
Updated on Jul 23, 2026
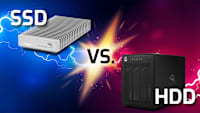
SSDs vs. HDDs in 2026: What the Flash Shortage Changes for Your Storage Strategy
Updated on Jun 18, 2026
The New Portkeys LH7C is a Rugged, Bright, Yet Affordable On-Camera Monitor
Updated on Jun 16, 2026