USA + International
 OWC Canda
 OWC Europe
How to Edit B-Roll and Stock Faster with DaVinci Resolve’s Cut Page
DaVinci Resolve's Cut page is the fastest way to assemble clips and is perfect for B-Roll and stock. Learn how to make the most of the Cut page.
Arthur Ditner • Oct 24, 2022
DaVinci Resolve’s Cut Page is the fastest way to assemble video clips, especially when it comes to B_Roll. Skim through entire libraries instantly with the Cut page and a few tools tucked away inside the viewer. By the way, the free version of DaVinci Resolve is all you need to follow along. Stay tuned after the B-Roll section because I am going to go over a few more tips at the end of this blog.
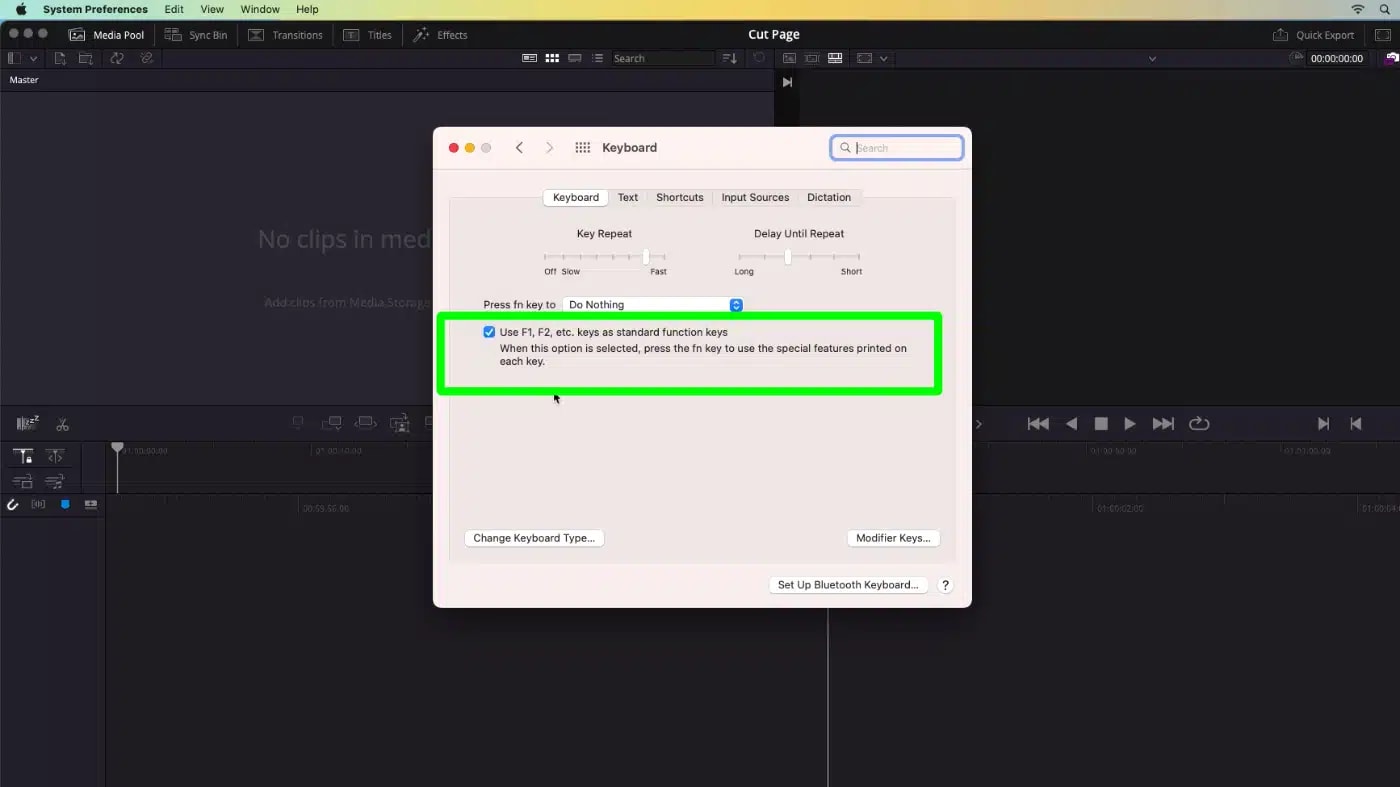
For this demo, we are going to need to use the F keys on the Mac keyboard. Check that the functions are disabled by going System Preferences > Keyboard > Use F1, F2 etc. keys as standard function keys.
Once you start a new project, click on the word Cut along the navigation ribbon here and, this is the Cut page in DaVinci Resolve. The Cut page is designed with speed and efficiency in mind. To start, I am going to import a folder of video clips.
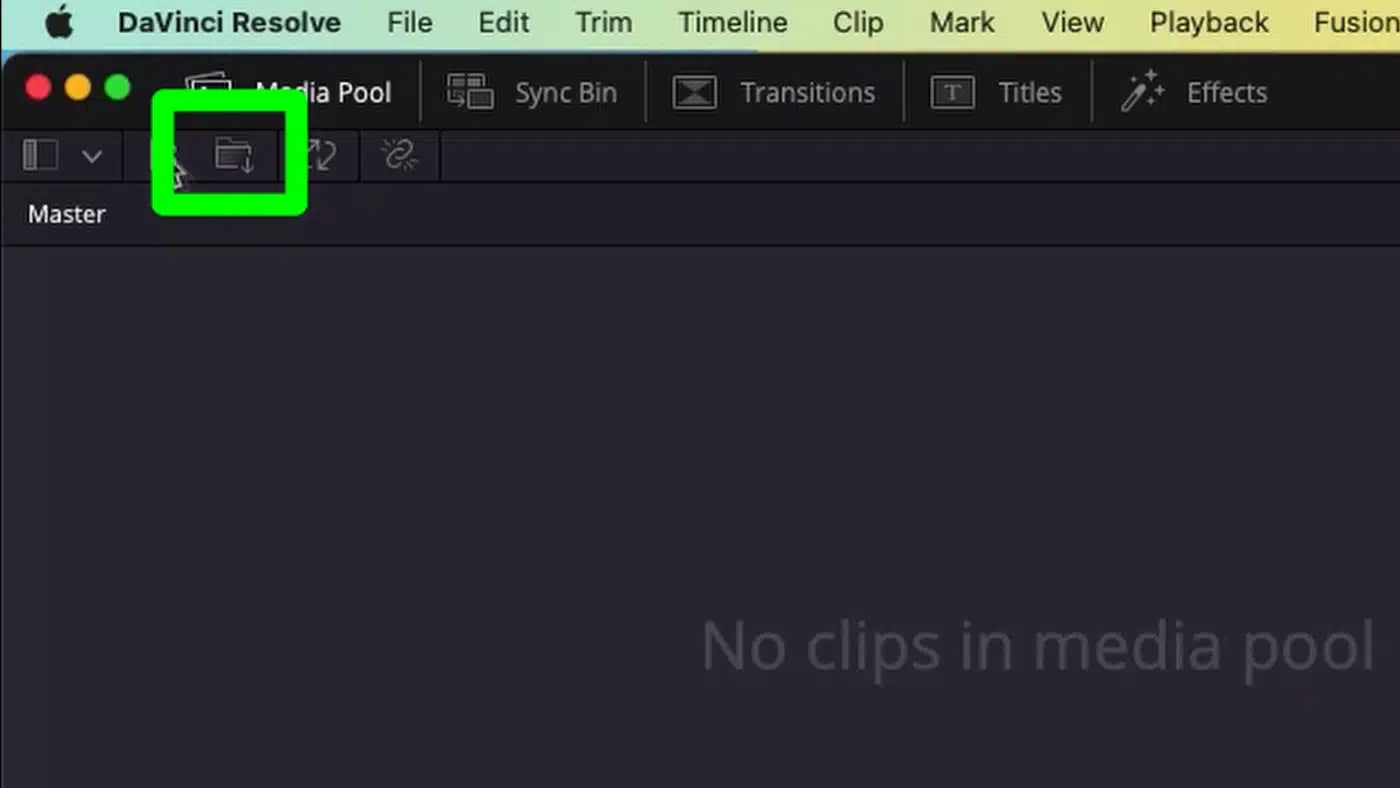
Click the Import Folder icon inside the Media Pool. These are generic stock footage clips that I am going to use for an infographic video, the kind of thing you’d see in a social media news feed. And, the clips are brought into the bin.

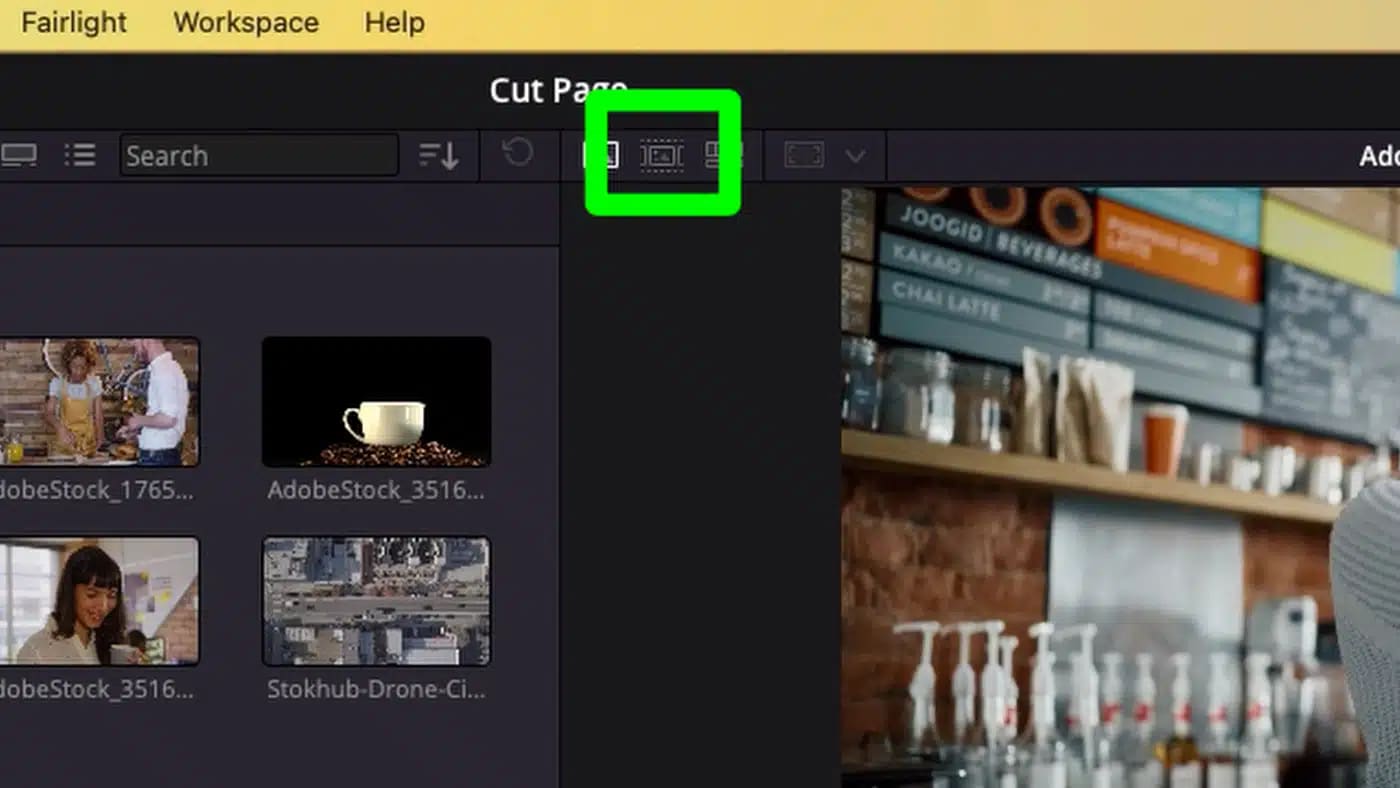
Normally, you would load these clips into the timeline, and scrub, and cut up a clip, maybe press delete. Or, you’d load a clip into the source viewer to review it first. Either way can be too many mouse clicks and time consuming. Check this out, along the top of the viewer here, the middle button is called Source Tape, and give that a click.
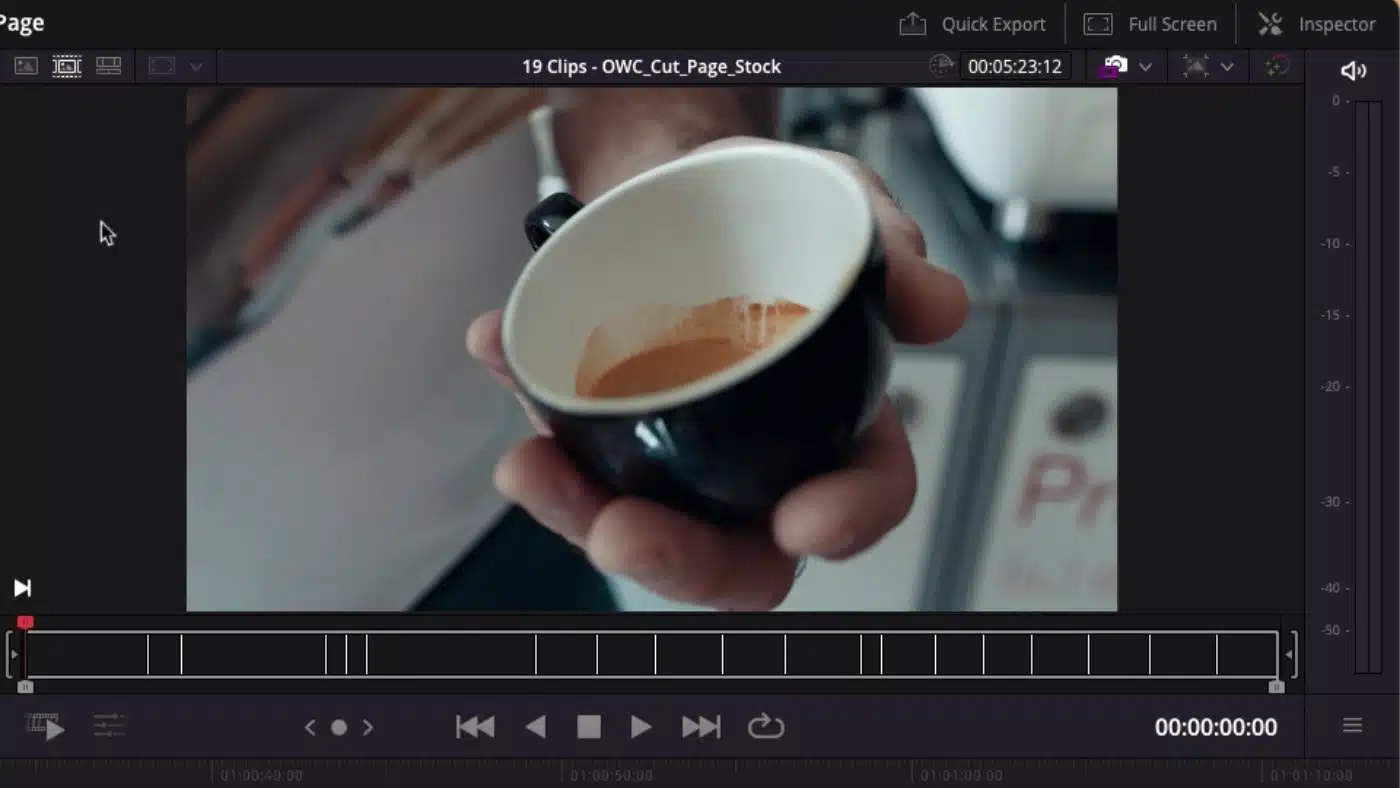
What you see is all of the clips from my bin, assembled inside the viewer. As I click and drag the mouse along the playhead I can preview every clip inside the bin, and over in the bin an orange highlight circles around the active clip inside the viewer. Sometimes this is called a string out of clips, or an assembly edit.
Choose any clip in Source Tape mode to edit into the timeline. The fastest way to do this is to Mark the clip. To mark the clip, press X on the keyboard.
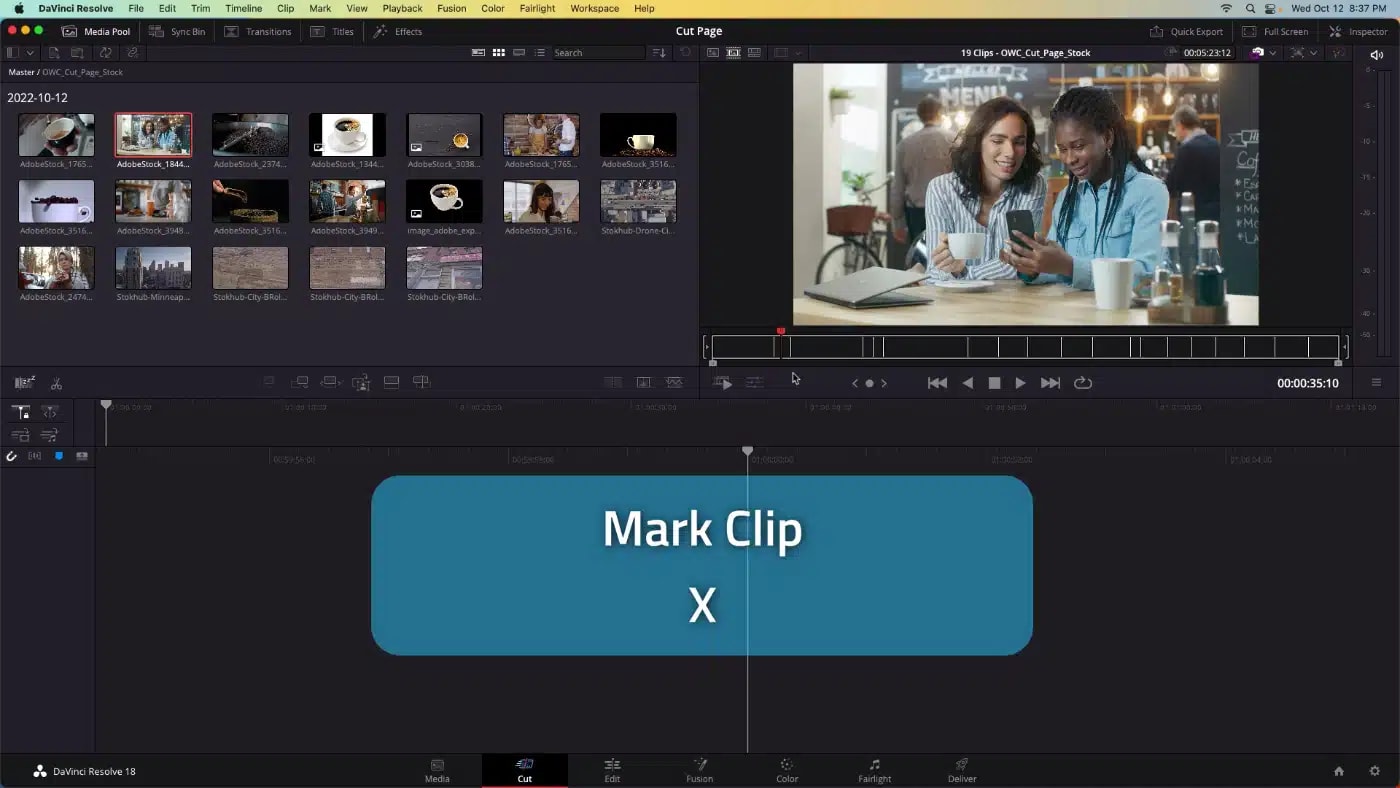
This creates in and out points around the shot. And to perform an insert edit into the timeline press F9.

Notice how my viewer has not changed? When I made the insert edit the viewer stayed locked on source tape mode. I am still viewing the contents of this bin. I can either drag the mouse to keep viewing clips or, I can press spacebar to playback. I am going to grab two more shots, an aerial photography clip, and a close up of an espresso pour.
I like this barista clip and I’m going to set my own marks this time. I’ve found a place where I’d like this clip to start, press i on the keyboard to mark an in point. And, this is where I’d like the clip to end, press o on the keyboard to mark an out point. F9 to insert the clip. Still in source tape mode, the viewer hasn’t changed. I like this aerial clip, that will make a good establishing shot. Mark and Insert Edit.
We’ve just scrubbed through 19 clips that totaled 4 minutes in duration, and cut it down to 4 clips and 40 seconds in duration!. Now it’s time to refine the edit.
The Two Timelines
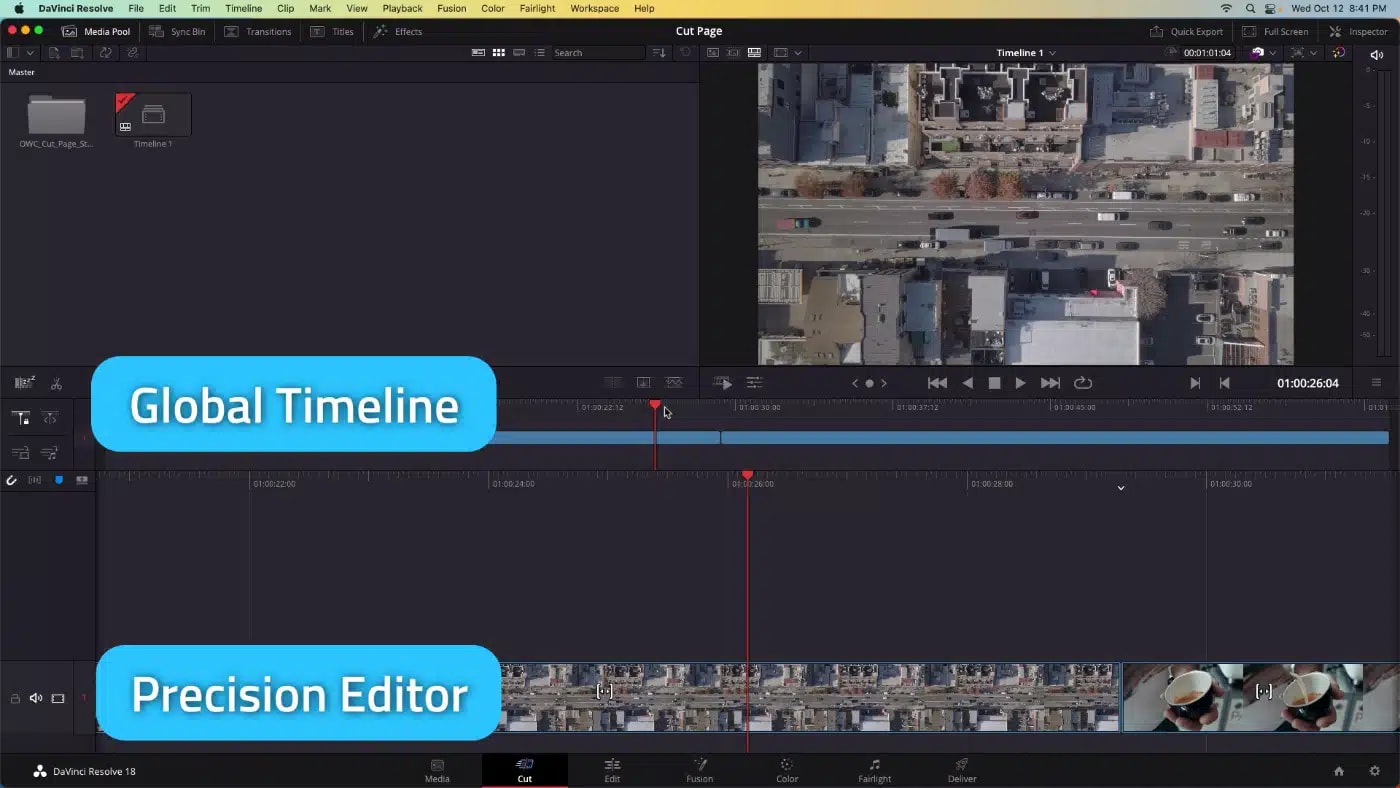
A lot of people ask, why are there two timelines in the cut page and how do I zoom in and out of these timelines to answer both questions? The upper timeline shows every clip in the entire edit, no matter how long the edit is and the lower timeline always shows a detailed precision view. You can’t control the zoom level in either timeline.
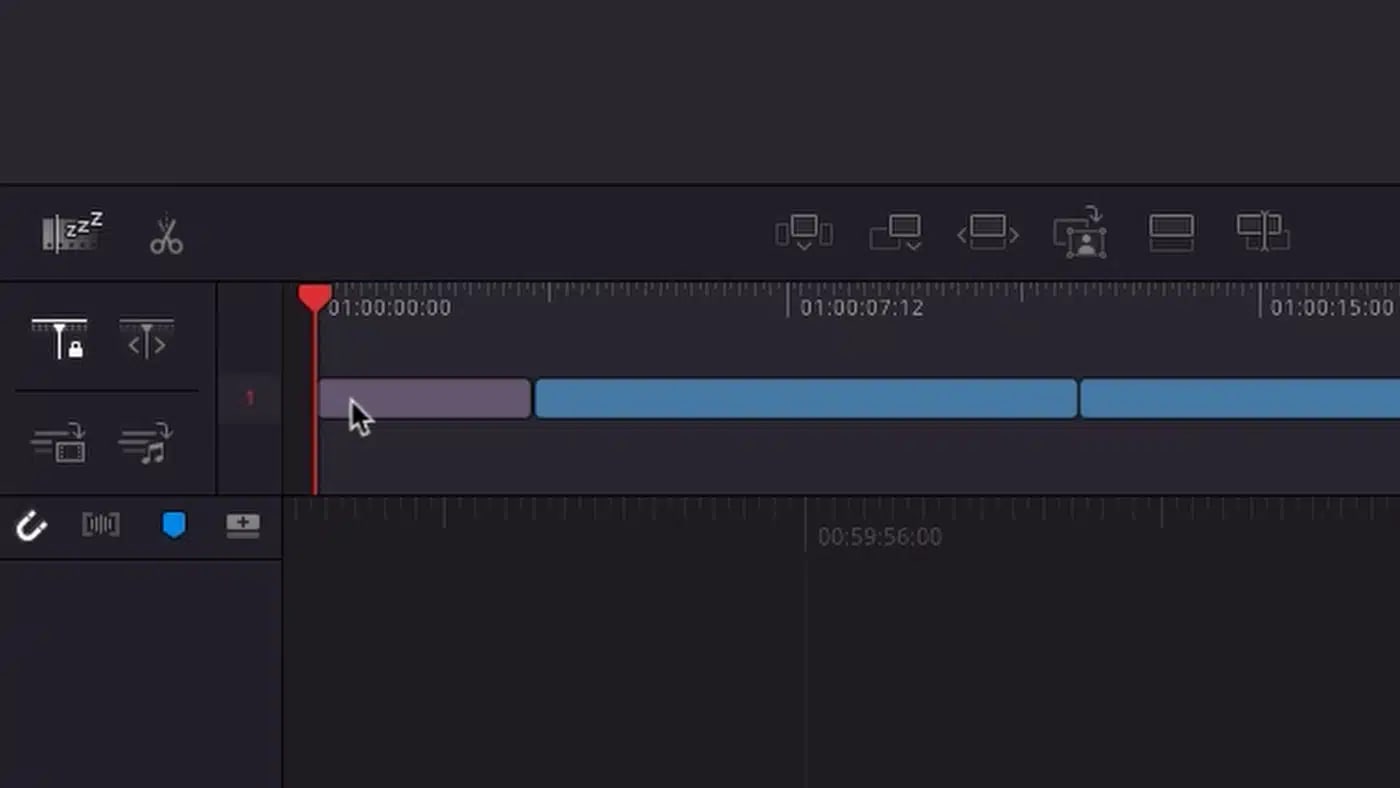
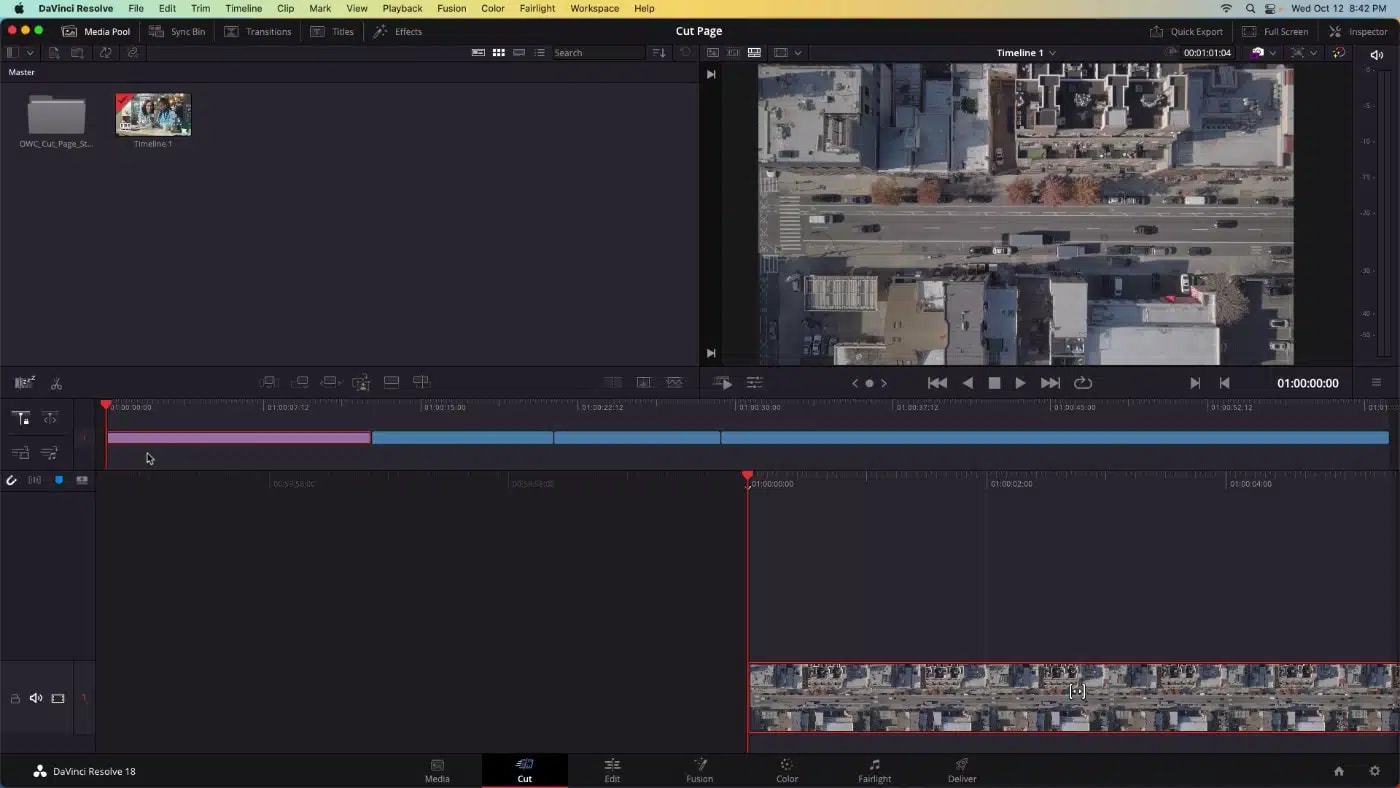
This dual timeline format has its advantages though. For example, this aerial drone clip. I want to reorder my timeline and have this clip come first. Select the clip in the timeline, hold control and click change the clip color. I’m going to select purple and you can see in my upper timeline viewer that container has turned purple. This is the drone shot and I want to move this drone shot to the beginning of the timeline. To do that, simply click and drag the container and move it to the beginning of the edit. There’ll be a little bit of a snap and when that snap happens, I can release the mouse and I’ve timed the entire timeline moving this drone shot first and all the other subsequent decisions are preserved.
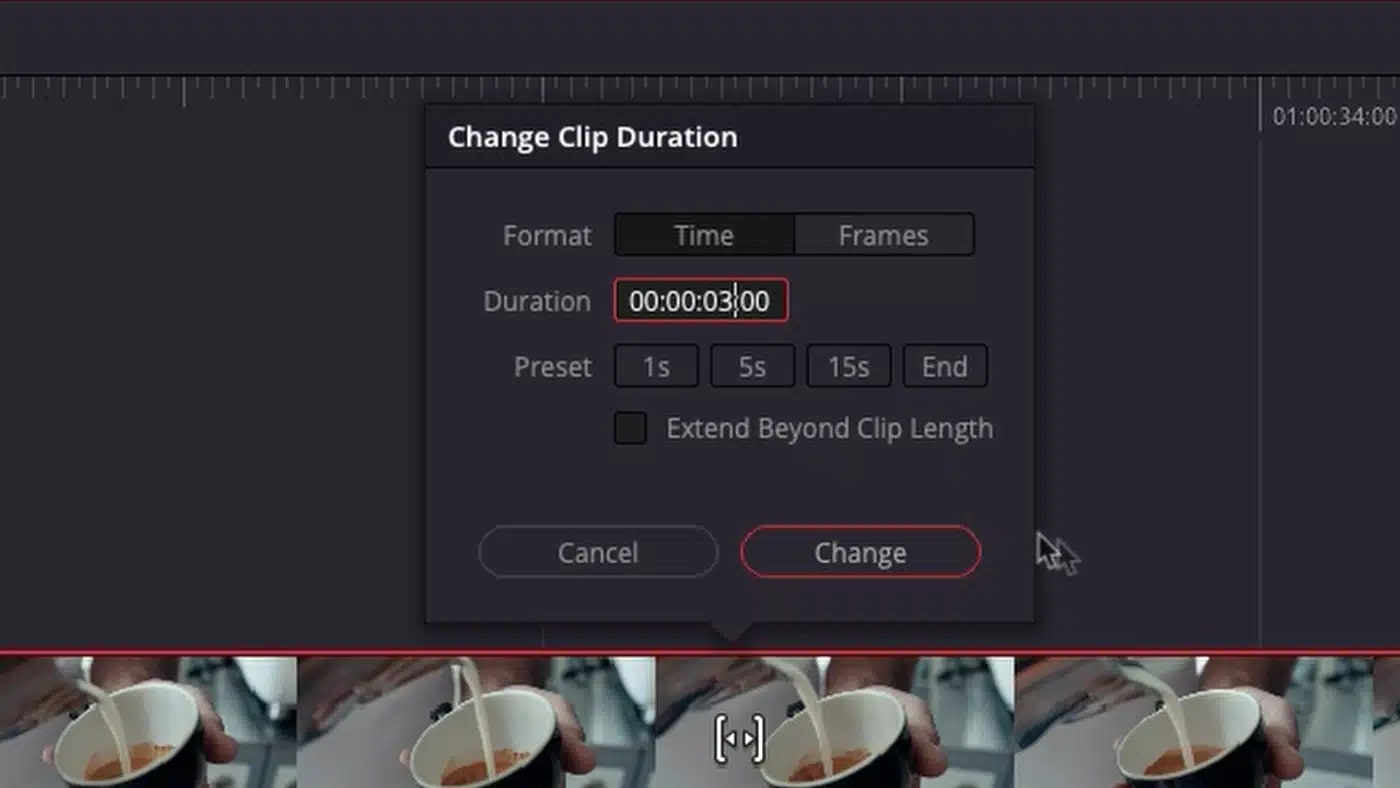
Change Clip Duration
Reviewing my timeline, this espresso pour shot is too long. to quickly change the duration click on it, and press command D on the keyboard to edit the duration. let’s type in 3 seconds.
Mouse Trim
Reviewing this clip back though it takes a little while for the milk to be poured when this edit starts. I want the milk to already be pouring. So to do that, hover your mouse inside the container in the precision editor and simply click and drag the mouse. That opens up the trim tools.
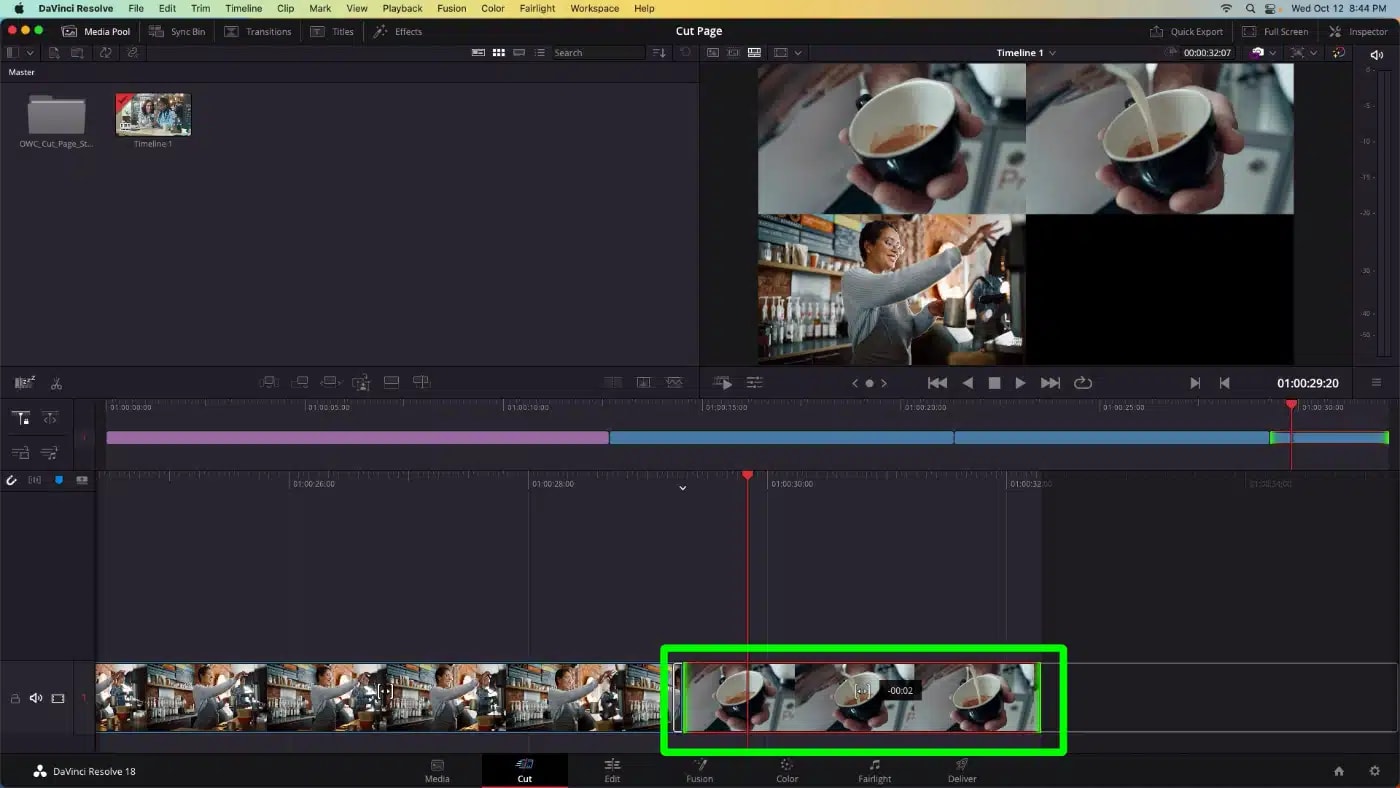
The trim tools and the upper left window shows me what frame I’m viewing when this edit starts. And on the upper right window, what frame I’m viewing when this edit ends. So if I just click and drag my mouse, you can see I’m re-timing where the clip is beginning, but it’s all existing in the same container.
Difference Between the Cut Page and Edit Page
What’s the difference between the cut page and the edit page? Both pages can be used for video editing and both pages work in the same timeline at the same time. To demonstrate this, I’m going to click on the edit page button in the navigation ribbon.
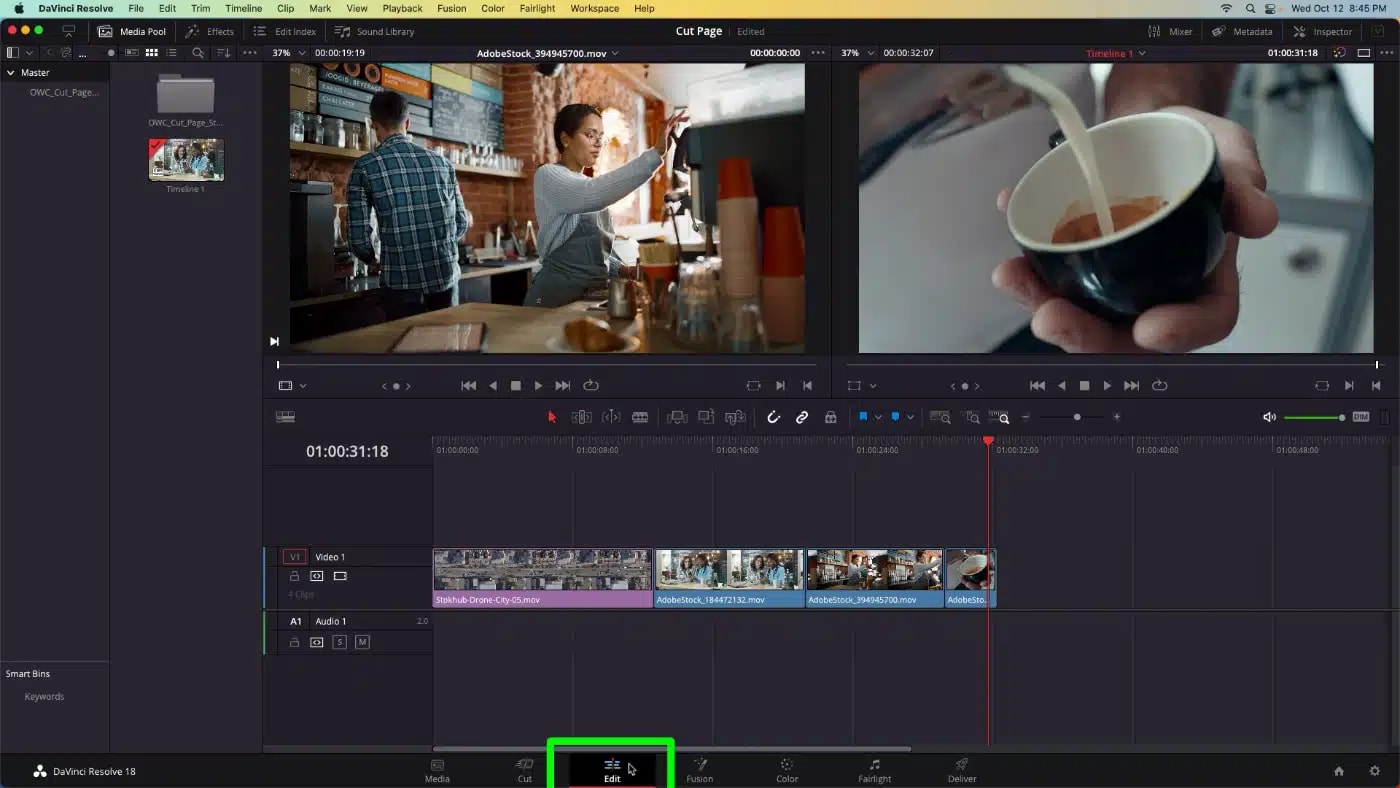
I have the same timeline open with all of the same edits, but the layout and the tools have been changed. This is a more familiar view. It looks more like Adobe Premiere Pro or Avid Media Composer. The Cut page is just a different view for working on the same timeline. That might be where your project starts. And then if you want, you can move into the edit page to have a more traditional layout to refine your edit, and you can use any combination of both as you go.
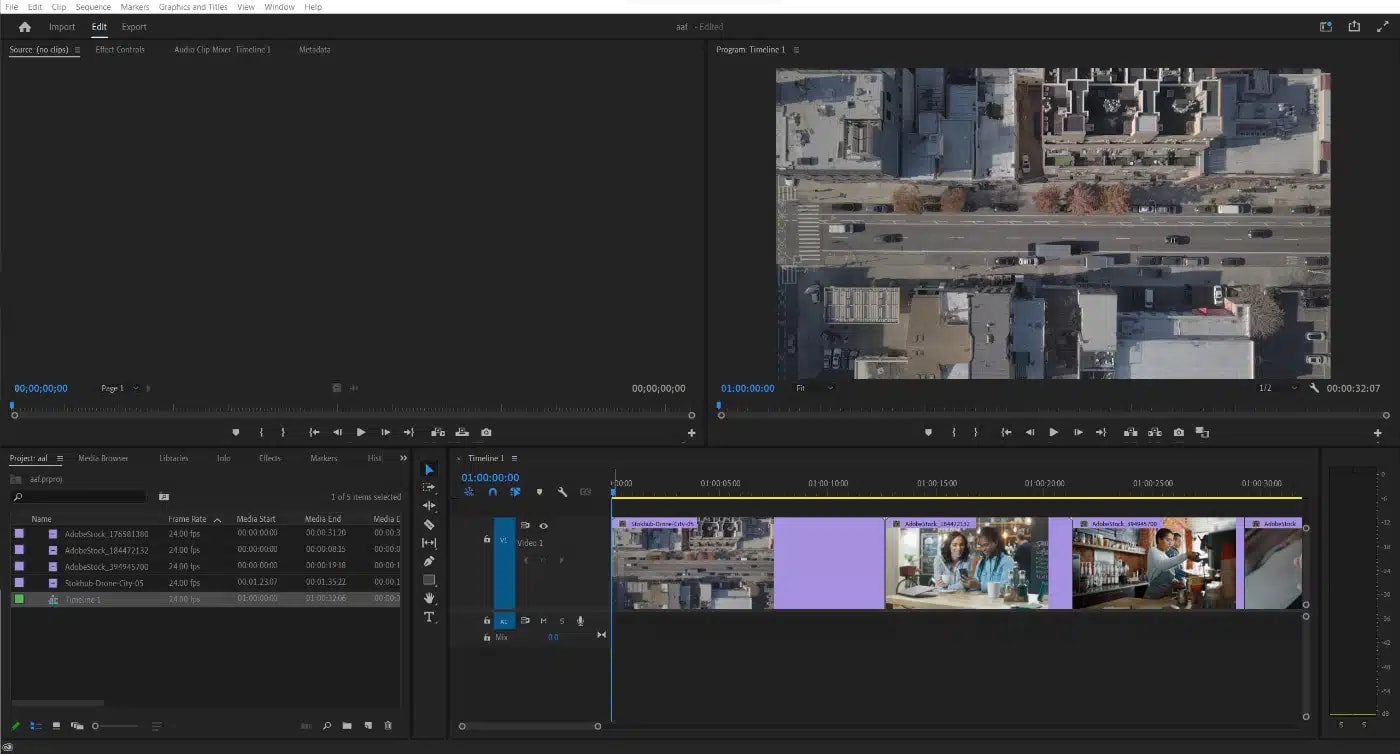
Sending out to Premiere Pro
I’m going to end today showcasing that timelines can be sent from DaVinci Resolve’s Cut Page into other software like Adobe Premiere Pro. Go menubar > File > Export Timeline. Change the interchange file to an AVID AAF. Now inside Adobe Premiere Pro, I can import that AAF and the edit comes in.
It’s important to note that moving timelines between edit software doesn’t always translate things like titles and effects and transitions. AAFs work well for moving a basic assemble edit like this one.
Do you have any questions about the cut page? Did you find source tape mode useful? Let me know in the comments section.
Other topics you might like


SSDs vs. HDDs in 2026: What the Flash Shortage Changes for Your Storage Strategy
Updated on Jun 18, 2026
The New Portkeys LH7C is a Rugged, Bright, Yet Affordable On-Camera Monitor
Updated on Jun 16, 2026