 USA + International
 OWC Canda
 OWC Europe
How to Quickly Export Images From PowerPoint for Use in Video Editing
If you're a video editor who frequently receives PowerPoint decks, here's how to export images and video assets you need out of these files—even if you don't have PowerPoint.
Brian Levin • Jan 11, 2023
If you work as a video editor and have ever worked with corporate marketing teams you are familiar with this very problem. You ask for some assets for the video: maybe you need some artwork, a couple of metrics to create graphics, or some video assets. What do you receive?
A file called information.pptx. Great, it’s a PowerPoint.
Fortunately there are plenty of workarounds for video editors to get what they need from this file format.
Why PowerPoint?
If you are a jack-of-all-trades video editor with motion graphics chops, then you might scoff at the idea that someone involved in marketing or communications is using PowerPoint to send you materials. However, in a corporate world, that’s the most commonly used tool. While I have received Illustrator or EPS files, it’s rare.
Most large corporations have pre-built PowerPoint templates for their employees to use that include layouts, logos, and fonts. This makes it easy for internal teams to build communication tools and documents to share their thoughts and ideas, but can of course make it difficult for video editors and motion graphics artists to pull that information into programs like Adobe Premiere or Adobe After Effects.
Why You Should Have PowerPoint As a Video Editor
Even though most of my time is spent in Premiere, After Effects and occasionally Cinema4D, Photoshop, Illustrator or other design software, I do keep an active Microsoft Office subscription on hand for scenarios where I receive a PowerPoint or Word document from a client.
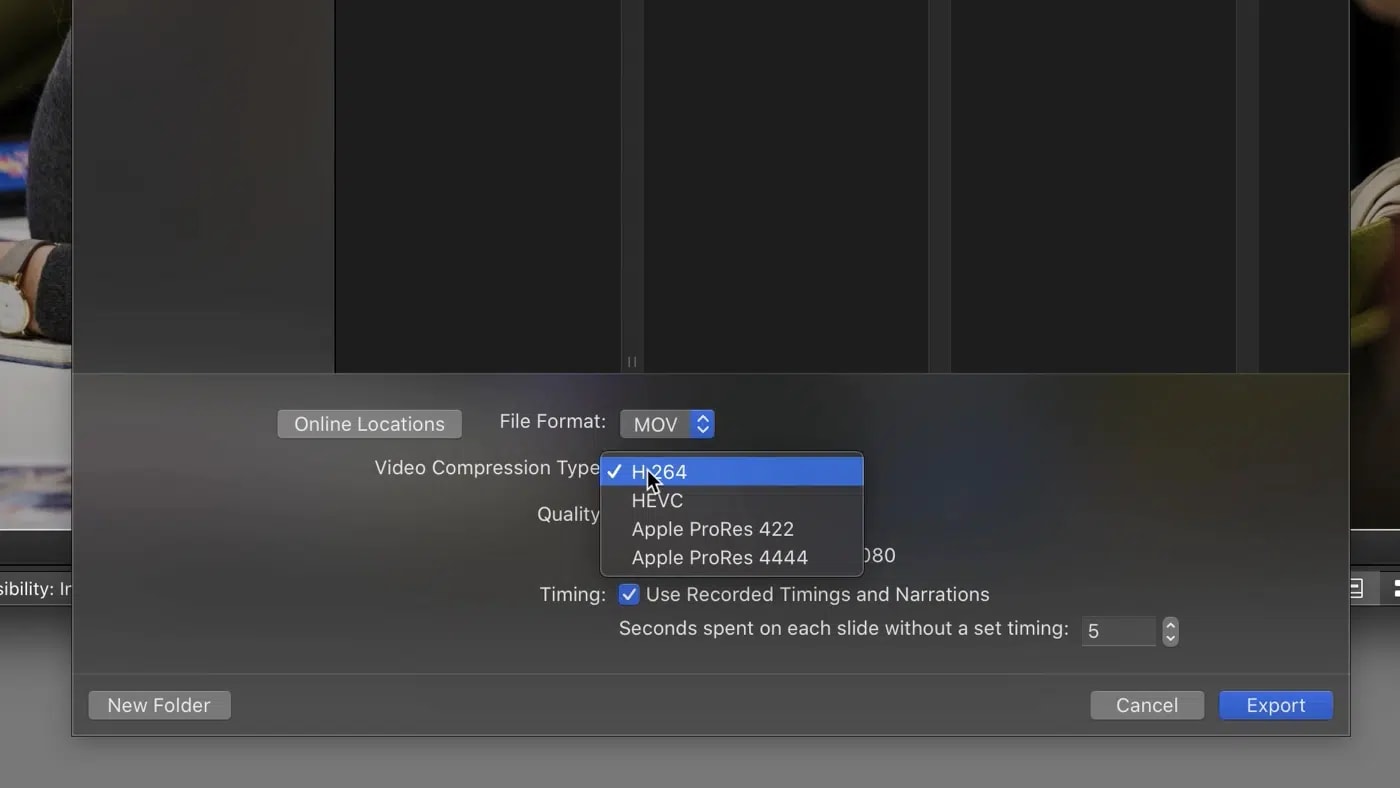
Inside of PowerPoint you have the power to export presentations as individual JPG images, or export a presentation as a MOV file.
When creating the MOV files you can set the length of each slide, so if you have a presentation with a lot of animated elements that the client wants to see in the video, this MOV can really save you a lot of time.
However, a Microsoft Office subscription can be an added expense in a world of subscription based tools. If you are looking for workarounds to dealing with PPTX files, look no further.
Pulling Assets Out of a Microsoft Office File
I have one clever, handy trick for you when you need to pull graphics and assets out of a PowerPoint and into your editing project.
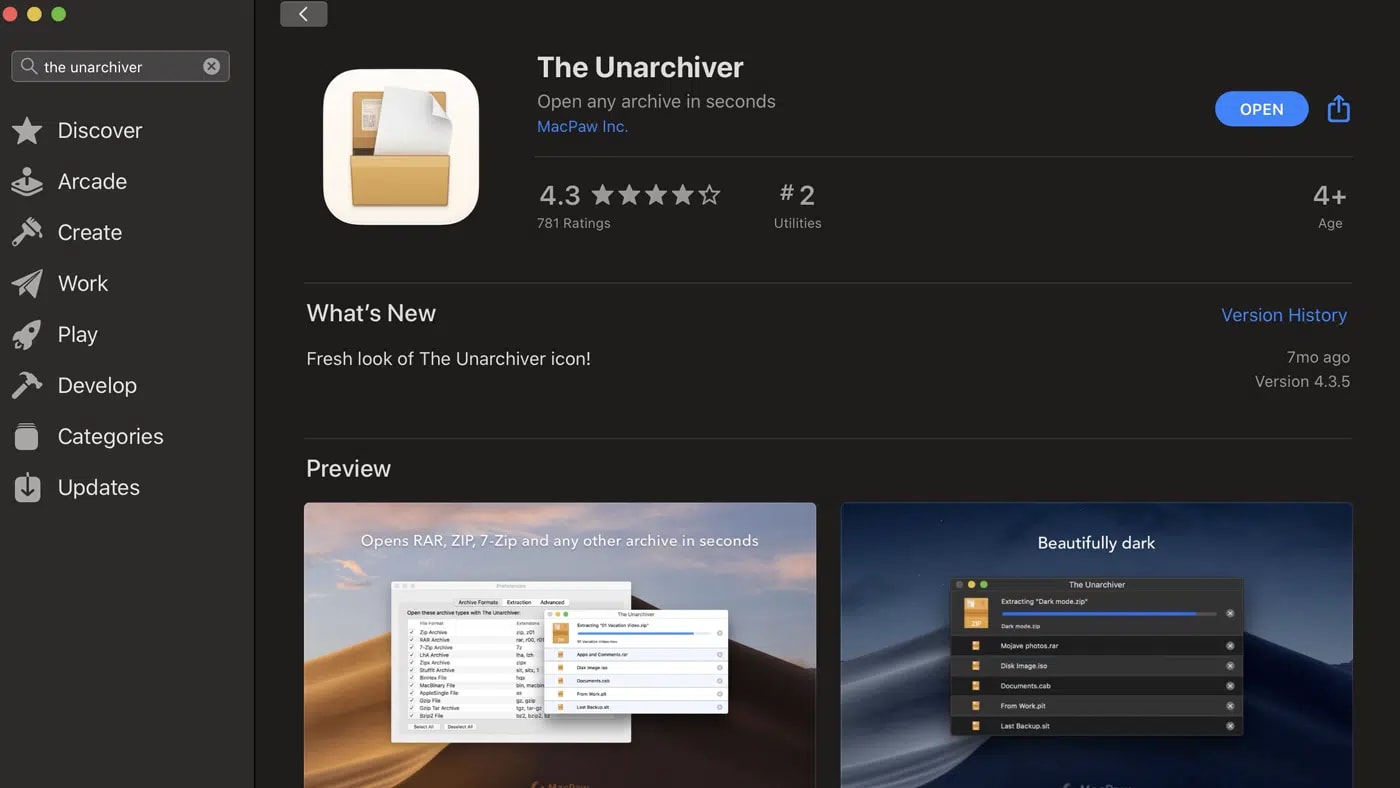
All you need to pull this off is an unzipping tool. This should work for Windows users without needing any third party tools, however for Mac users the Archive Utility won’t work for you here, so you’ll need to try out something like Keka or The Unarchiver, both of which are free and available on the Mac App Store.
The trick is very simple. Rename your PPTX file to get rid of the .pptx at the end of the filename, and replace it with .zip.

This will turn the file into a ZIP file. Using Keka or The Unarchiver you can unzip this file. You’ll end up with some random looking folders.
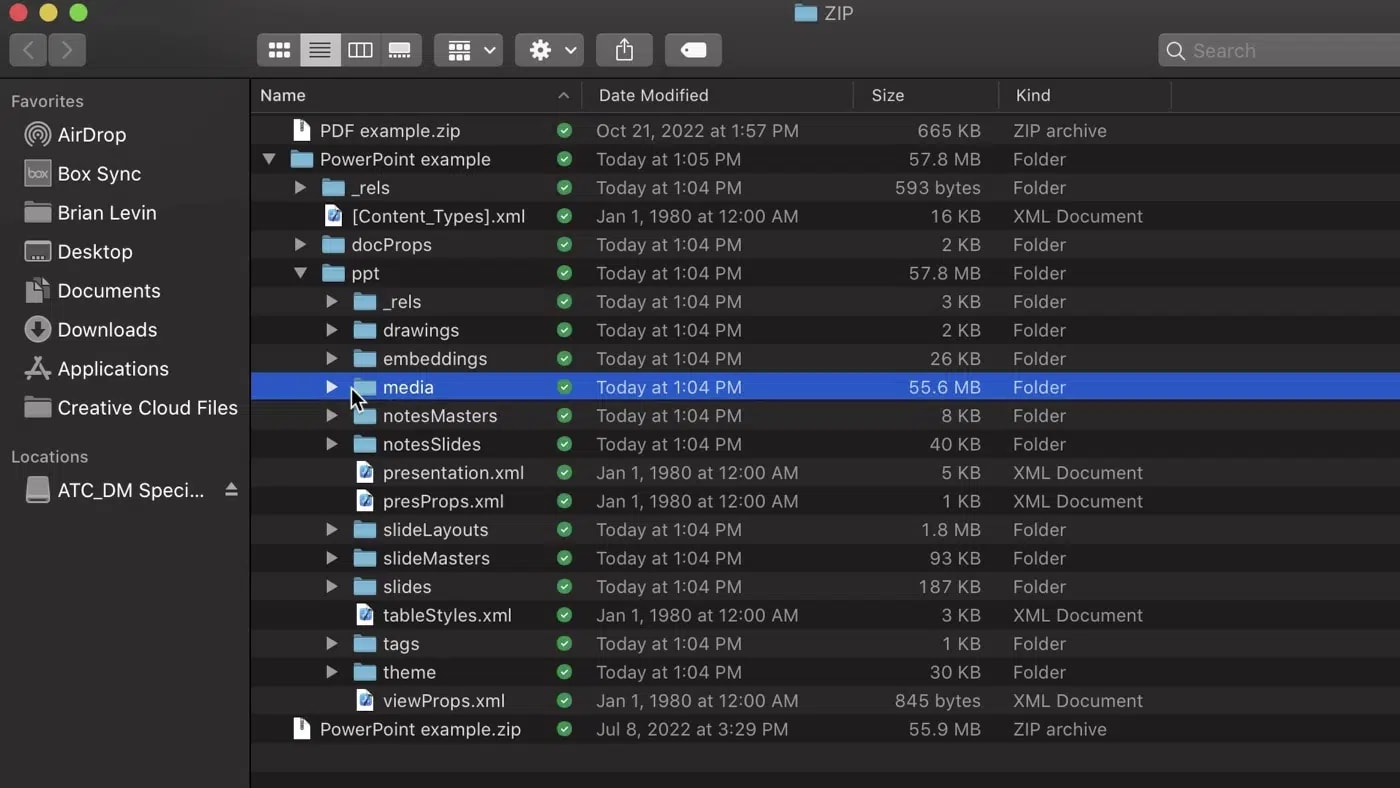
If you expand the PPT folder, inside of it you’ll find a folder called “media.” The media folder will contain images as they appear in the order of the PowerPoint. These numbers don’t represent pages, just the order in which the images appear in the document, as many images can appear on a single page.
Simply get rid of the remaining folders to clean up your folder structure and keep these images.
Thinking Ahead
I have a couple of last important points to make when it comes to creating these files.
First, if you use PowerPoint to extract the slide images you will end up with a folder full of slides called Slide1.jpeg, Slide2.jpeg and so on. If you only ever have to do this to one document one time in this project, you won’t run into any issues. However, if you have multiple documents, or may be extracting slides from multiple versions or iterations of the same document, it would be wise to rename these files before importing them into your editing software.
Specifically, Adobe Premiere can get a little confused when it finds multiple files with the exact same filename in nearby destinations, so to avoid this potential problem you can use Finder to rename your files quickly and easily.
To batch rename your files, simple select all of them, right click and choose Rename. You are provided with three options here.
You can Add Text, Replace Text or use a Formula. For our purposes let’s Add Text. I’ll usually use the date and the name of the document with an underscore and set it to “before name.” This way all of my slides will now read 221228-powerpoint example_Slide1.jpeg and so on.

If I ever revise this document and extract the slides again I would use a new date, therefore never ending up with two files with the exact same filenames.
I would do the same thing for the images I extract from the ZIP file just for safety. File management is an important part of editing, so taking great care at the organization stage of your project to create smart file management will save you time in the long run.
Other topics you might like


The New Portkeys LH7C is a Rugged, Bright, Yet Affordable On-Camera Monitor
Updated on Jun 16, 2026

Grab Great Audio From Anywhere with This New DPA 4097 CORE+ Micro Shotgun Microphone
Updated on May 29, 2026
Canon’s New EOS R6V Adapts the R6 III Into a Video-First Body Aimed at Creators
Updated on May 13, 2026