 USA + International
 OWC Canda
 OWC Europe
How to Make Sound Bridges in Premiere Pro
Improve your edits and make them more professional with this simple sound editing trick.
Josh Edwards • Oct 04, 2022
In film making, the sound editing is equally as, if not more important than, the visuals themselves. You can use sound editing to really flesh out your scenes, build atmosphere and convey emotions. Learning how to use sound bridges is an easy editing transition that can really help with this. Any professional editor will be using these little sound bridges in Premiere Pro multiple times throughout a cut.
What is a sound bridge?
Sound bridges (sometimes also known as audio bridges) are an editing technique used to transition from one scene to another, through the use of sound. You are effectively bridging the gap between one shot and another by using sound. There’s a clear example in the tutorial video where we transition from the quiet, peaceful serenity of the Himalayan mountains to a hectic, busy scene in Kathmandu.
Why use a sound bridge?
A sound bridge is used primarily to connect two scenes with sound. They decrease the abruptness of a cut, guide your audience through a story’s twists and turns and sometimes, can even create intrigue or drama.
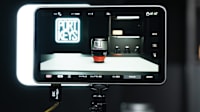
How to make a sound bridge in Premiere Pro
There are three audio bridges in Premiere Pro I’m walking you through today – all really simple and easy.
Constant power crossfade
Adding a “constant power” crossfade effect at the point where two audio clips meet on the timeline adds a nice layer of polish to your edit. Rather than one audio clip abruptly ending and feeding straight into the next one (this can sometimes produce a noticeable clipping sound), the two audio tracks blend seamlessly from one to the other.
All you have to do is go to the effects tab in your project window, navigate to audio transitions in the drop-down menus, then to crossfade, where you can drag constant power and drop it onto your audio.
L Cut
An L cut is when the audio from a preceding shot runs further on, under the succeeding shot and past the point where the two visual shots transition.
To achieve an L cut, you just need to hit N on the keyboard to select the rolling edit tool, then hold ALT (for windows) or OPT (for MAC), click and drag the video track of the succeeding shot, ensuring it runs a little over the preceding shot to a point you’re happy with. You’ll now see how the audio from the preceding shot is running a little further on under your succeeding shot. I demonstrate this in the tutorial video.
J Cut
The J cut, as you may have guessed, is the opposite of an L cut. In this instance, you let the audio of the succeeding shot start a little bit sooner under the preceding shot, before the visual cut has been made. Again, I demonstrate this in the tutorial video.
Note – for both the J and L cuts, you’ll want to use the constant power crossfade to ensure the audio tracks blend nicely.
Other topics you might like
The New Portkeys LH7C is a Rugged, Bright, Yet Affordable On-Camera Monitor
Updated on Jun 16, 2026

Mountain Lodge Meets Music Magic: Inside Dark Horse Recording with Dave Hagen
Updated on Jun 4, 2026
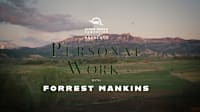
Dont Miss "Personal Work" a new Photography Series from Forrest Mankins and OWC
Updated on Jun 3, 2026