 USA + International
 OWC Canda
 OWC Europe
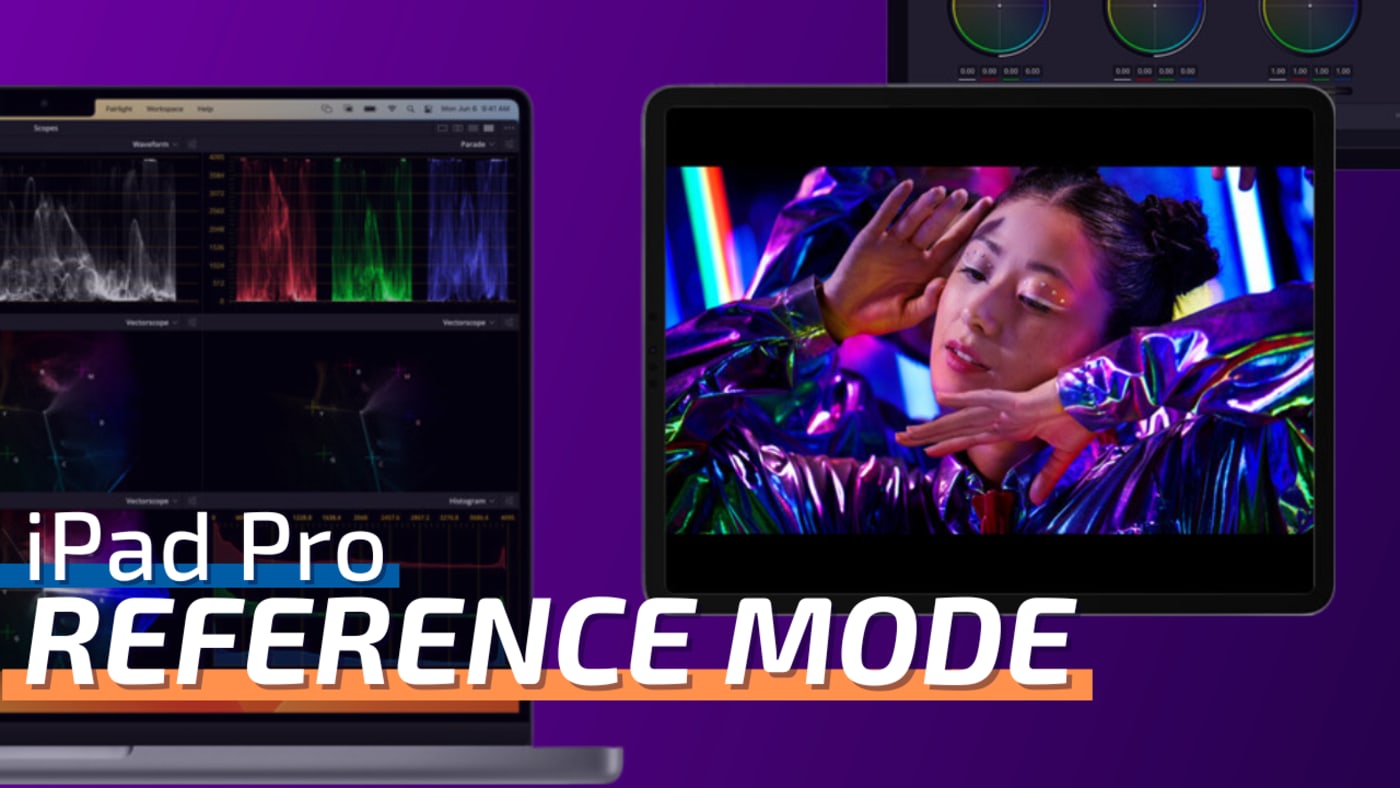
How to Use iPad Pro as a Reference Monitor for Video Editing
Put your iPad Pro's hyper-accurate display to use with Reference Mode, specifically created for pro workflows.
Dennis Sellers • Apr 21, 2023
The 12.9-inch iPad Pro boasts extremely accurate color representation and within both iPad OS and macOS, Apple has baked in some great ways to put that amazing display to use.
Whether you're using the iPad Pro on its own or in tandem with a Mac as a secondary Sidecar display, this new mode is called Reference Mode. In this post, we'll detail how to use Reference Mode for workflows where only the iPad is in use, but also those where the iPad Pro is being used as a second display.
How to enable Reference Mode on iPad Pro
According to Apple, Reference Mode is a display mode for professional content creation workflows, like color grading, editing, and content review, where accurate colors and consistent image quality are critical.
When Reference Mode is on, your iPad Pro displays reference color for these common color standards and video formats, up to 1,000 nits peak brightness for HDR and 100 nits peak brightness for SDR.
Apple says that the mode enables the tablet to match the color requirements of your workflow. It targets a D65 white point and disables all dynamic display adjustments for ambient surround, like True Tone, Auto-Brightness, and Night Shift.
To use Reference Mode, you'll need a 12.9-inch iPad Pro that is either a 5th generation model or newer (sorry 11-inch users), and it will need to be running iPadOS 16 or later.
On your iPad Pro, do the following:
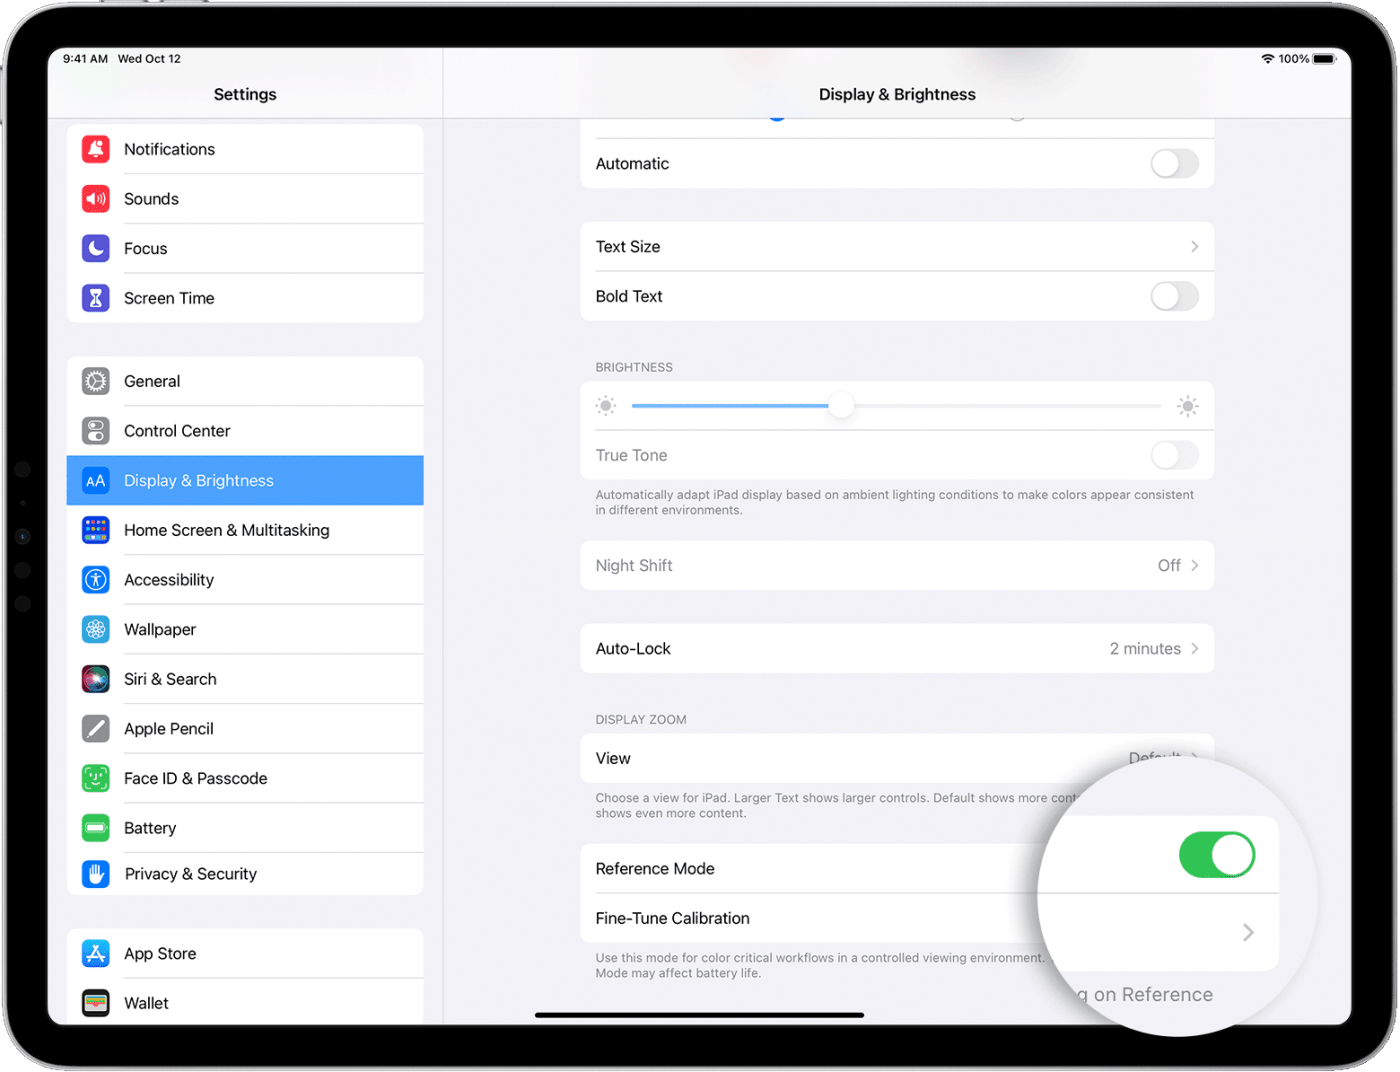
1. Open Settings
2. Tap Display & Brightness in the menu on the left side of the screen.
3. Under the Display & Brightness menu, scroll down until you see a toggle for Reference Mode and ensure that the toggle is set to on.
Once Reference Mode is enabled, your iPad Pro will display content for these common color standards:
- BT.709
- BT.601 SMPTE-C
- BT.601 EBU
- sRGB
- HDR10 BT.2100 PQ
- BT.2100 HLG Dolby Vision Profile 8.4
- Dolby Vision Profile 5
How to calibrate white-point and luminance in iPadOS Reference Mode
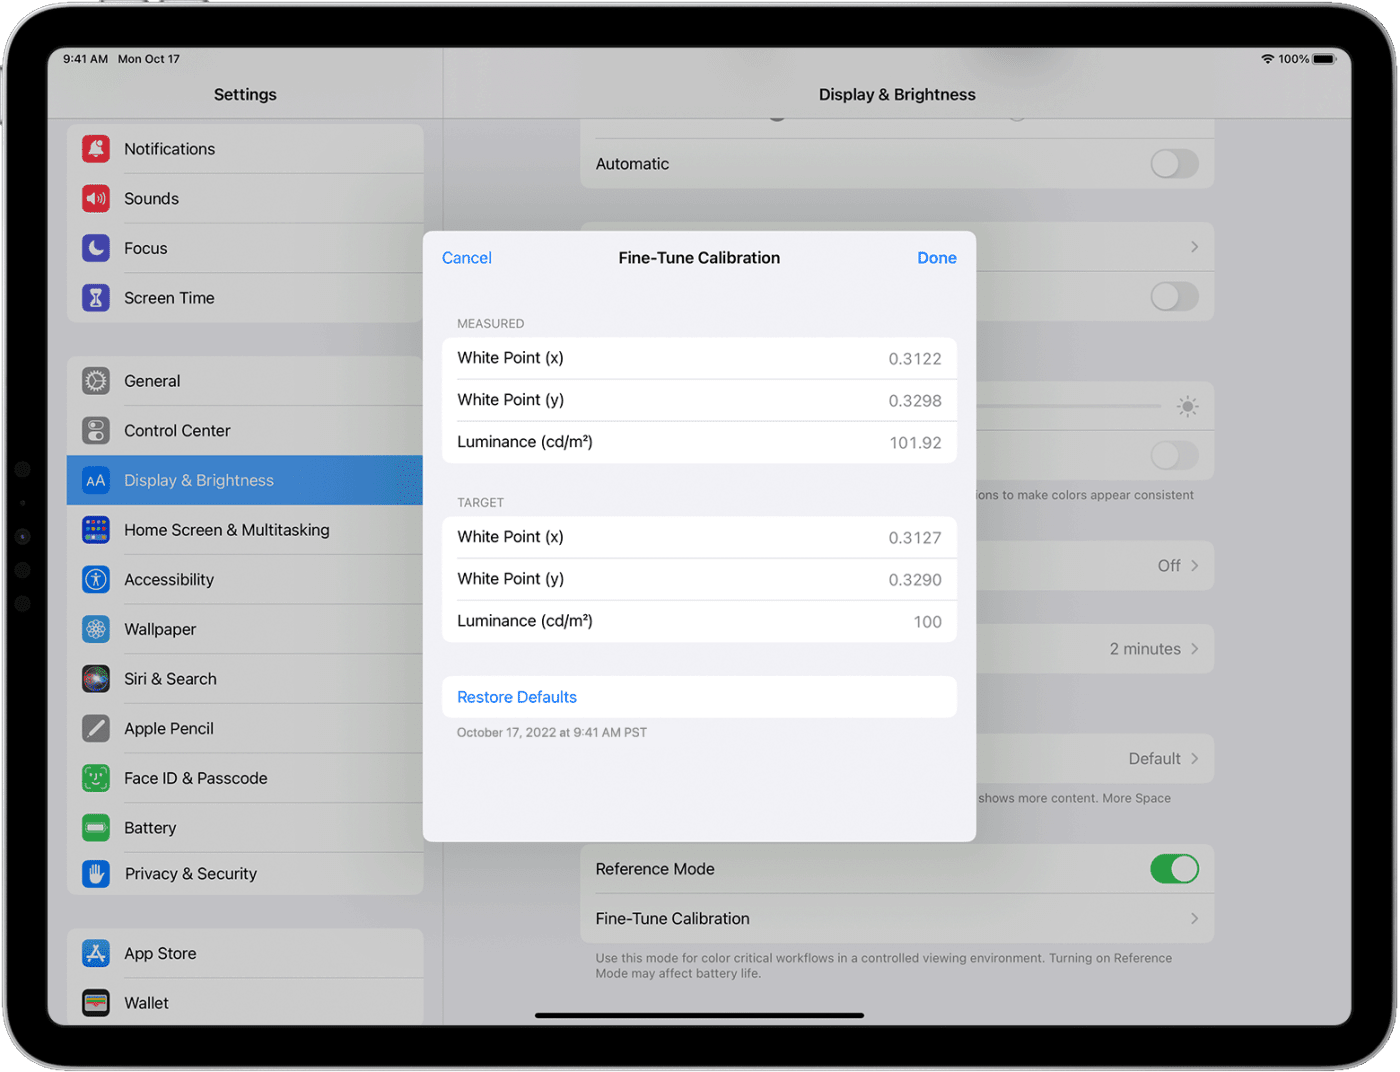
Once Reference Mode is enabled, you can also fine-tune white point and luminance calibration in the Settings app. Here's how:
1. Open Settings
2. Tap Display & Brightness in the menu on the left side of the screen.
3. Under the Display & Brightness menu, scroll down until you see Fine-Tune Calibration. Tap it.
4. Tap the space next to each setting and enter the desired value.
5. Tap Done.
How to use use Reference Mode with an iPad Pro being used a second display
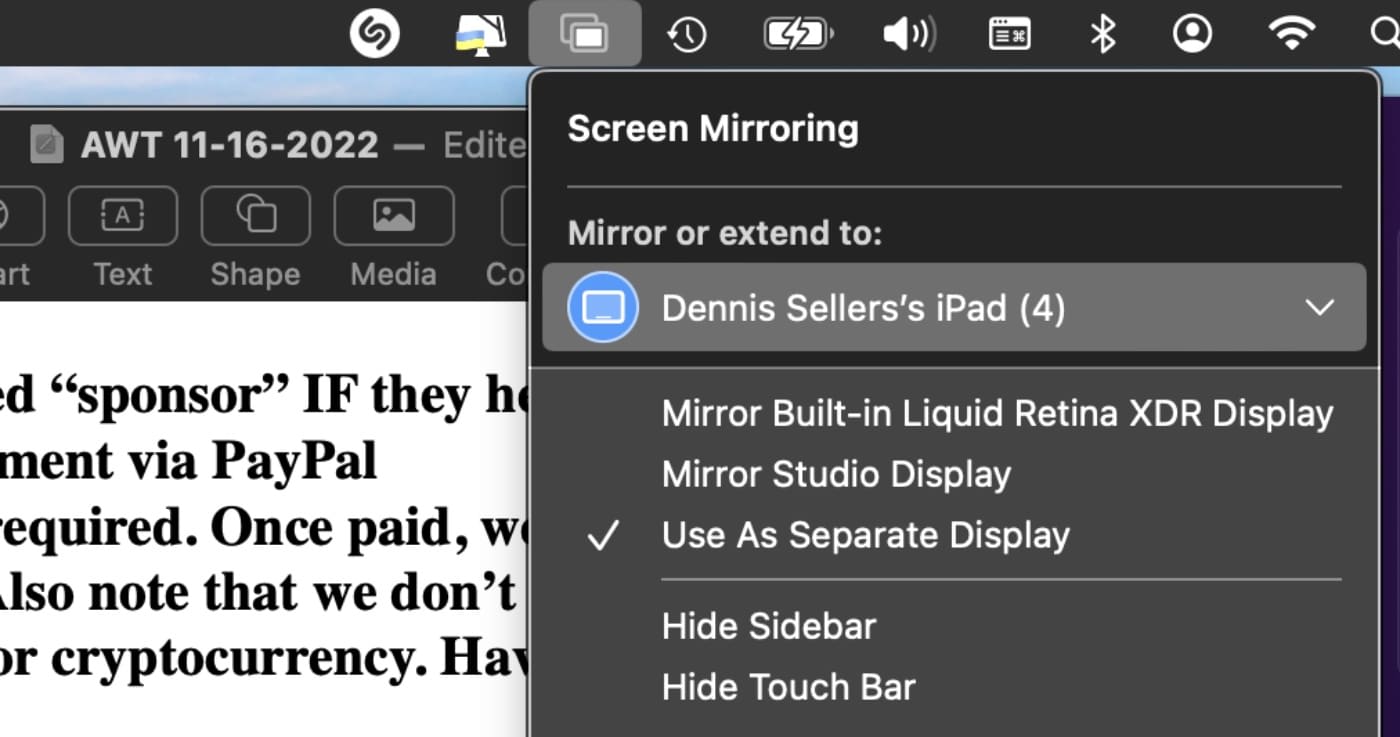
The Sidecar feature in macOS allows you to extend your Mac desktop by using your iPad as a second display or as an input device across creative Mac apps.
Let’s look at how to use it. But first, make sure that your Mac and iPad meet the Sidecar system requirements, including that each is signed with the same Apple ID. Also note that you can use Sidecar wirelessly, but to keep your iPad charged during use, connect it directly to your Mac with the USB charge cable that came with your iPad.
How to start Sidecar extended display
Option One: Open System Settings and click Displays. Click the “+” button and select your iPad Pro. You can choose to show Sidecar (that is, your iPad Pro) on the left or right of your Mac’s screen.
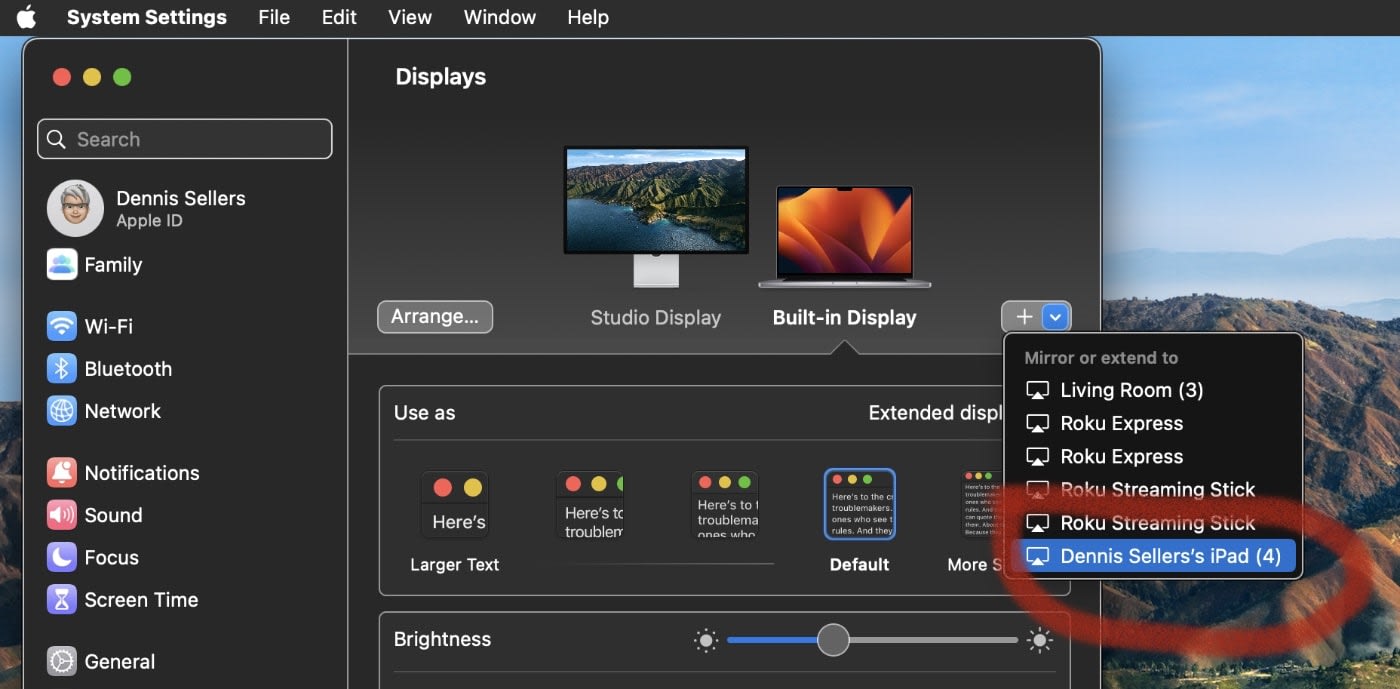
Option Two: Select the Display icon on your Mac’s Menu Bar. Find the iPad you want to use as a secondary monitor and select it. Your iPad should immediately start working as a secondary display.
You can move an app to Sidecar by clicking and holding (you have to hold it; in other words, keep pressing) your mouse over the green expansion button on the top bar of a Mac app. A menu will pop up; press Move to [iPad] and the app will immediately be sent over to the iPad.
To disengage Sidecar, press the blue rectangle again. You’ll see a menu pop up. Press Disconnect and the iPad will go back to being a normal iPad.
You can also mirror your Mac’s display instead of using the iPad as a secondary monitor by selecting the Display icon on your Mac’s menu bar and selecting “Mirror Display.”
How to enable Reference Mode with Sidecar
Once you've enabled Sidecar, you can still turn on Reference Mode to ensure content appearing on the iPad is color accurate.
To do this, you'll simply start Sidecar and once your iPad is enabled as a second display, you'll go in and ensure Reference Mode is turned on just as you did before:
1. Open Settings
2. Tap Display & Brightness in the menu on the left side of the screen.
3. Under the Display & Brightness menu, scroll down until you see a toggle for Reference Mode and ensure that the toggle is set to on.
Once Reference Mode is enabled on the iPad Pro, you can also choose a reference preset on your Mac. You can use one of the following presets (with the corresponding color standards and video formats that are supported by Reference Mode in parentheses):
- HDTV Video (BT.709)
- NTSC Video (BT.601 SMPTE-C)
- PAL & SECAM Video (BT.601 EBU)
- Internet & Web (sRGB)
- HDR Video (HDR10 BT.2100 PQ, BT.2100 HLG Dolby Vision Profile 8.4, Dolby Vision Profile 5)