

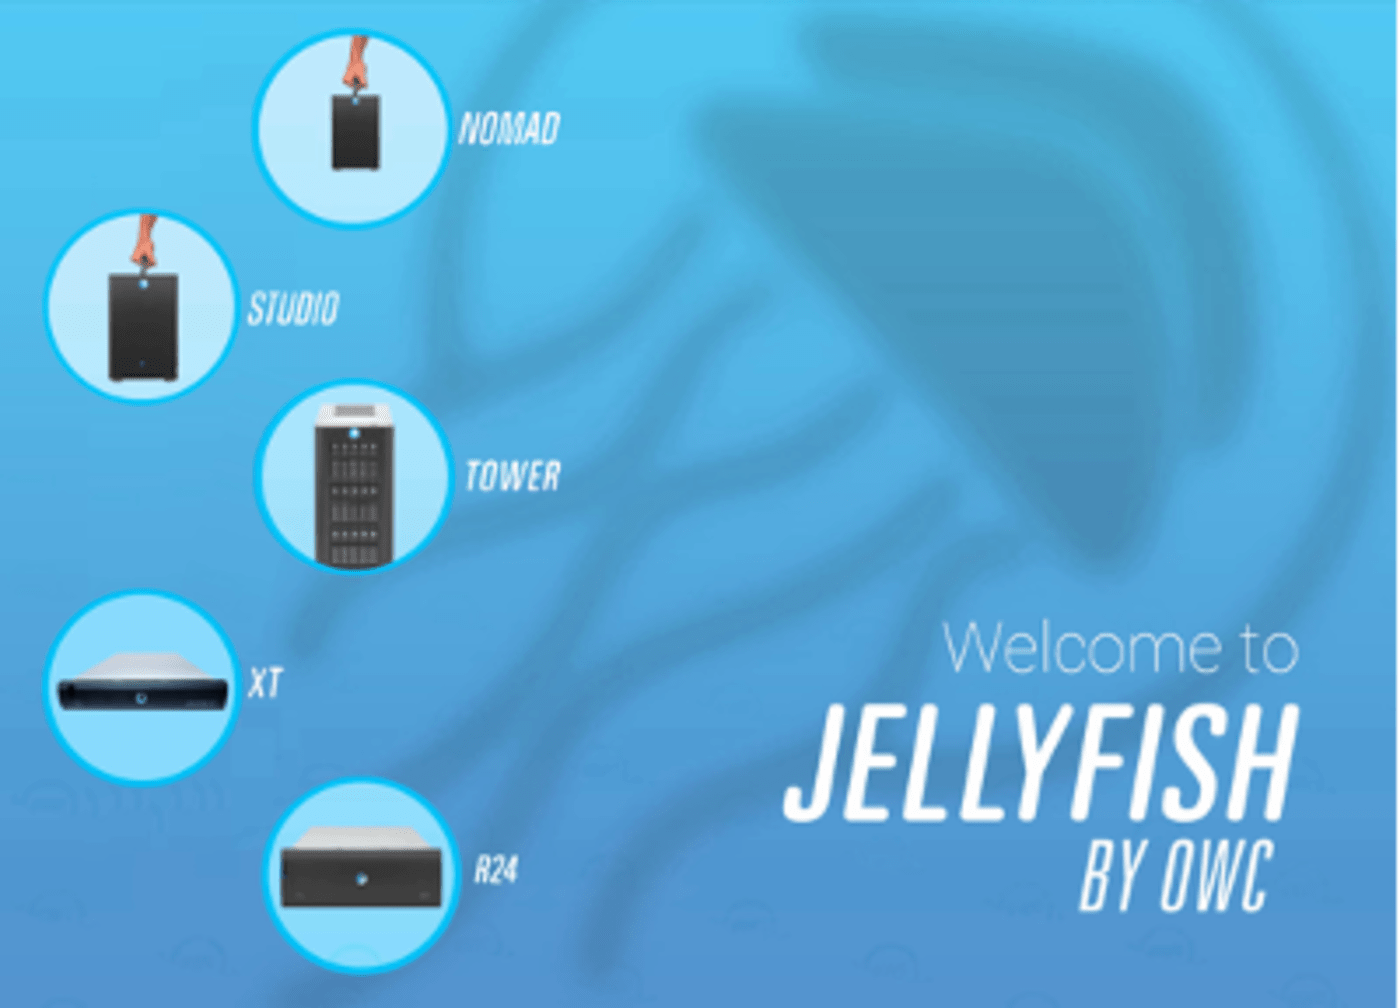
OWC Jellyfish Nomad Support Manual

Table of Contents
- Unboxing Your OWC Jellyfish Nomad
- Welcome Card
- Power Cable
- Drive Shuttle Keys
- OWC Jellyfish Nomad Chassis
- How To Access Drives
- Powering the OWC Jellyfish On/Off
- Powering Your OWC Jellyfish On
- Powering Down Your OWC Jellyfish
- Ports and Cabling Overview
- OWC Jellyfish and Adapters
- Do I Need an Adapter?
- Which Adapter Do I Purchase?
- Adapter Settings & Drivers
- OWC Thunderbolt 3 10G Ethernet Adapter
- Additional Resources
Unboxing Your OWC Jellyfish Nomad
- Congratulations on the purchase of your OWC Jellyfish Nomad! Everything you need will come shipped conveniently in one box, with the following items detailed below.
Welcome Card
- Hang on to this handy resource as it contains important information for quick links to our setup and support websites. The card also contains the serial number for your unit.
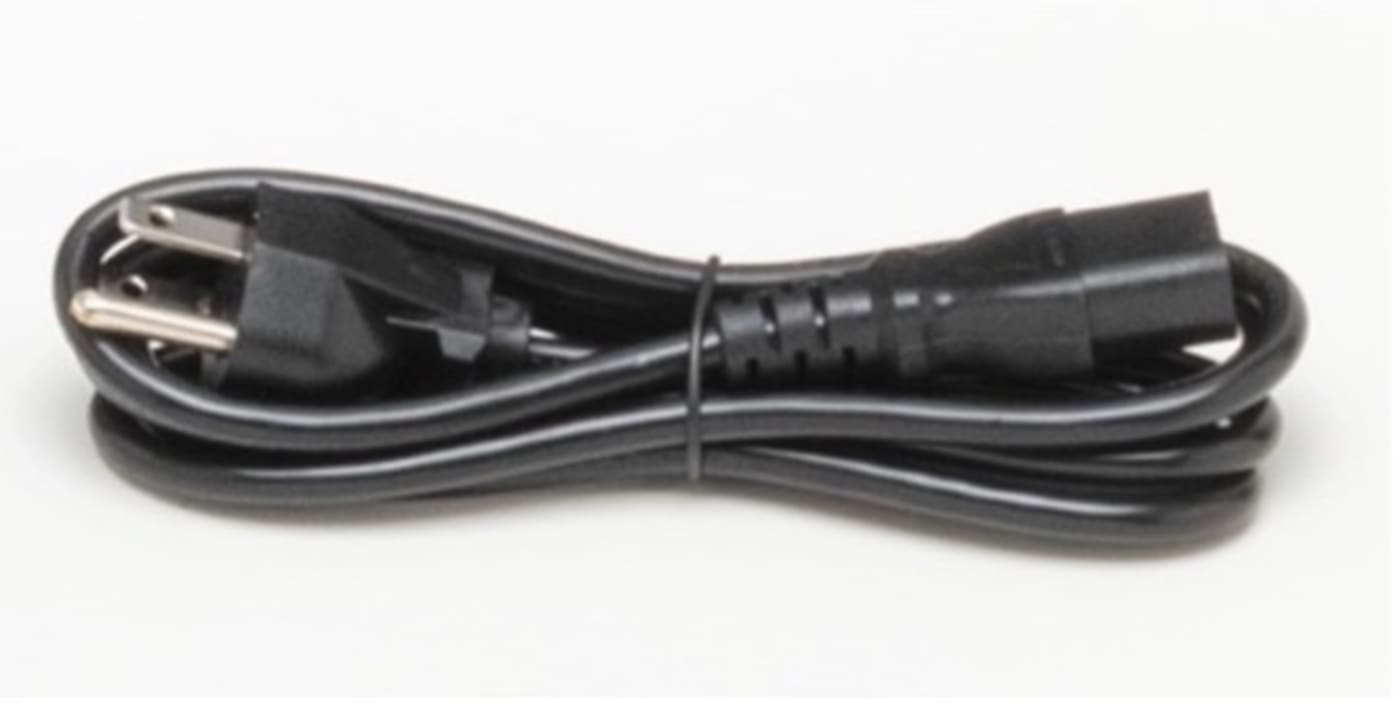
Power Cable
- This will plug into the back of the unit. We recommend connecting to an uninterrupted power supply (UPS).
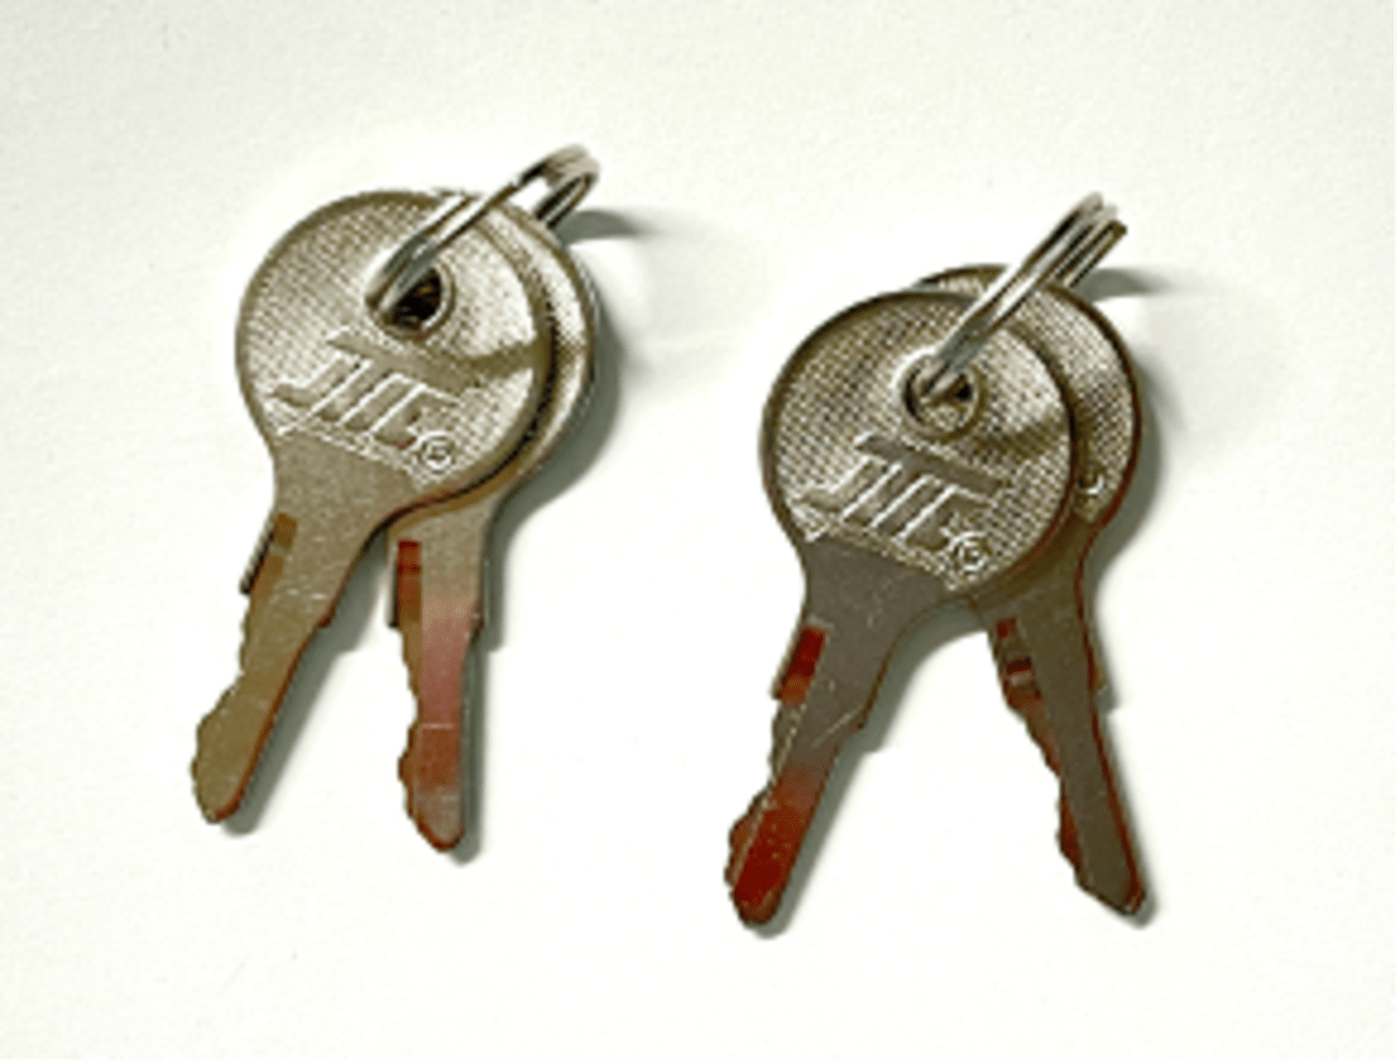
Drive Shuttle Keys
- When you remove the front panel, you’ll notice the Nomad’s drives come enclosed in OWC U.2 Shuttles. These are secured in the chassis with key-entry locks and come with two sets of keys.
The OWC Jellyfish Nomad Chassis

How To Access Drives
- The OWC Jellyfish Nomad drives are pre-installed, but if for any reason you need to access them, you can remove the front panel easily, and without using any tools.
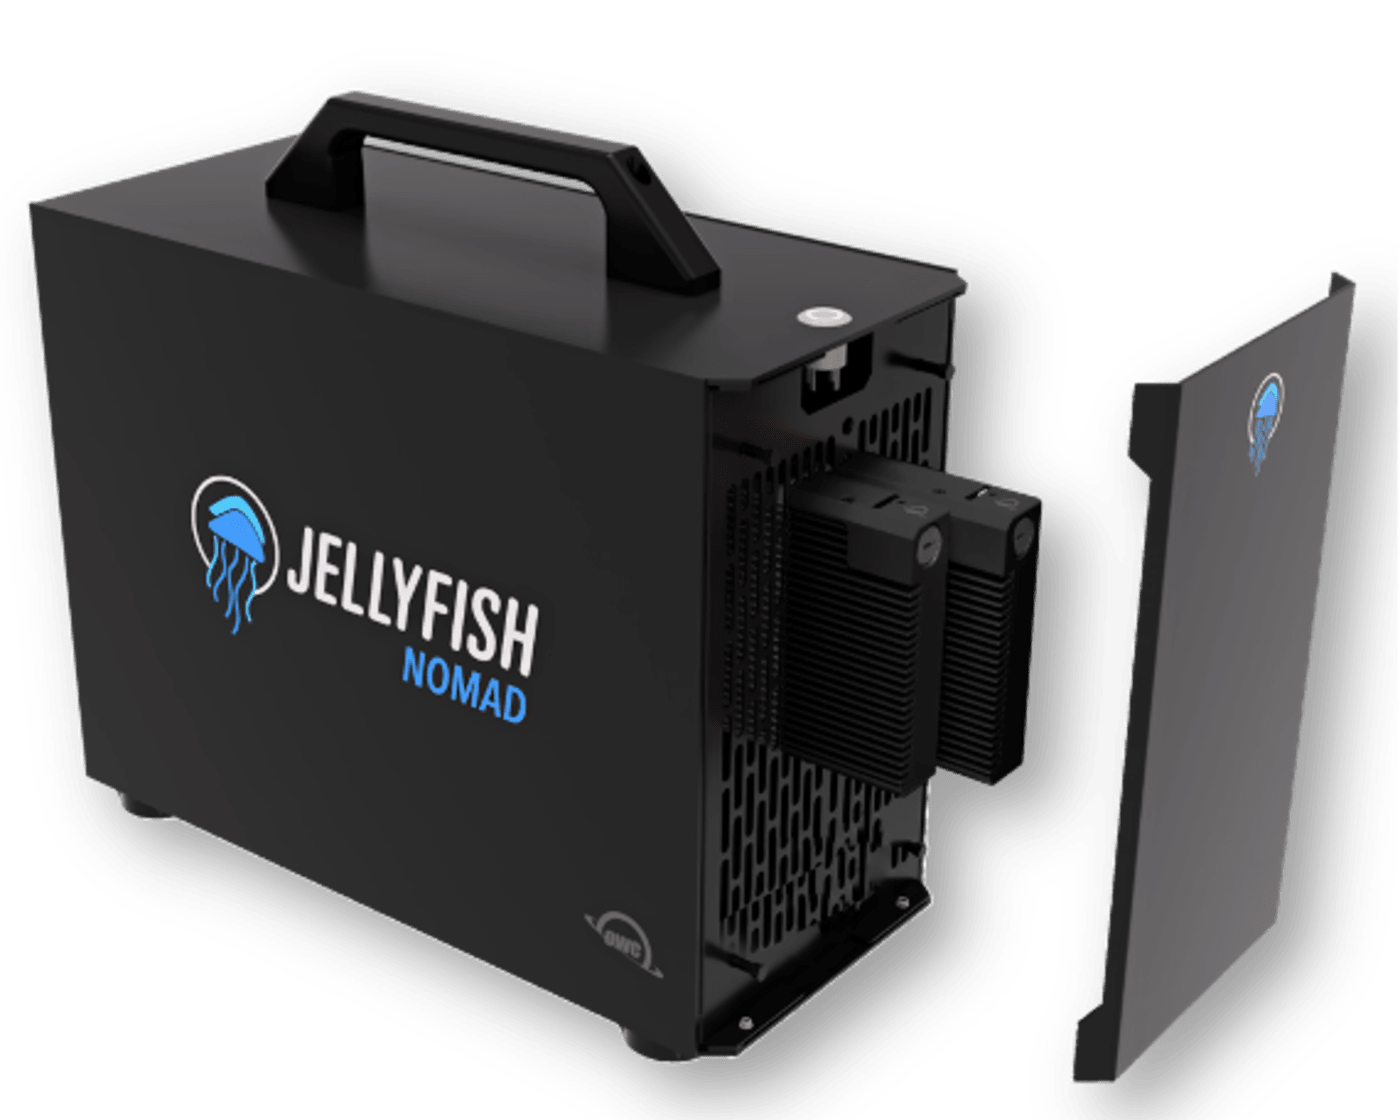
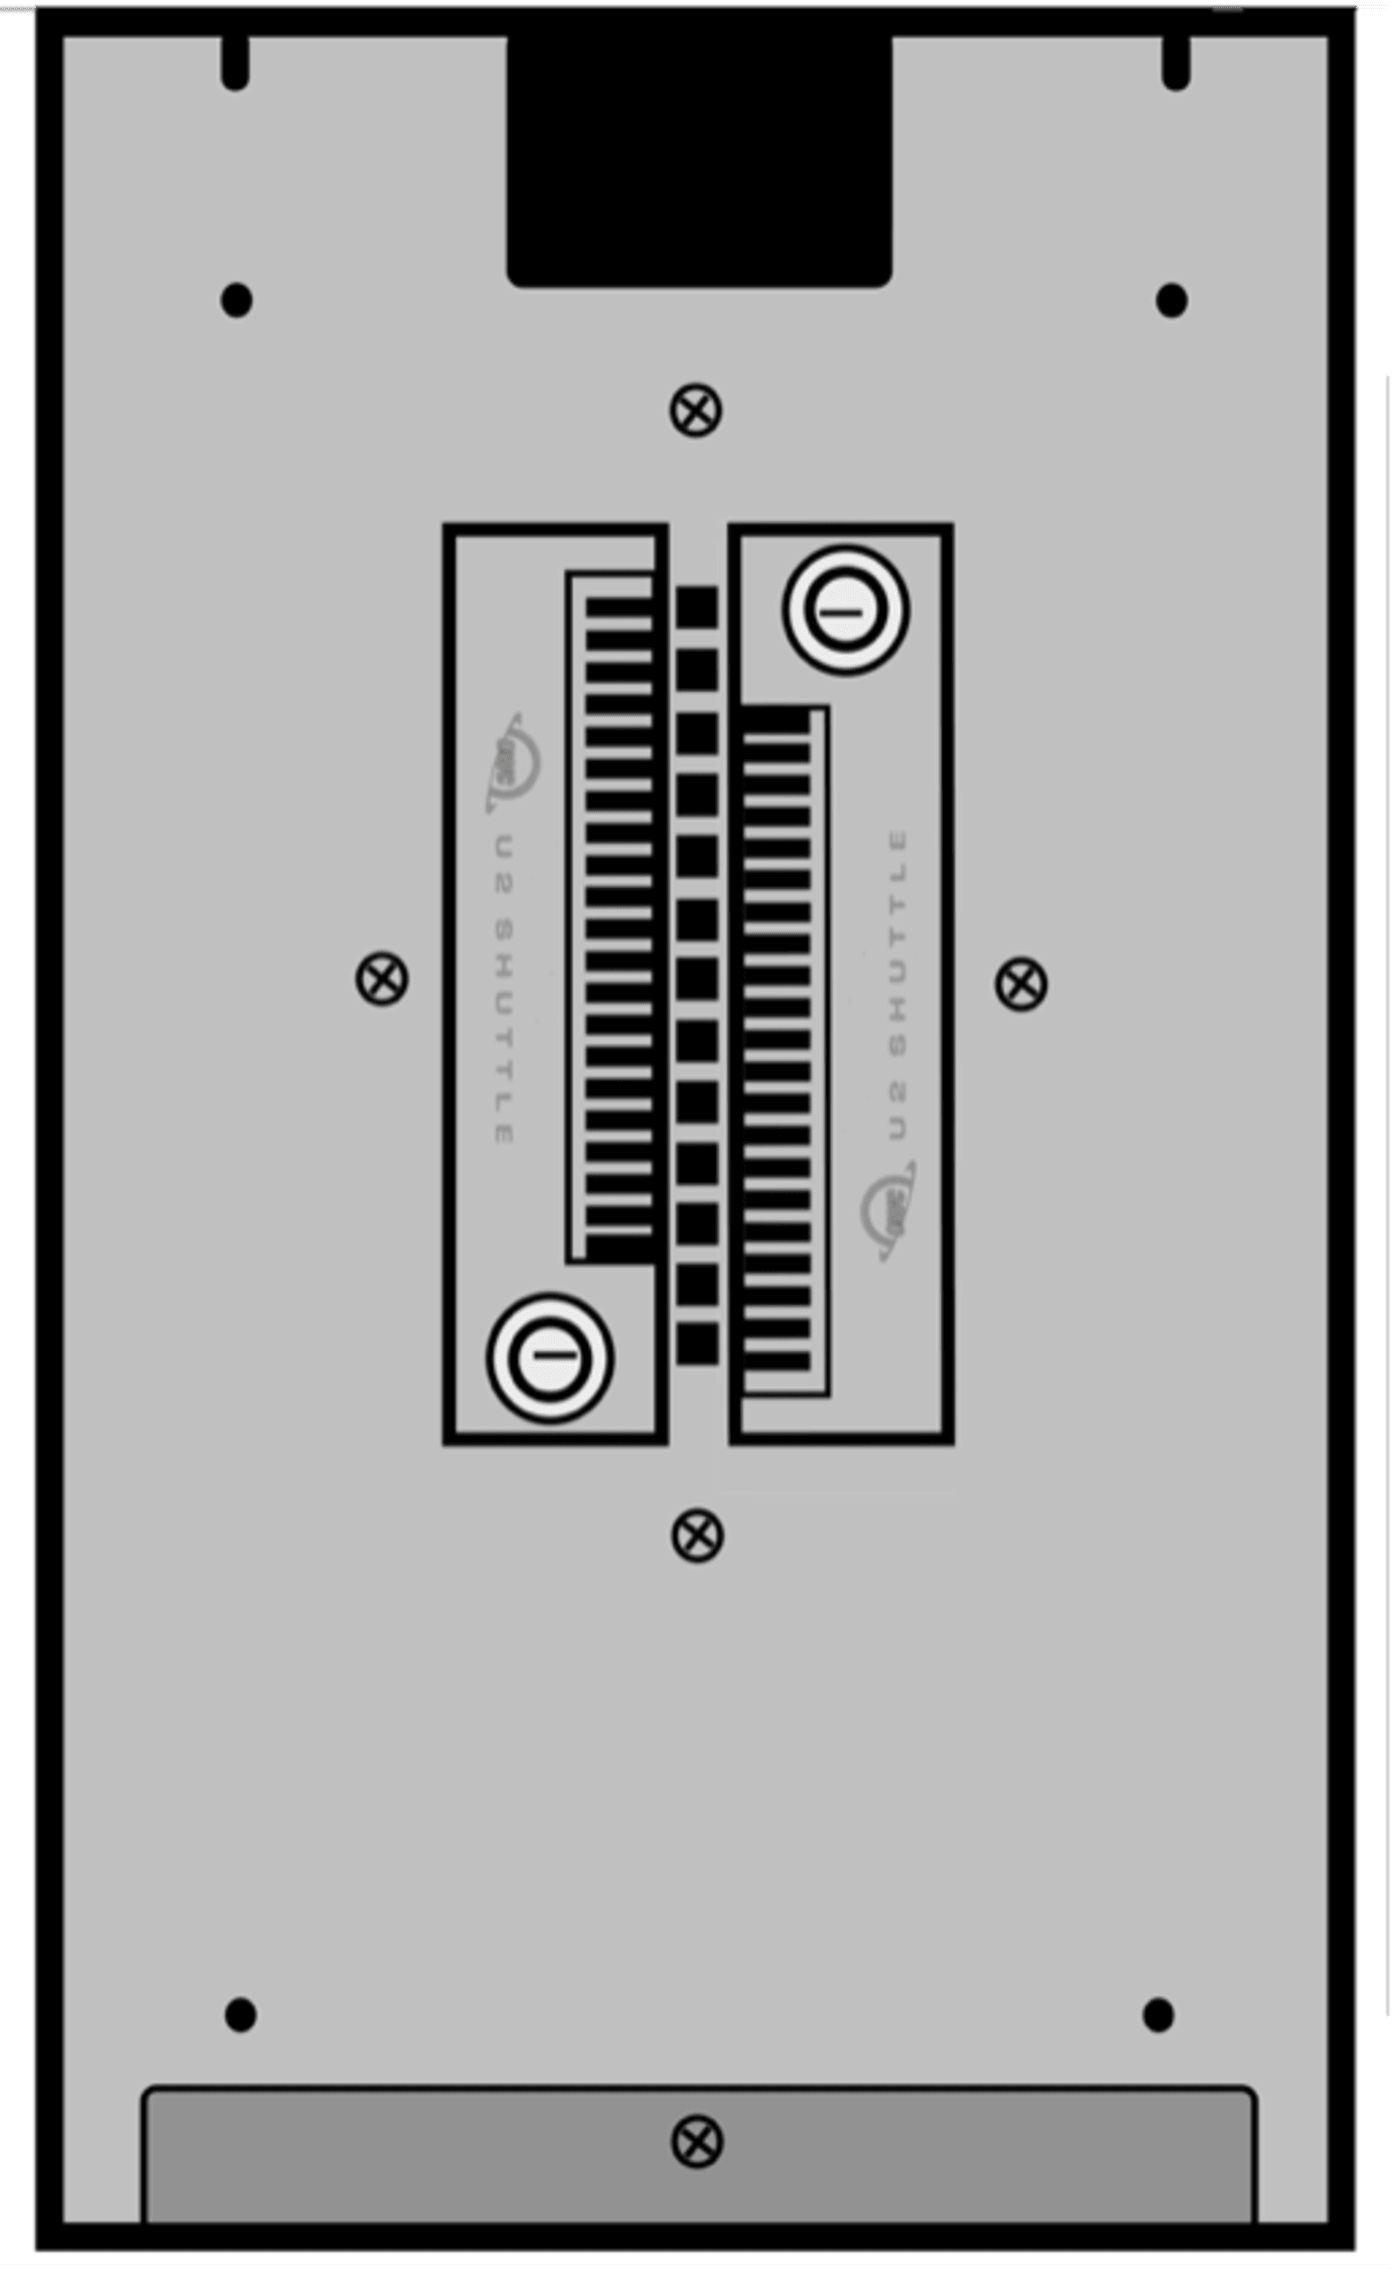
- From here you will see your two U.2 Shuttle drive sleds, each with their own locks. Using the keys supplied, a gentle quarter turn clockwise will unlock completely, allowing you to carefully remove the drive sled to give access to the drive. This will give you complete access to remove or replace the SSDs as needed.
- When returning the drive sleds, into the chassis, gently slide them in until you meet some resistance. From there you may secure them by inserting the key and turning a counterclockwise quarter-turn and removing the key. Once both drives are secured in place and the keys are removed, you can return the front panel by lining up the plastic posts with the holes in the front of the unit. Once in position, apply slight pressure until you hear a click, signaling the front panel is securely in place.
Powering the OWC Jellyfish On/Off
Powering Your OWC Jellyfish On
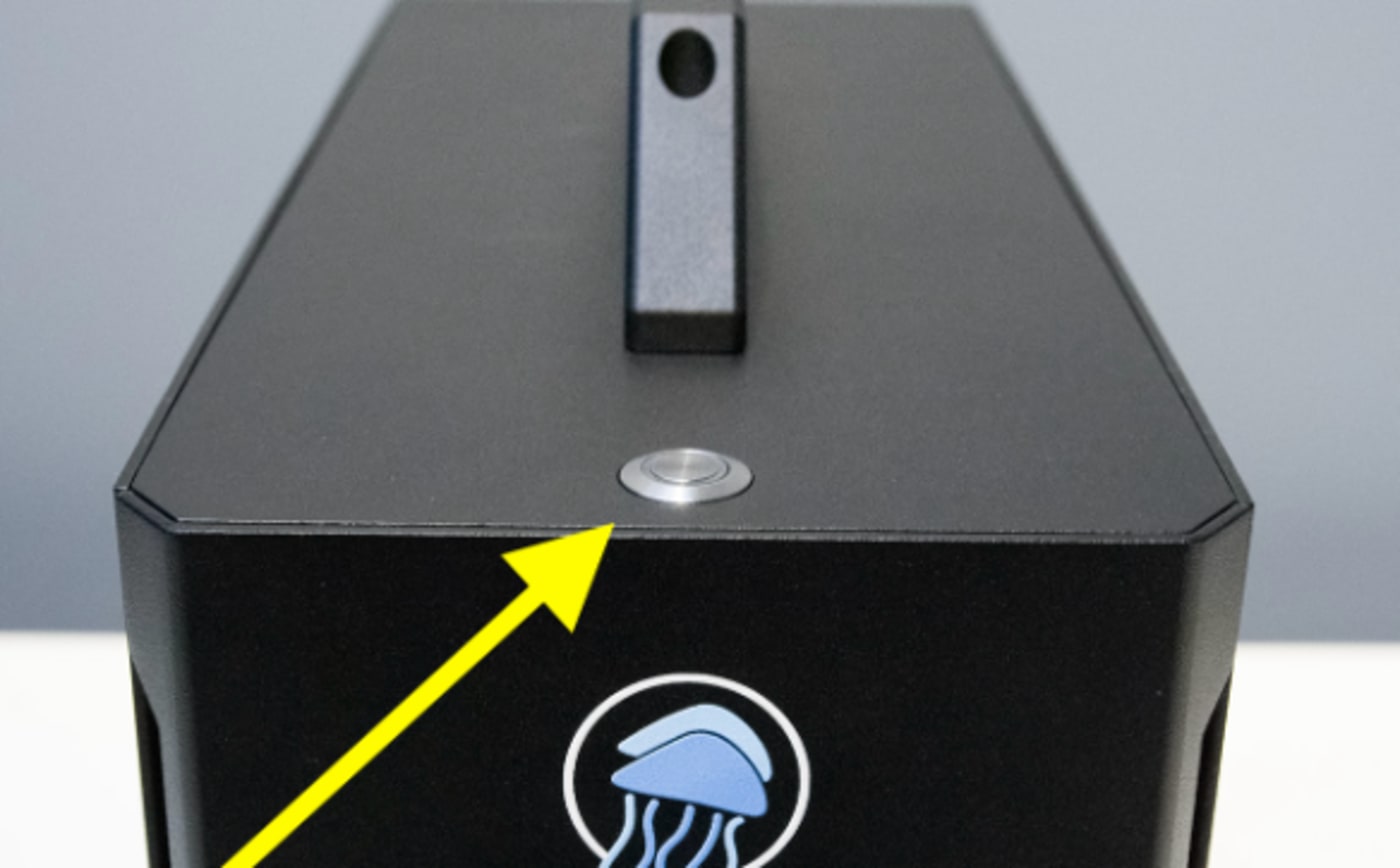
- Once you’re all set up, you’ll need to power on your OWC Jellyfish. Powering your Nomad on is very simple. The Nomad’s power button is located on the top panel. A circular light surrounding the button is the power indicator. This will illuminate a bright blue light when the system is powered on.
Powering Down Your OWC Jellyfish
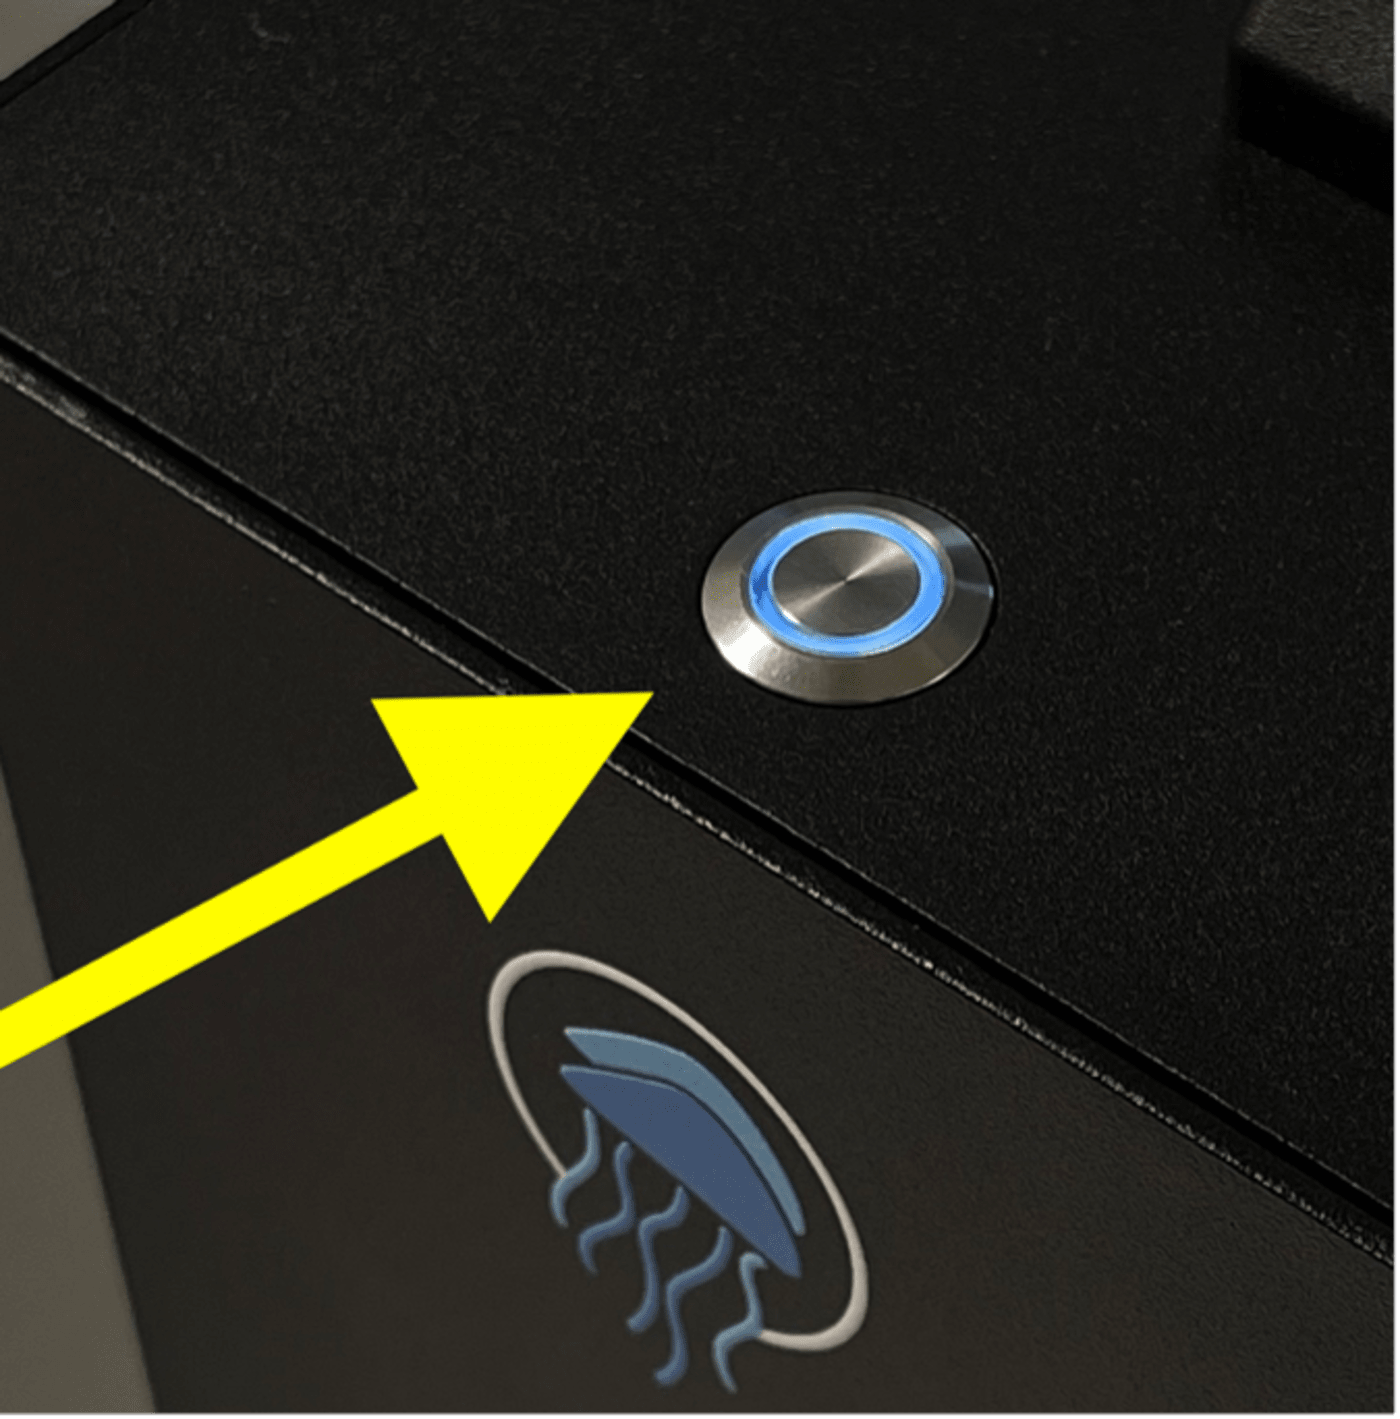
- Powering down your OWC Jellyfish is just as simple. Clicking the Nomad’s power button on the top panel will initiate shutdown.
- NOTE: If you hold the power button, it will force-power off your Nomad, and can cause system corruption. You should always let it run its shutdown process whenever possible.
Ports and Cabling Overview
- In this section, we will label the back layout of the OWC Jellyfish Nomad, including a brief description of every port. This will help you determine your cabling needs.
NOTE: All OWC Jellyfish orders are customized entirely, and your build may differ slightly from the model shown.
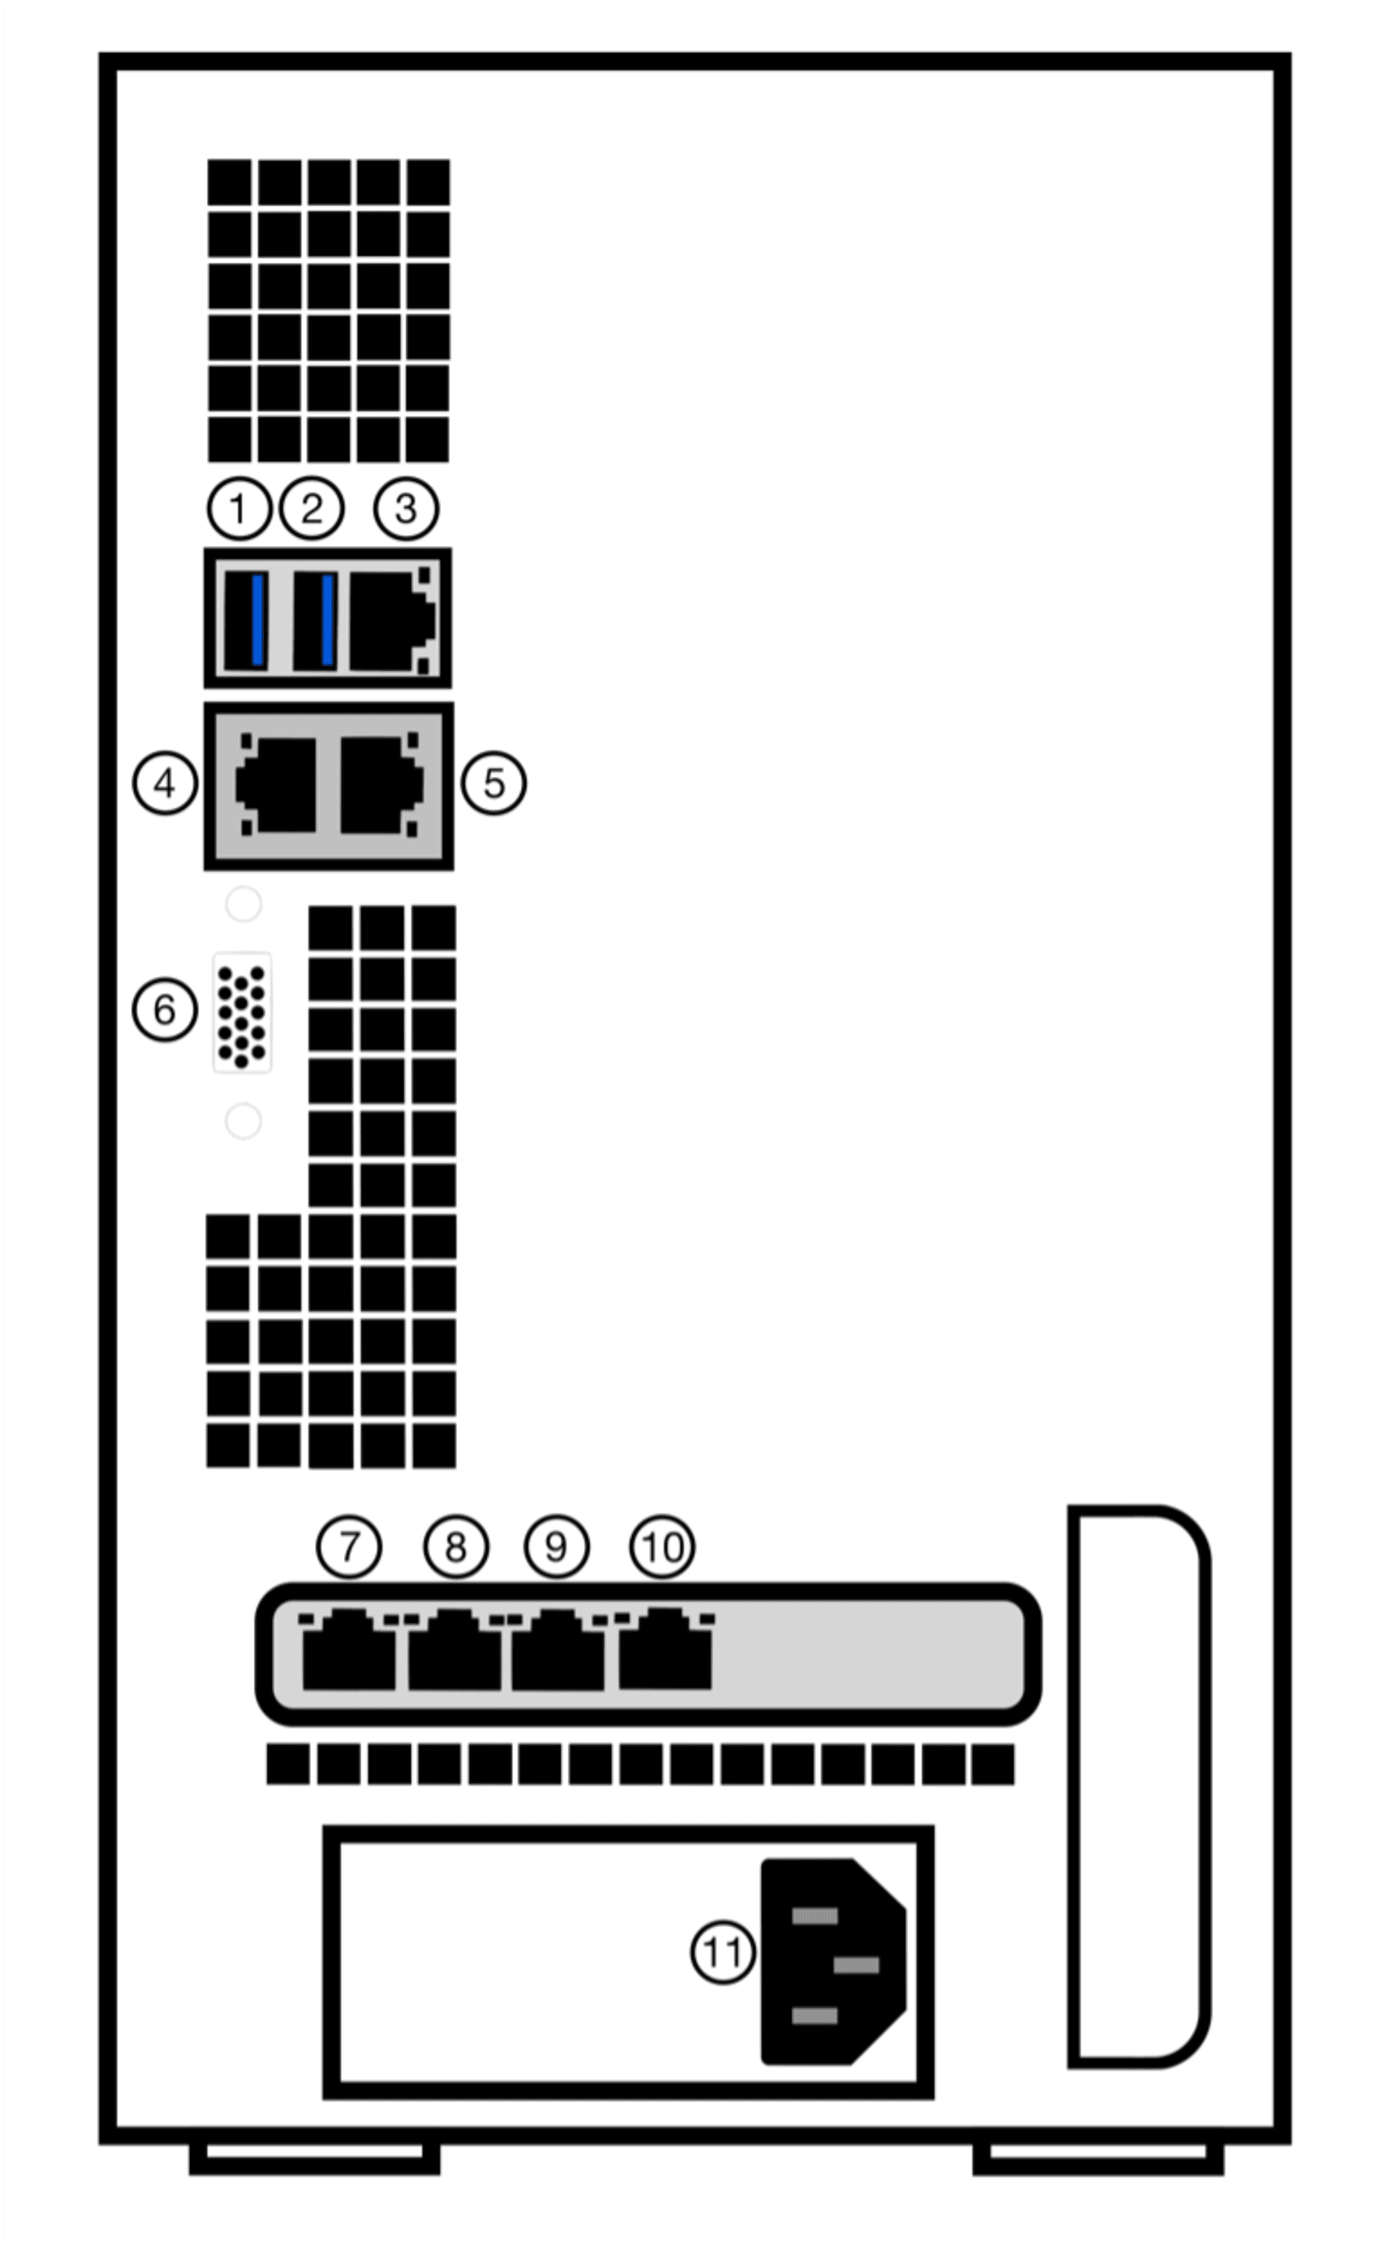
1 & 2 - USB3 Ports (These are used to directly interface with the terminal without using a workstation. They are to be used if you would need to plug in a keyboard and mouse)
3 - IPMI port (This is a service port and cannot be used for data access)
4 & 5 - RJ-45 Ports (These two built-in ports are capable of 10 GbE speeds)
6 - VGA Port (This is a display connector for monitoring boot processes)
7, 8, 9, & 10 - RJ-45 Ports (These four built-in ports are capable of 10 GbE speeds)
11 - Power Supply Outlet (This outlet will be used to connect your power cable to a UPS (uninterrupted power supply))
OWC Jellyfish and Adapters
Do I Need an Adapter?
- If you have an iMac Pro, the most recent Mac Mini, or a PC with a 10GbE enabled port, you can plug directly into the OWC Jellyfish without having a network adapter and start editing 4K - 8K media without transcoding or going to a proxy workflow. Here are a few indicators that you may need an adapter:
- If there is not an ethernet connection to your workstation.
- If there is a 1GbE connection but you need 10GbE for 4k and up workflows.
- If more ethernet ports are needed on the workstation than what is provided.
Which Adapter Do I Purchase?
- That will be up to you, you can get a 1GbE adapter or a 10 GbE adapter based on your workflow. If you plan to work in 4k and up, you'll want a 10GbE connection from your workstation to the OWC Jellyfish. 10GbE Adapters we recommend:
Adapter Settings & Drivers
- The OWC Jellyfish Connect app will configure the connection from your workstation to your OWC Jellyfish automatically without you having to configure your adapter, but should you have connection issues, please ensure that you've done the following:
- Download adapter drivers:
- Depending on where you've purchased your adapter, be sure to download the latest drivers for your adapter from the manufacturer's website.
- Ensure your adapter settings are properly set. You can review 10G settings in the links below:
- Download adapter drivers:
OWC Thunderbolt 3 10G Ethernet Adapter
- Connect your Thunderbolt 3 equipped Mac or PC to high-performance wired networks delivering up to 10x the performance of Gigabit Ethernet.
Additional Resources
- Want to know more? Check out our online resources at https://www.lumaforge.com/tutorials and https://jellyfish.support/.