

OWC Jellyfish Connect Support Manual (for Jellyfish Connect 2)
Table of Contents
- Installation
- Setup
- Users & Groups
- Creating Groups
- Creating New Users
- Additional Resources
Installation
- Once your Jellyfish is physically installed and cabled, you’ll need to get started getting your computer to connect via its software.
1. First, you’ll want to download the Jellyfish Connect app:
- macOS: https://download.owc.com/jellyfish/connect/
- Windows: https://download.owc.com/jellyfish/connect/windows
NOTE: Below are useful links for information on setting up and utilizing OWC Jellyfish Connect and Manager for Jellyfish.
- https://www.owc.com/support/jellyfish/jellyfish-manager
- https://www.owc.com/support/jellyfish/jellyfish-connect
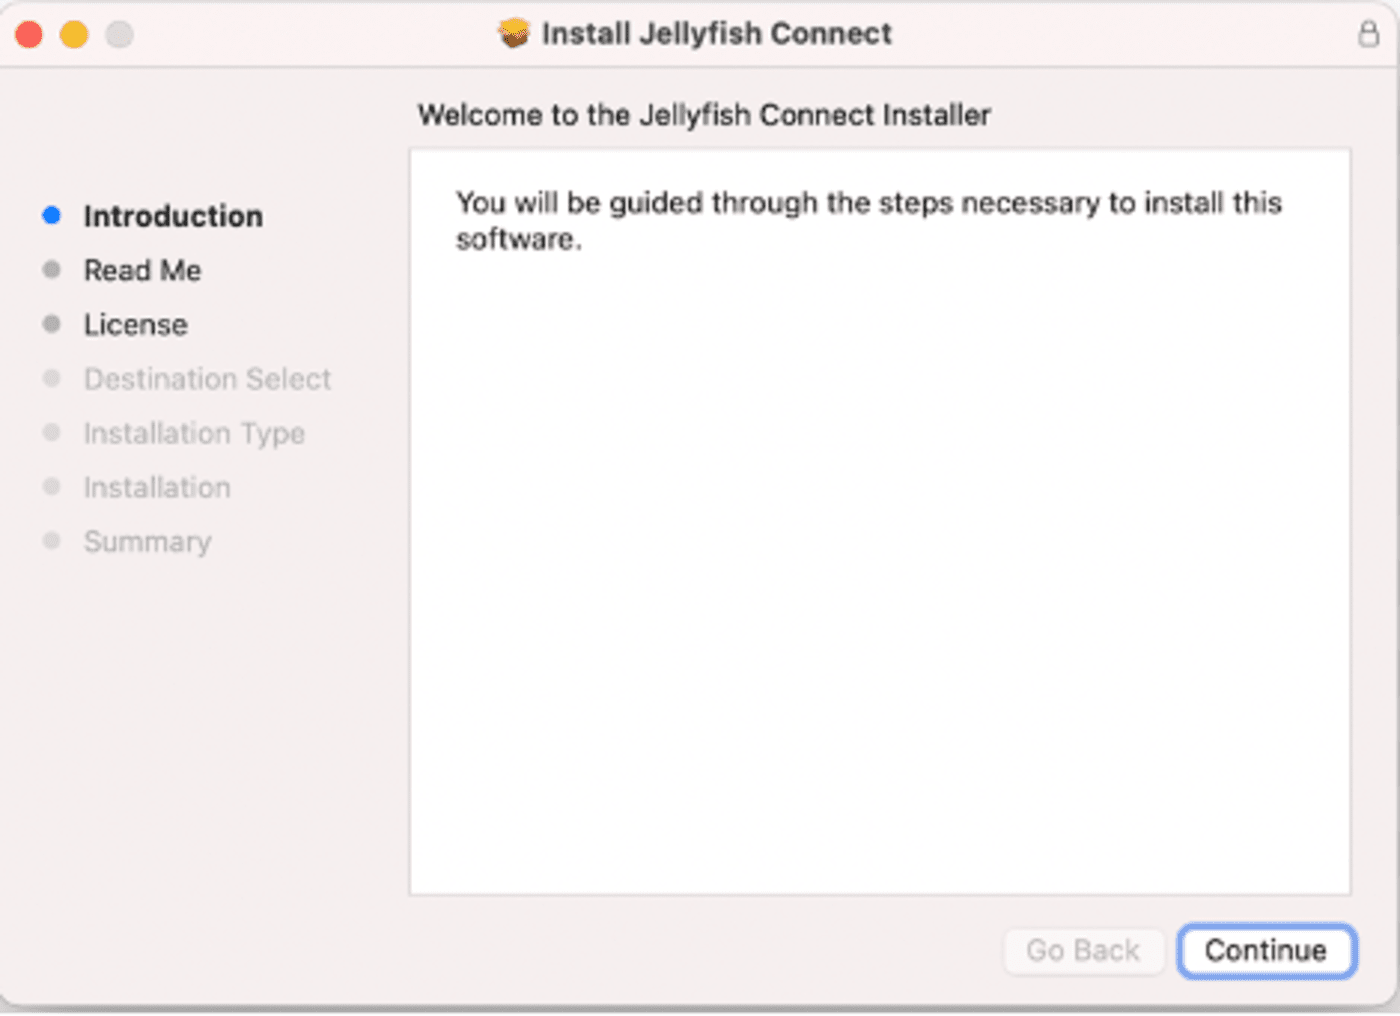
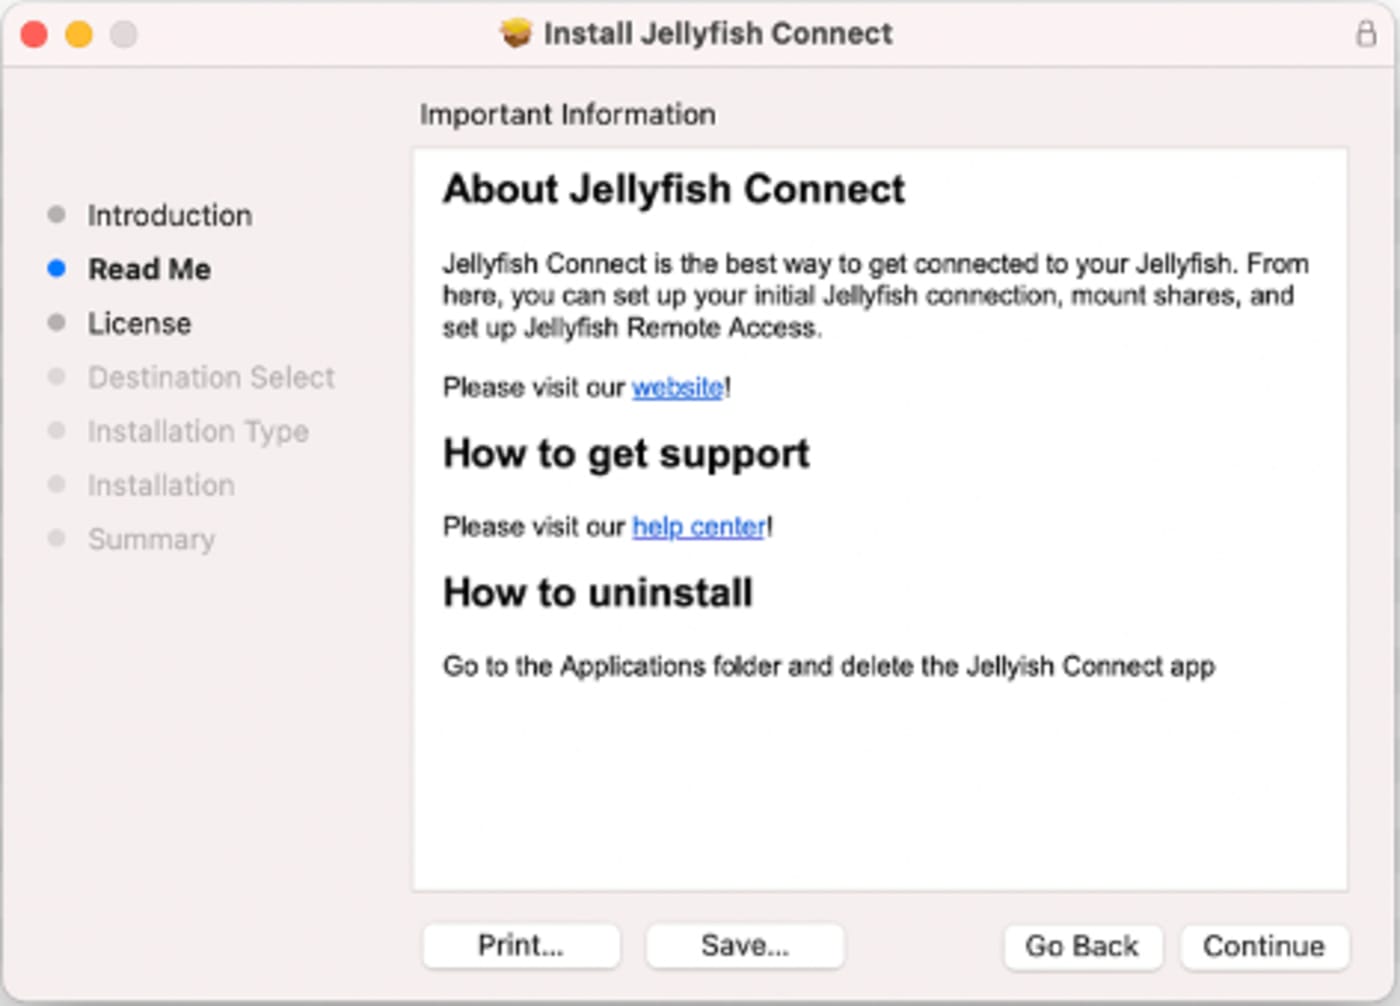
2. Launching the installer for Jellyfish Connect is quick and simple. Read the introductory dialogue and click Continue through each page to acknowledge you’ve read the information. The second page of the installation dialogue has quick support links.
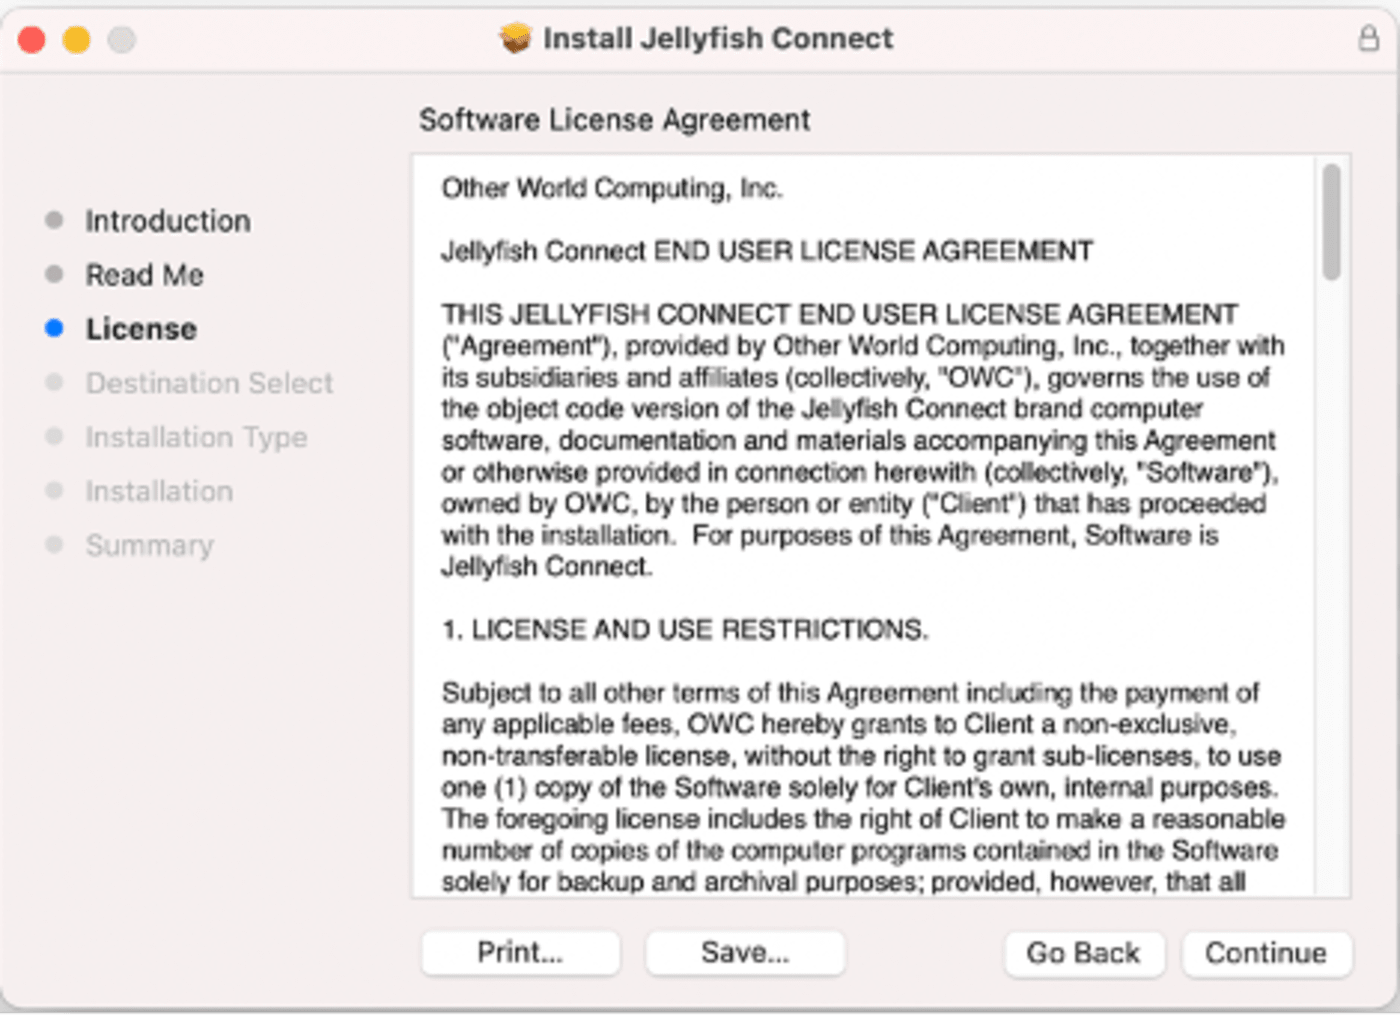
3. Next, read and acknowledge our software license agreement and click Continue.

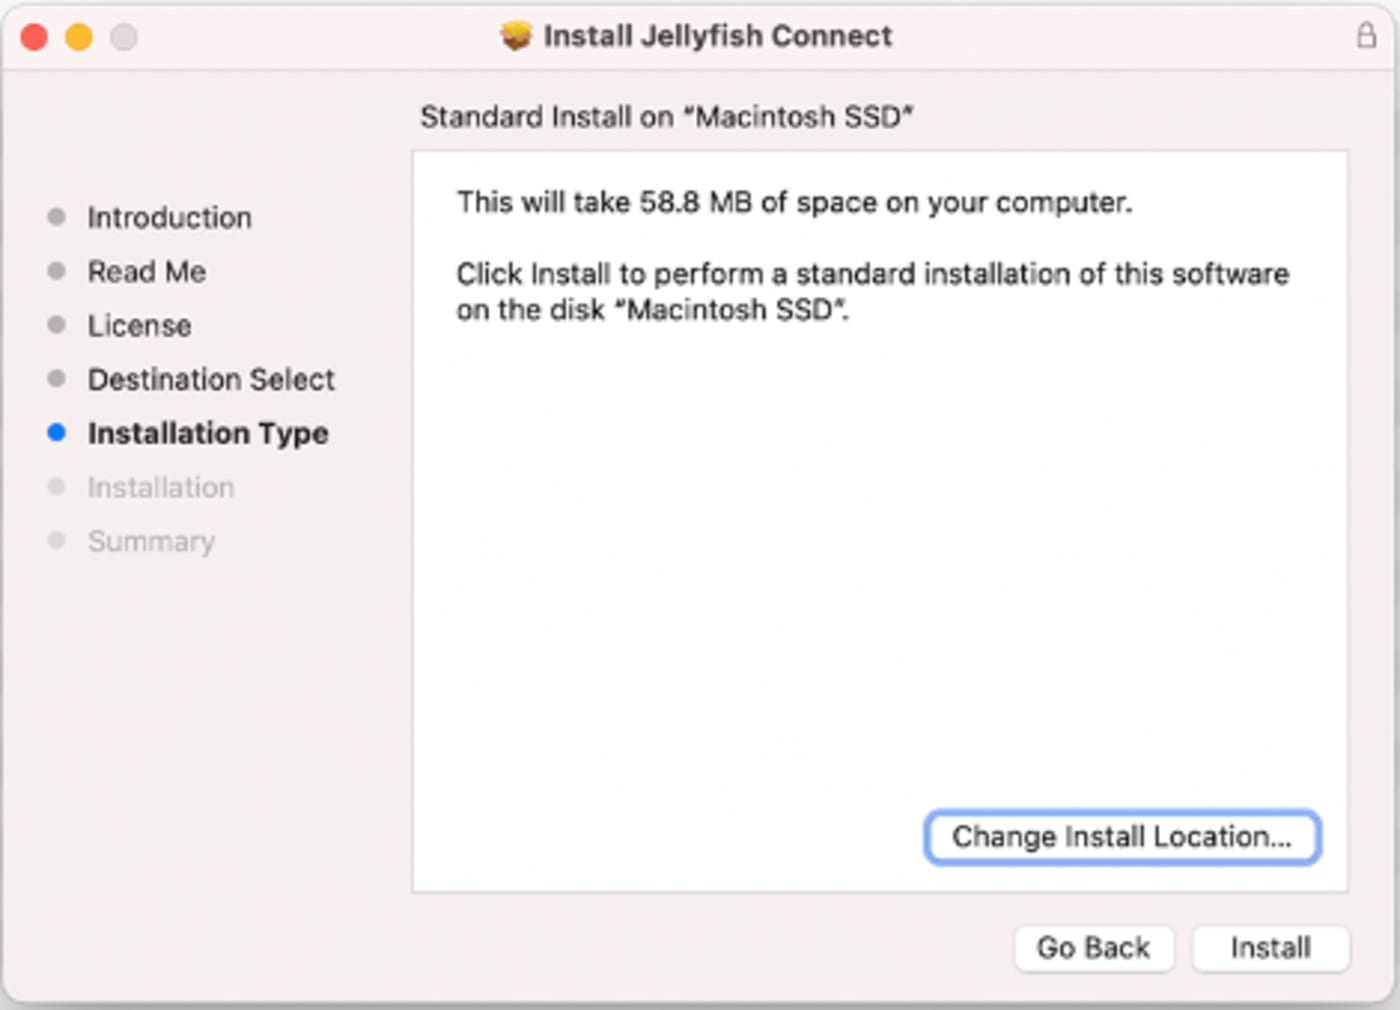
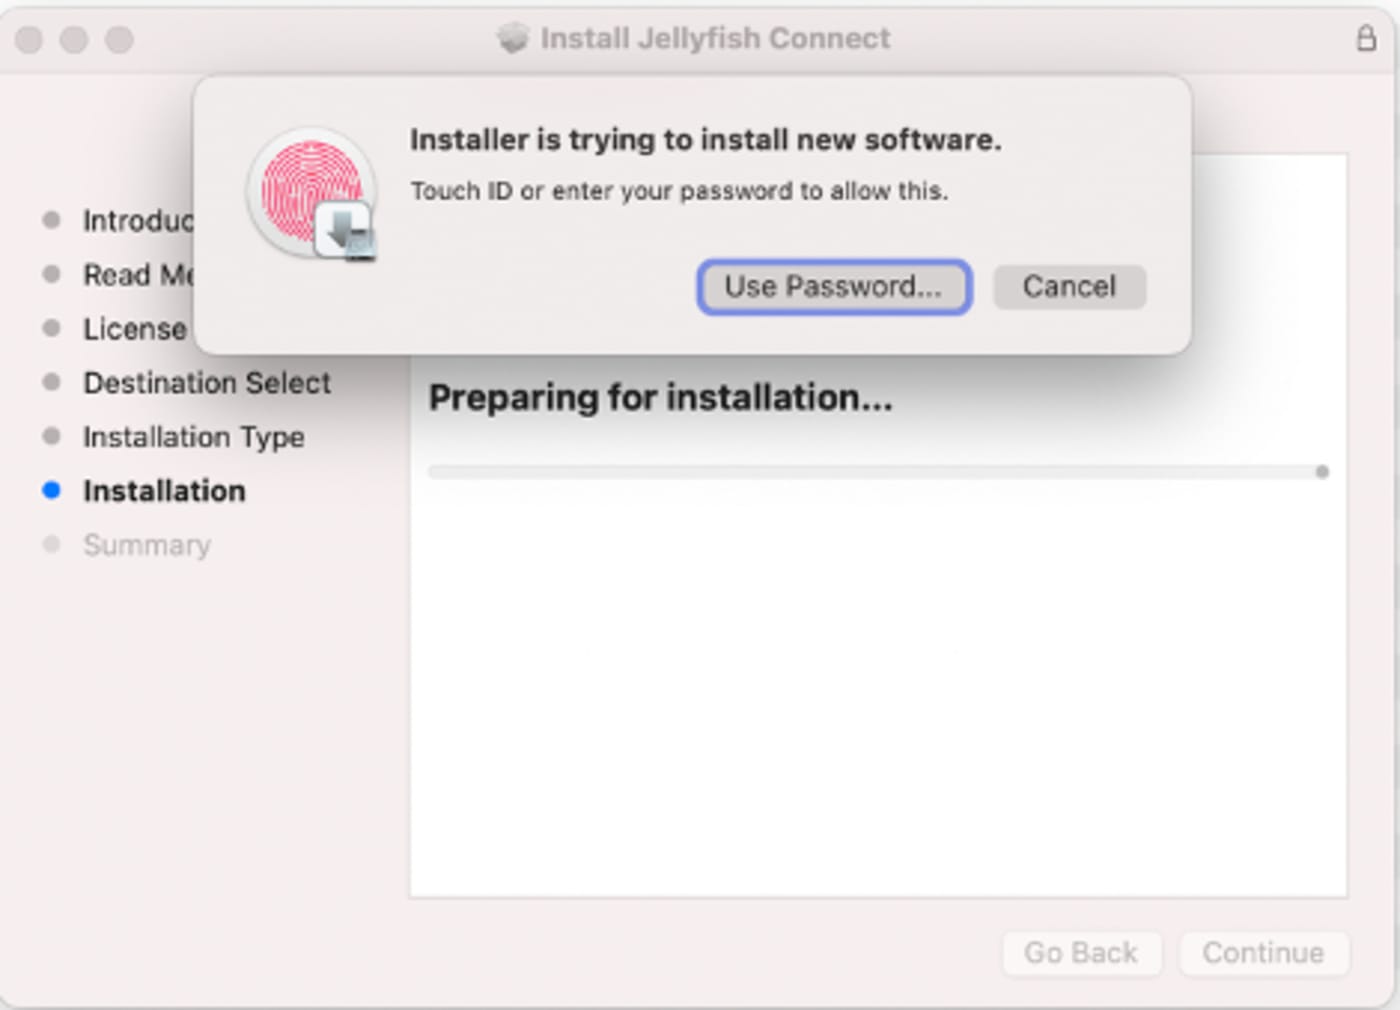
4. After approving where the application will be installed, you’ll be prompted to enter your computer password. Enter these credentials and continue.
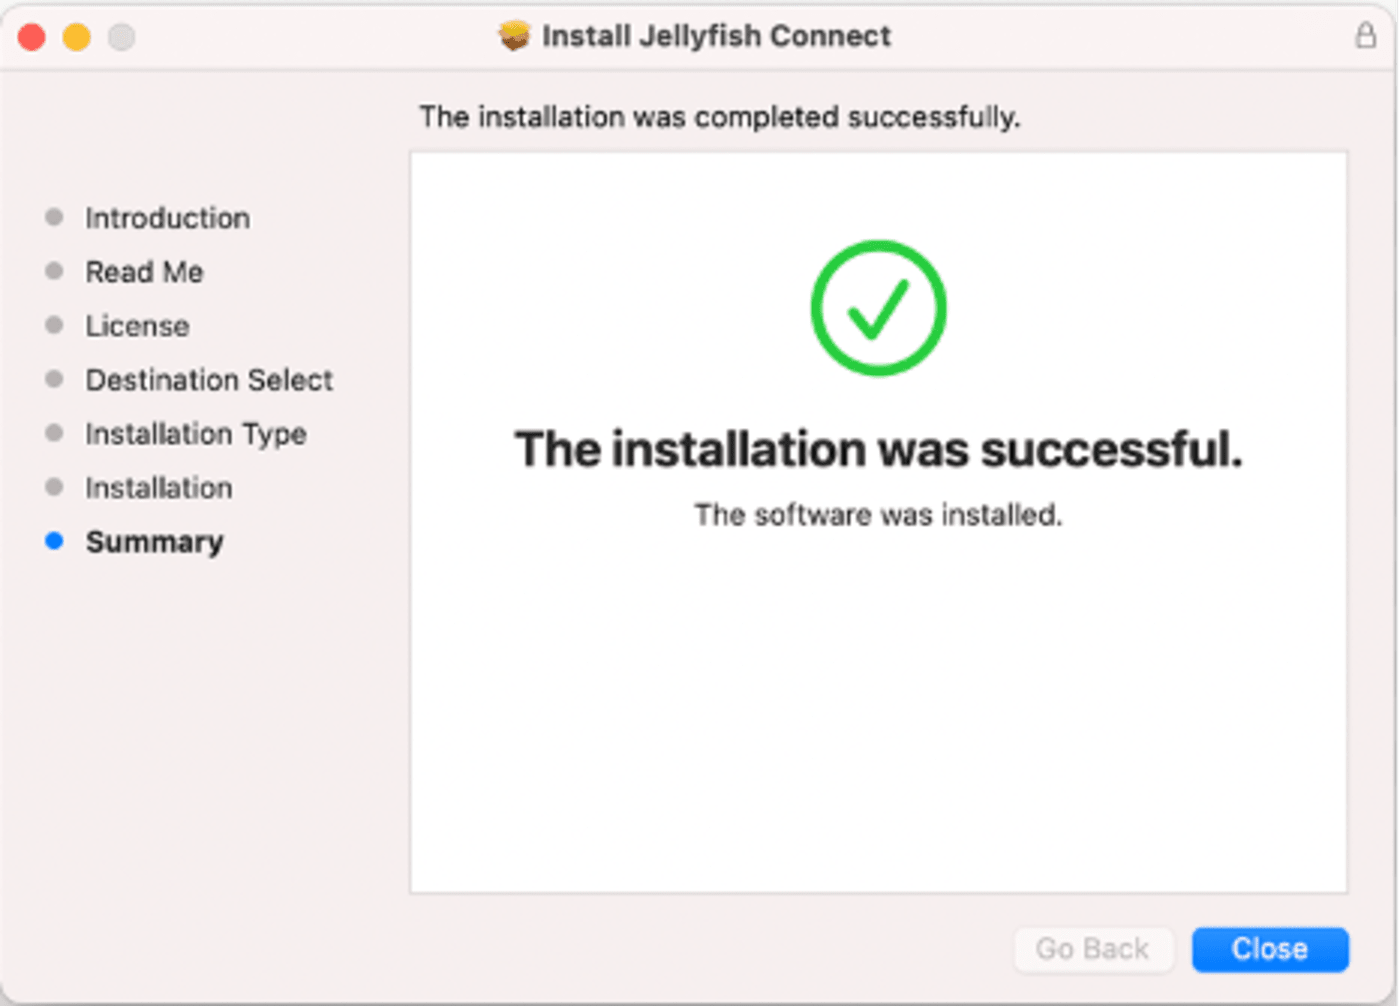
5. After successfully installing, you will be prompted to either keep or delete the installer. If you move it to the Trash, you can always download again from the link on our site if you ever need to do so.

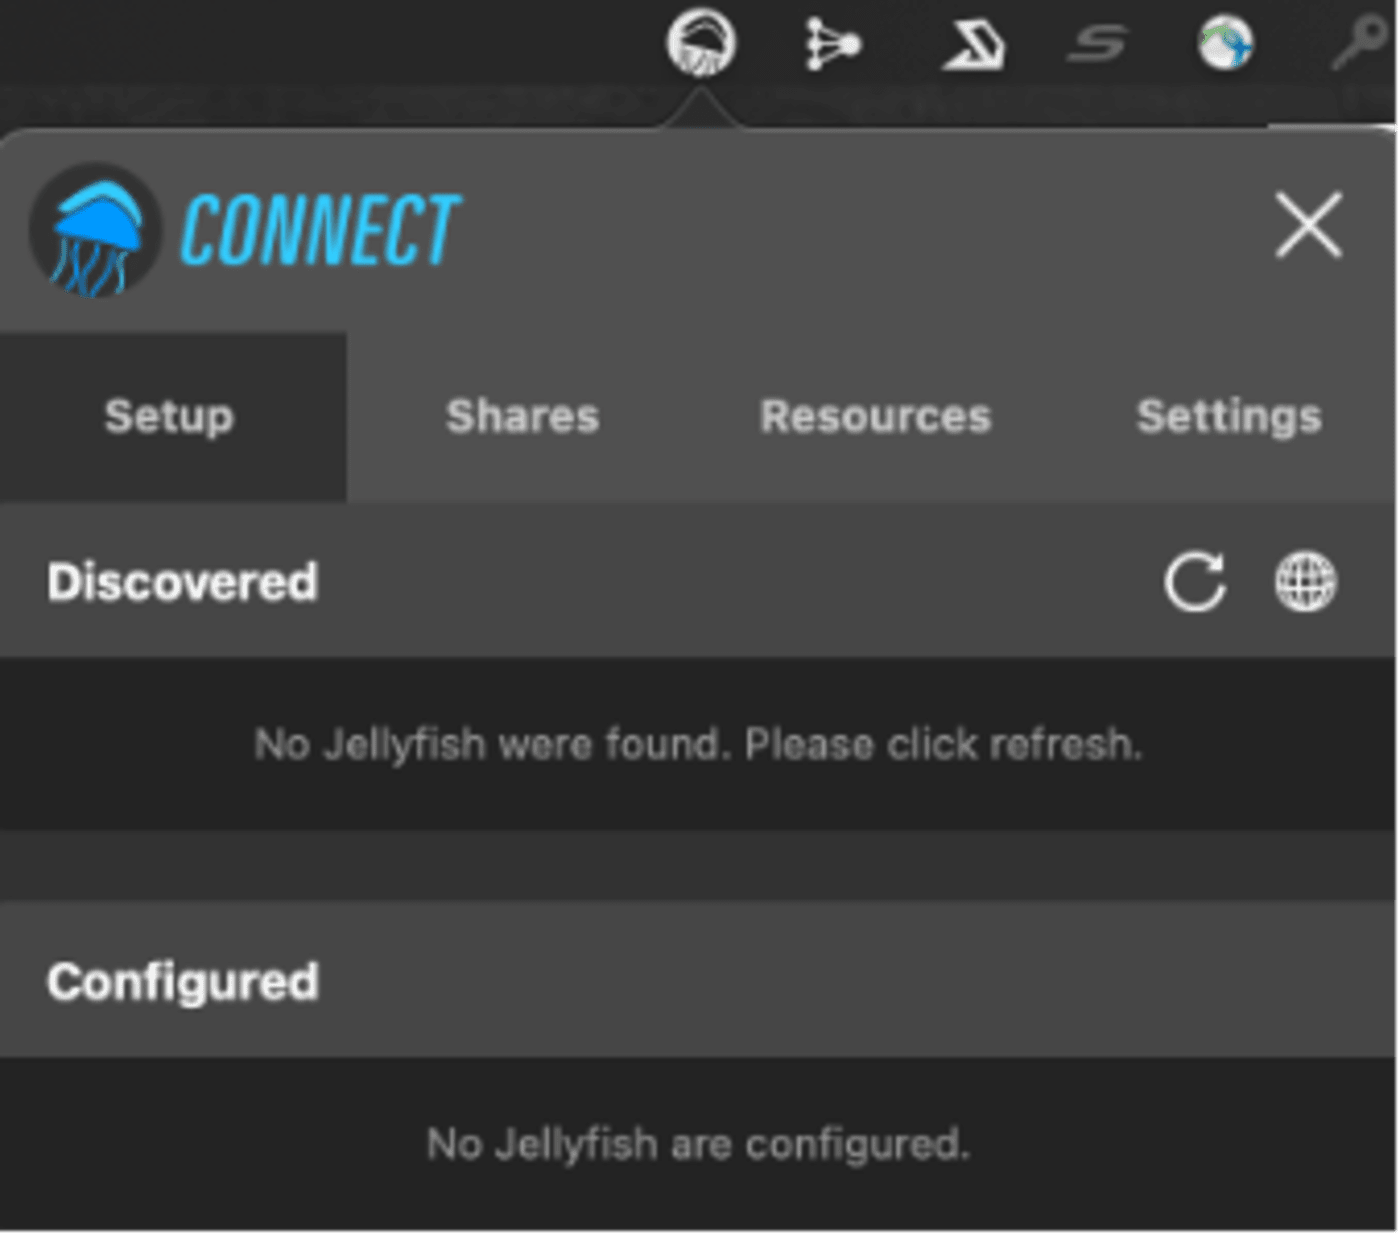
6. When installation is complete, click on the Jellyfish icon in the top right menu of your screen. This will launch Jellyfish Connect.

Setup
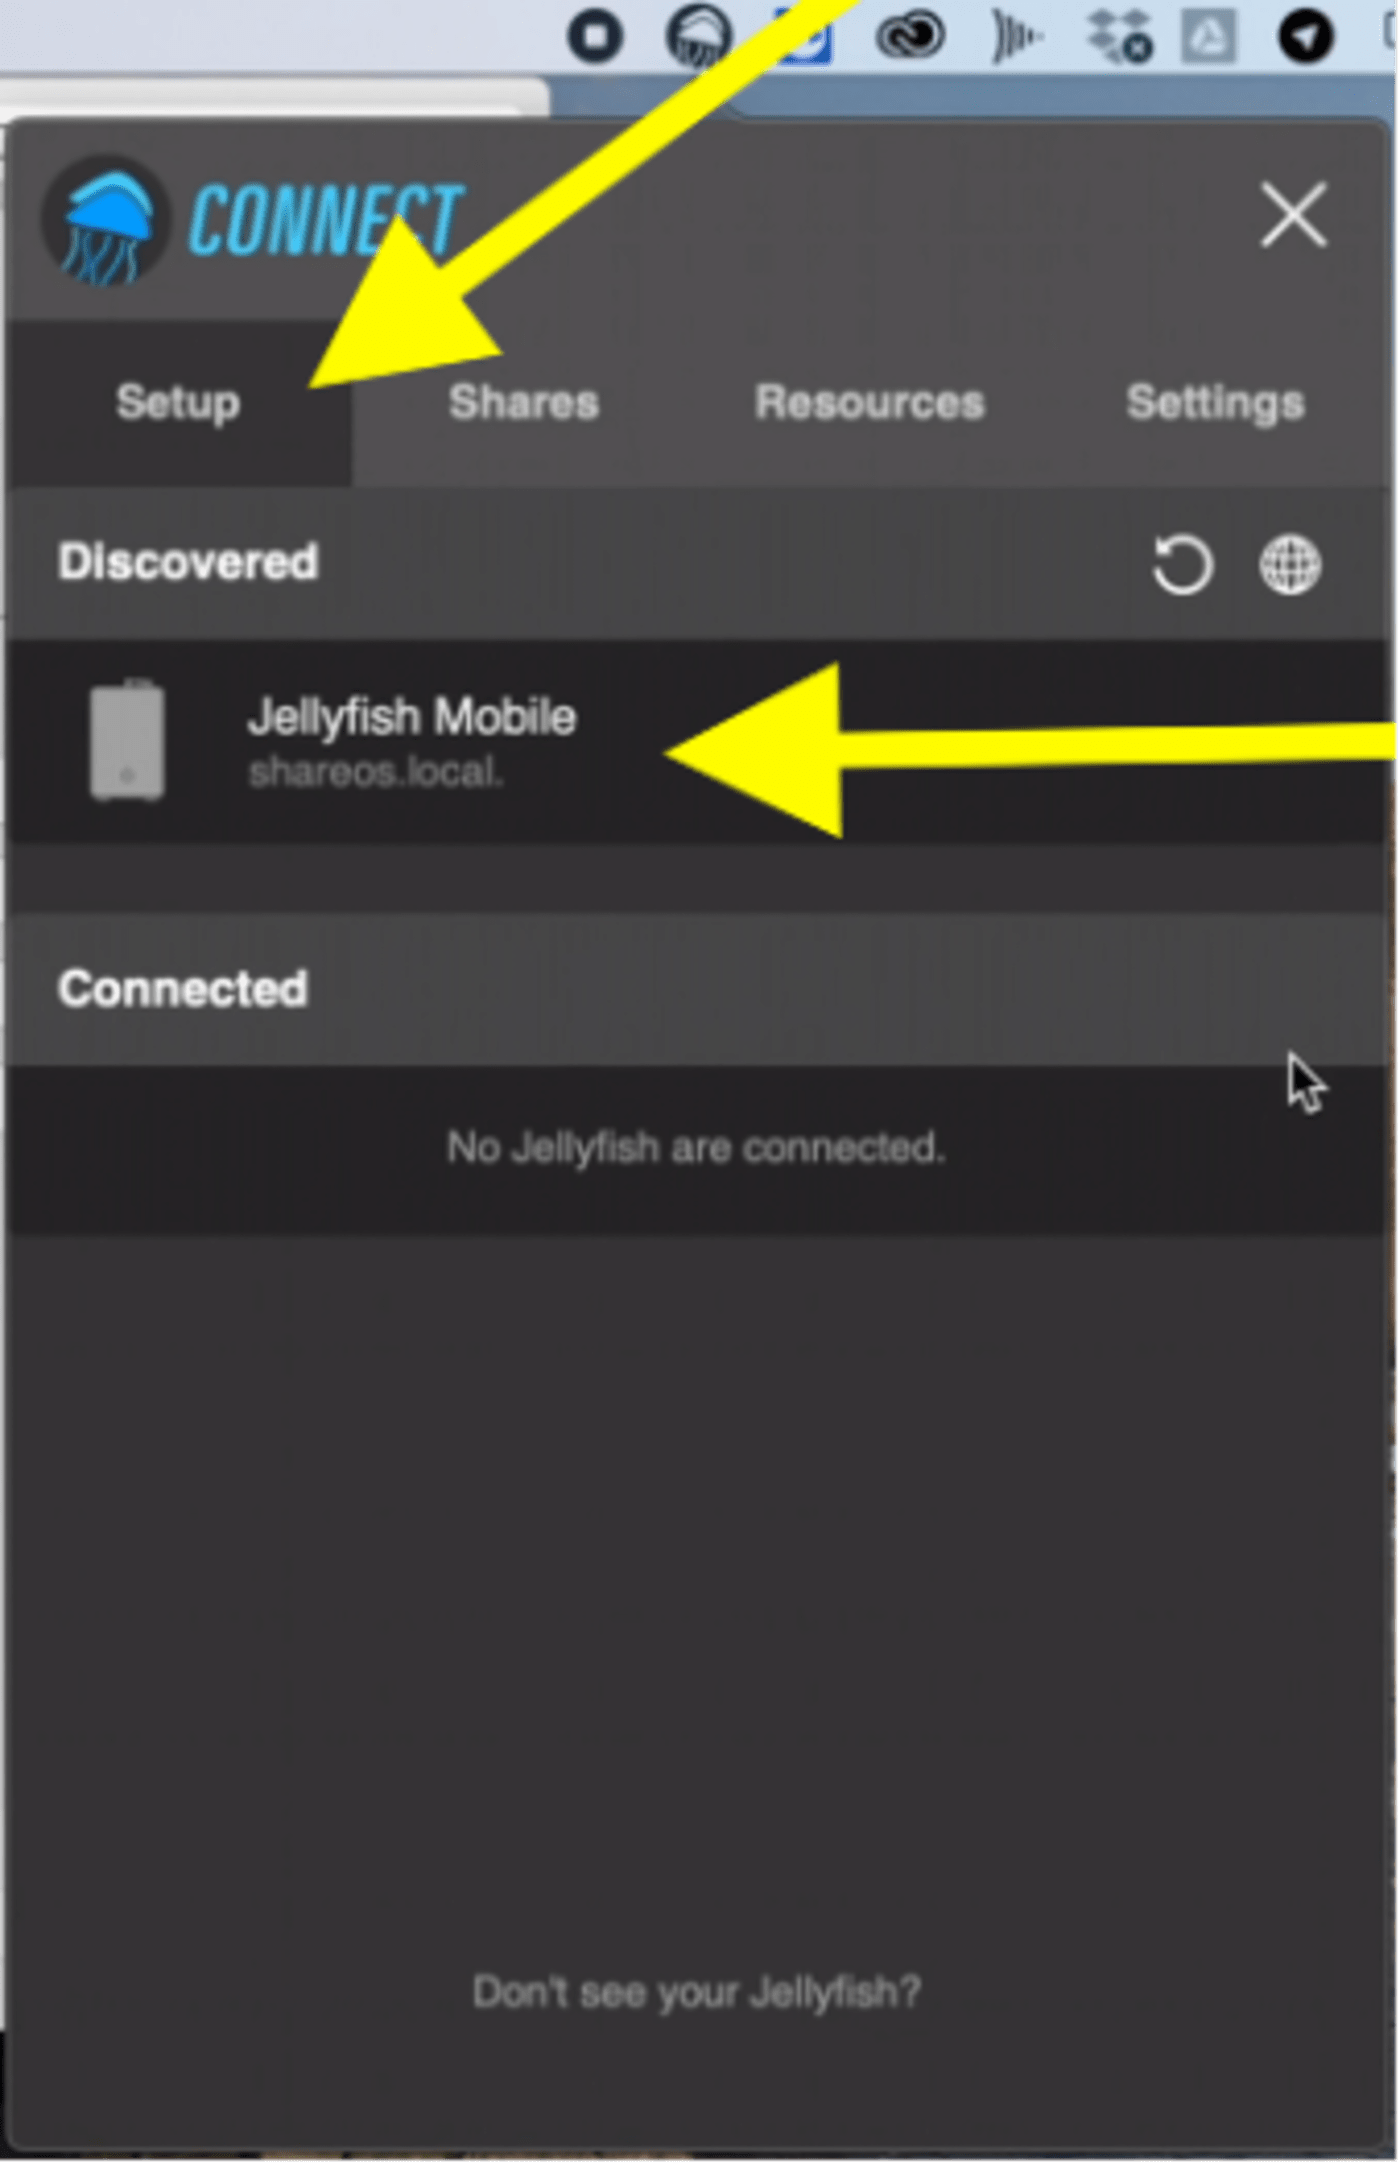
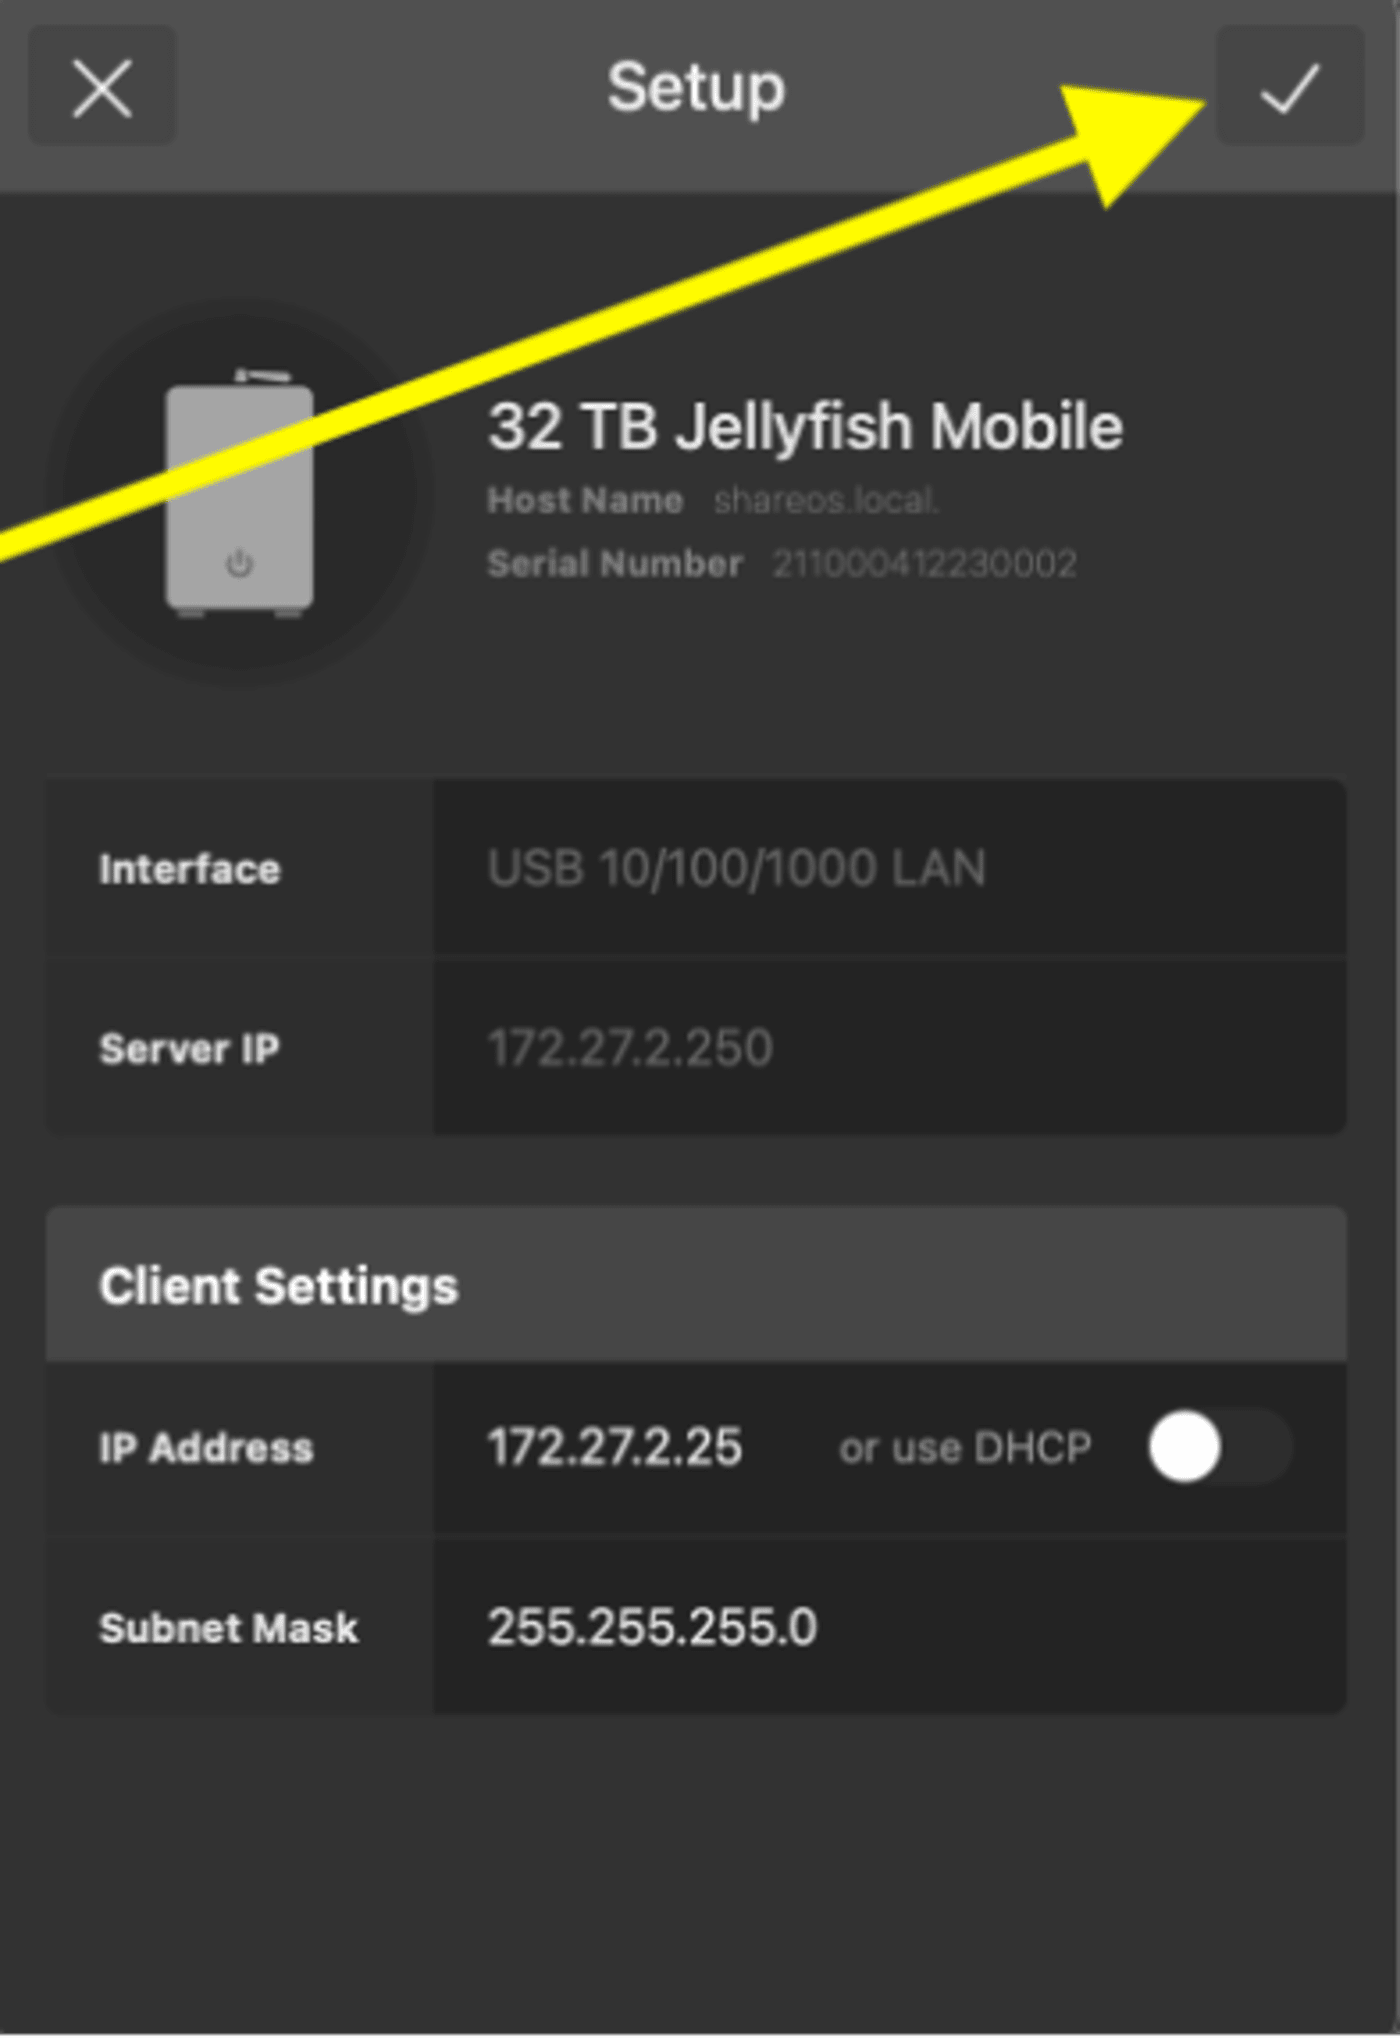
1. Under the Setup tab Your Jellyfish will appear in the Discovered section. Click on it to begin the configuration process.
2. A window will load to confirm your settings. Keep in mind that the Jellyfish Connect app is changing some network settings and other configurations on your Mac, so you may be prompted to enter your Mac’s admin password. Click the check mark in the top right corner of the window to auto-connect to the Jellyfish in the future.
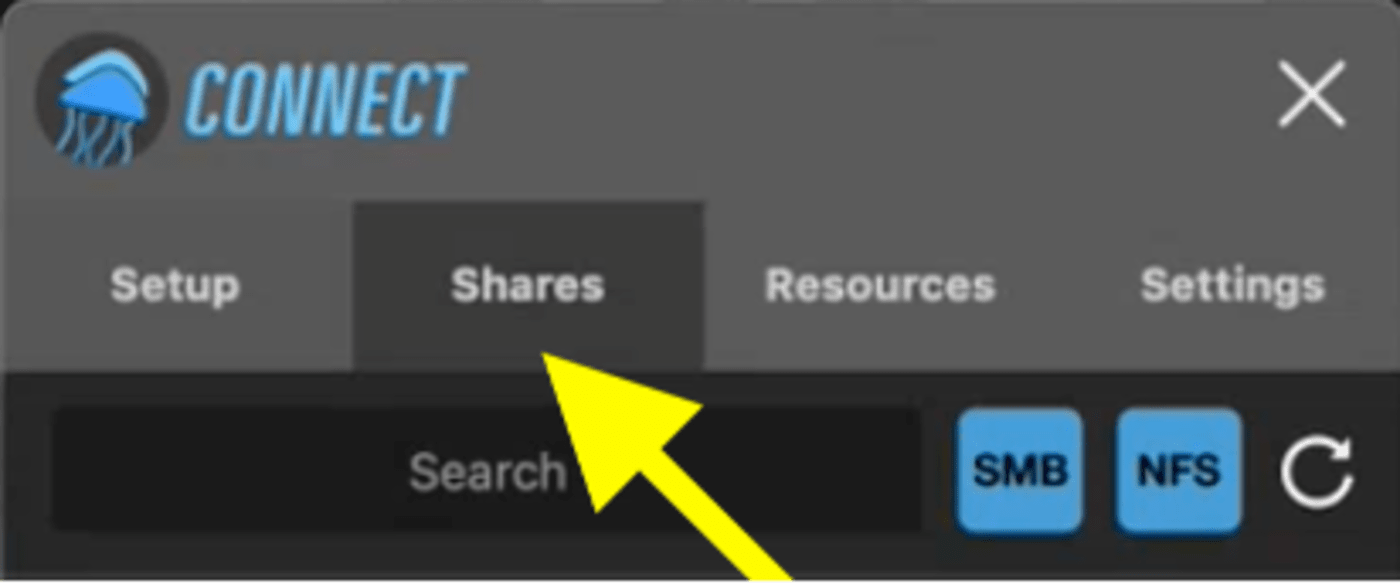
3. Once this is complete, you will have successfully configured the connection to your Jellyfish. Next, you’ll want to mount your shares. To find your shares, click on the Shares tab in the Connect app.
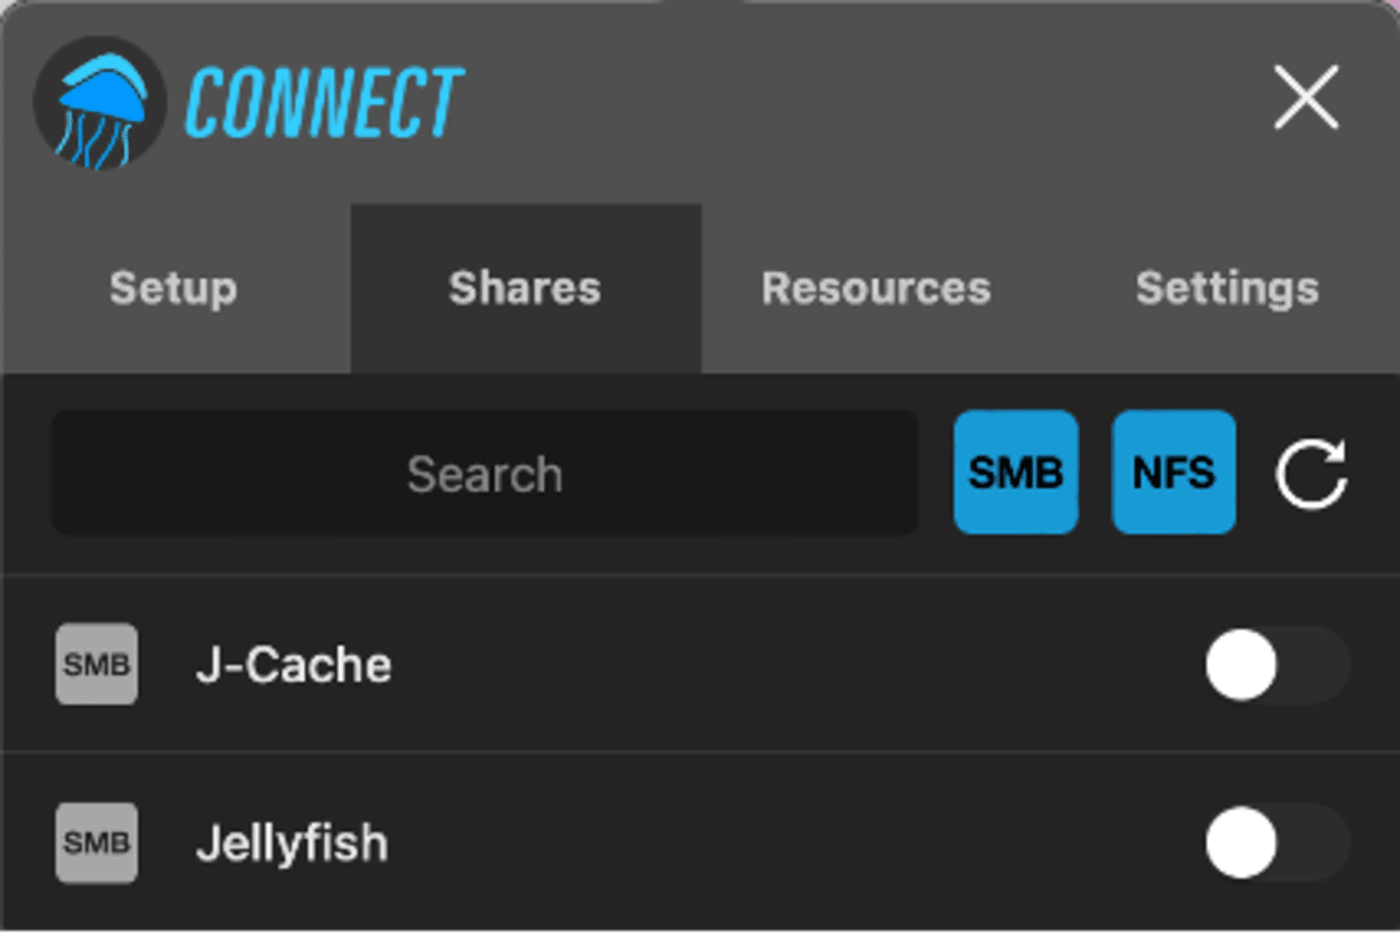
4. You’ll see that your Jellyfish comes with two pre-configured shares: Jellyfish and J-Cache (These are both SMB shares). Your main media should be stored in Jellyfish, while J-Cache can be used for your render files. Do not store your main media in the J-Cache, as it has no redundancy.
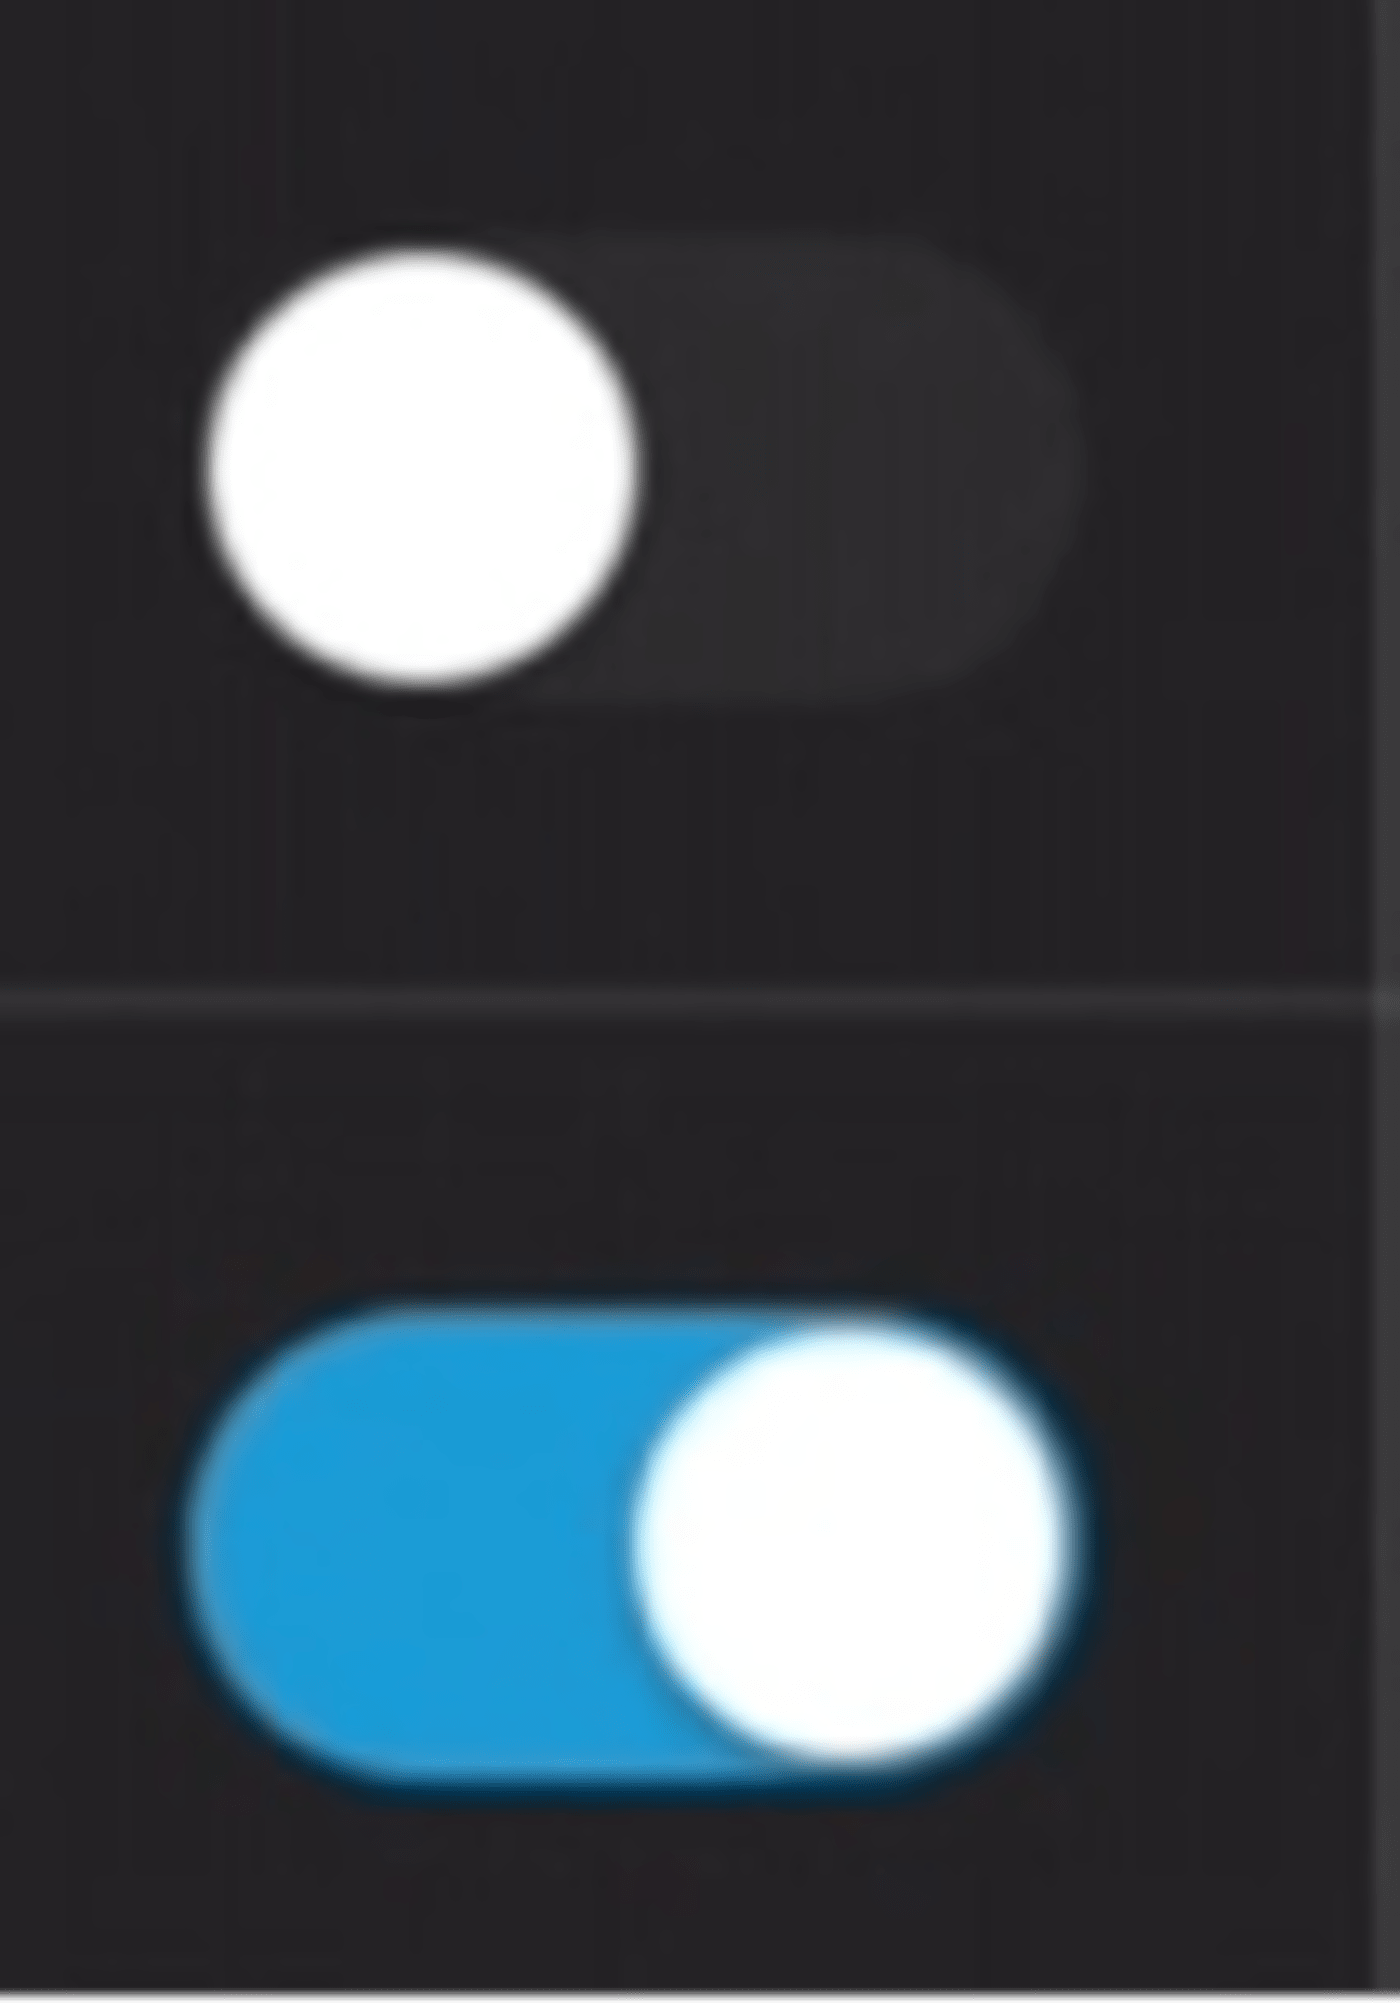
5. To connect to your shares for the first time, click the toggle button.
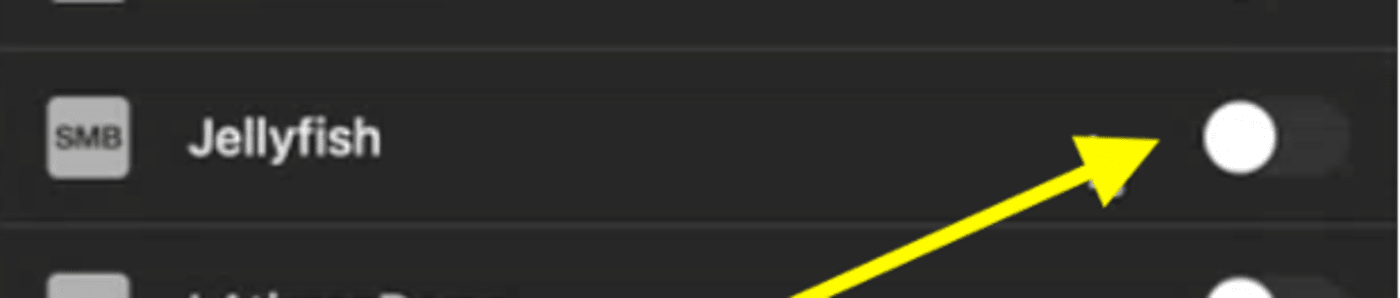
6. When toggled on, it will be blue.
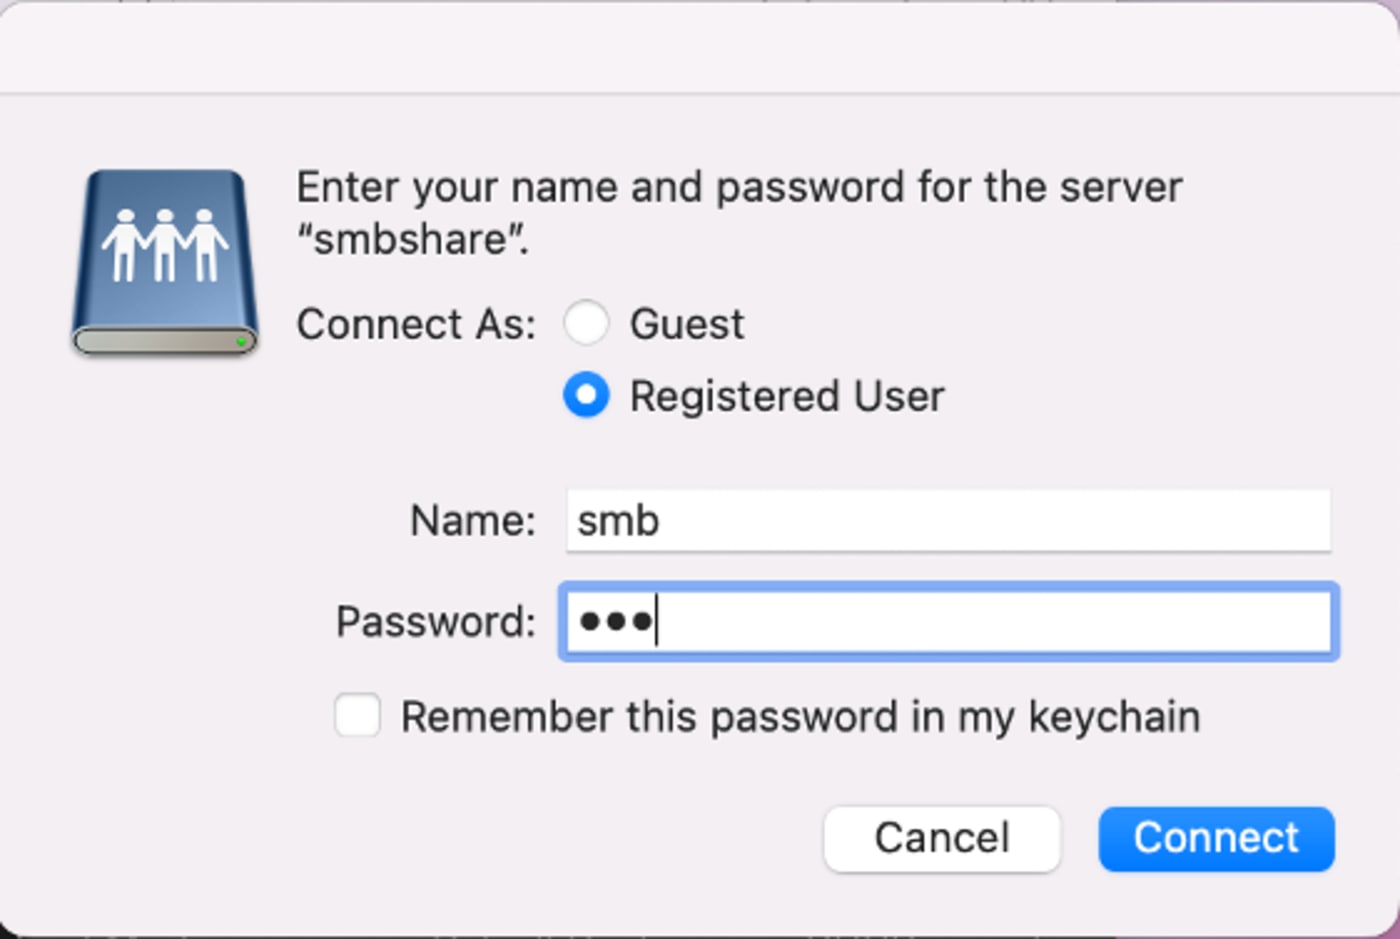
7. A login window will pop up for you. Be sure “Registered User” is selected, then enter the following default credentials:
- Username: smb
- Password: smb
NOTE: We strongly recommend changing the password for the SMB user.
8. Click the auto button if you’d like to automatically connect to the Jellyfish going forward. For added security, we recommend not using Keychain or Credential Manager. That way access will be authenticated each time you connect.

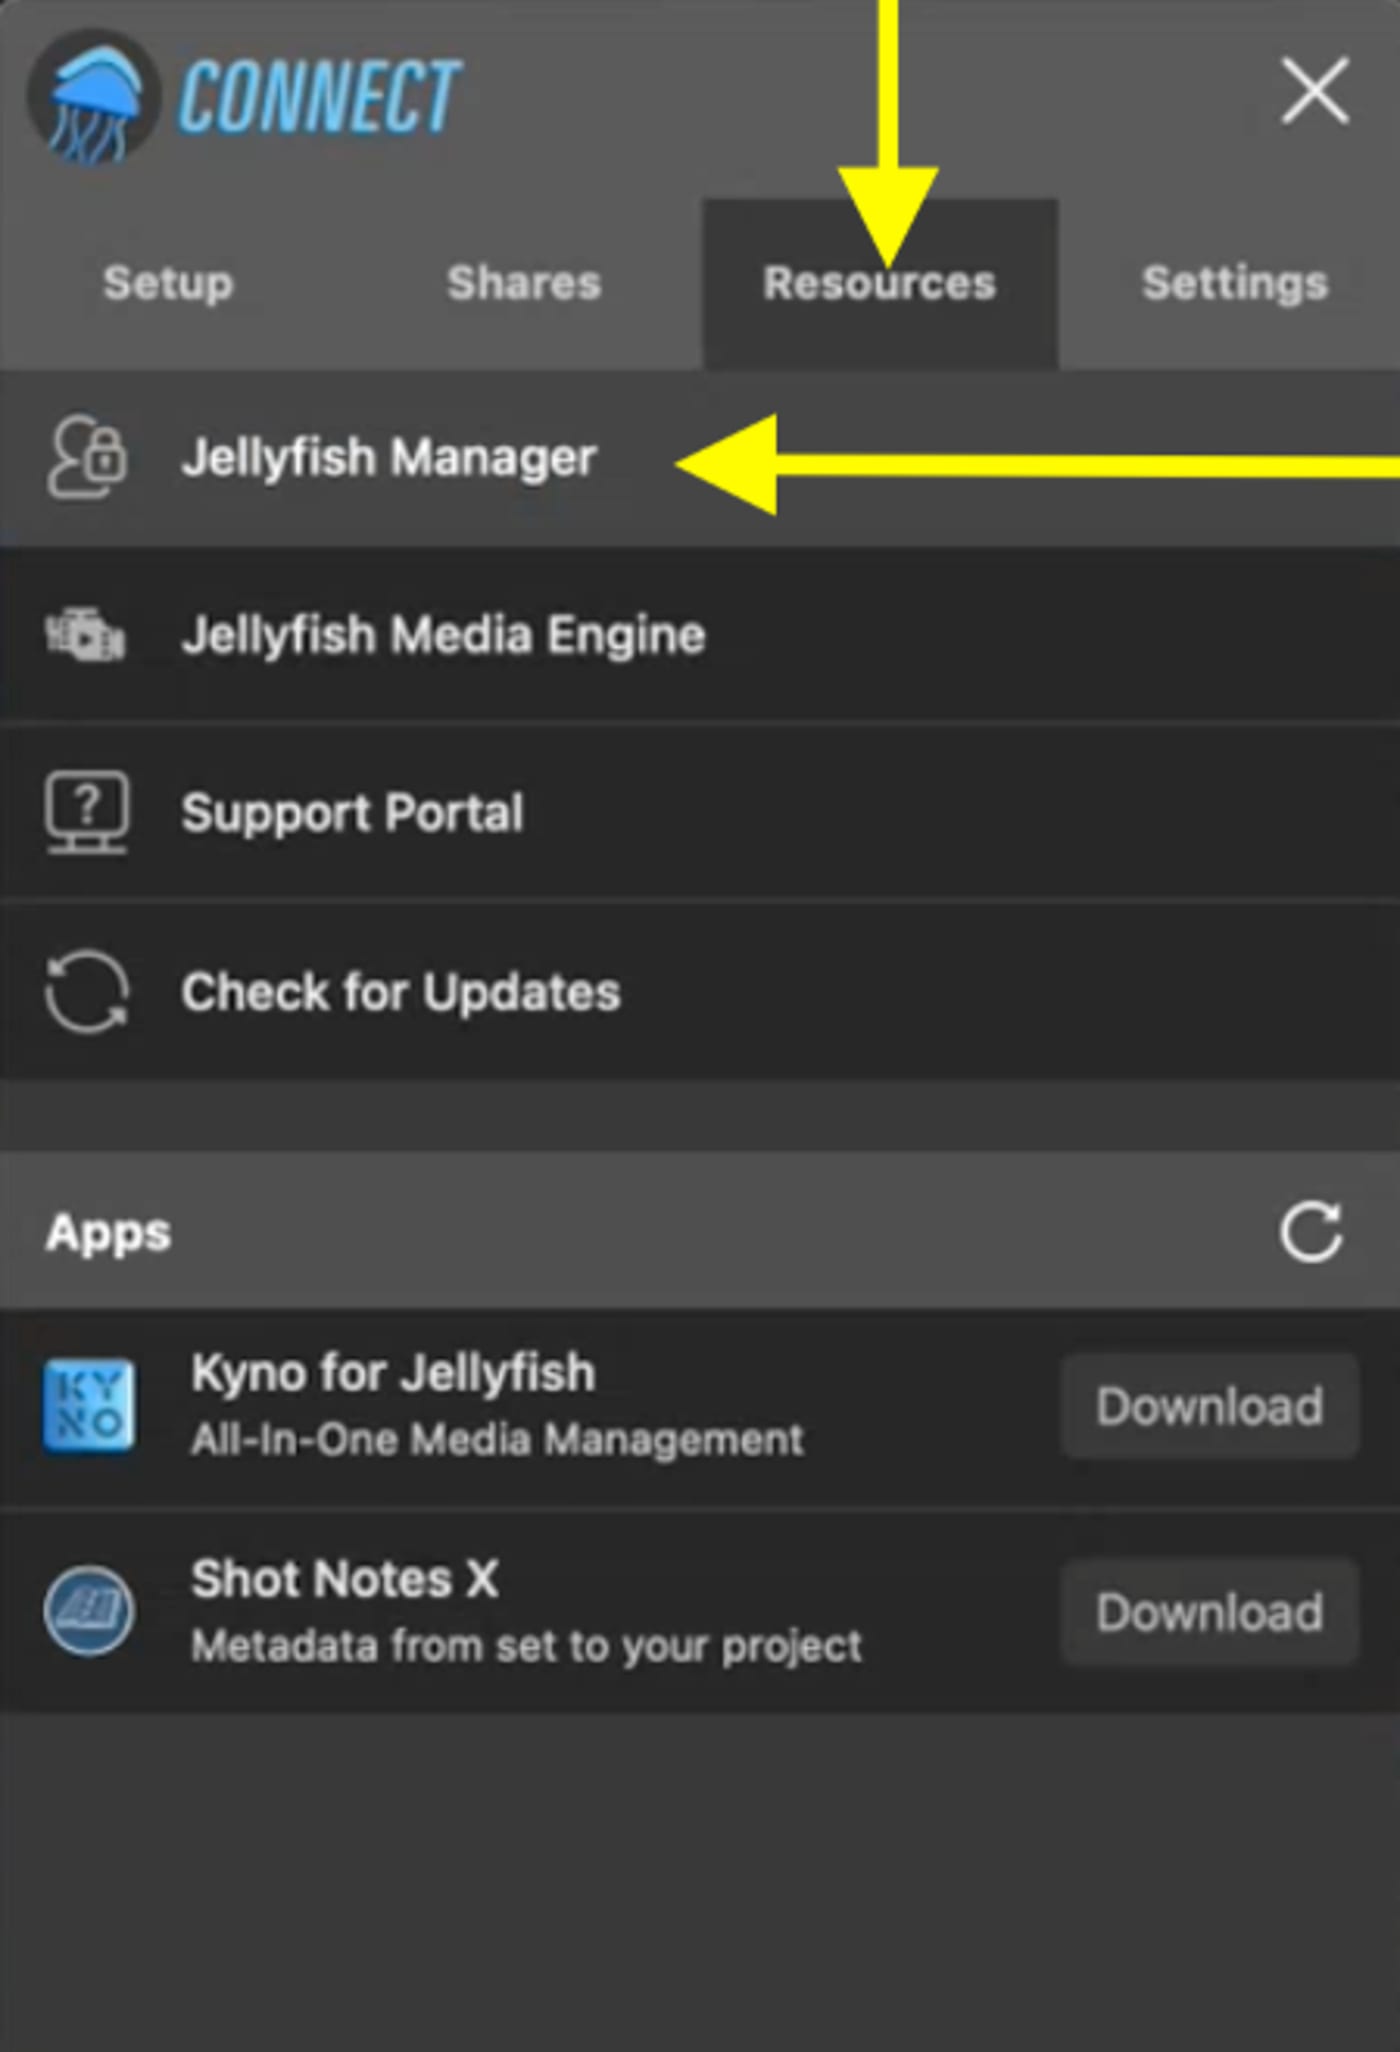
9. Now that you’ve connected to the Jellyfish for the first time, you will want to create a username and password for each team member. You can do this in Manager for Jellyfish, which is your Jellyfish admin hub. To get to Manager for Jellyfish, open your Connect app, click on the Resources tab, and click Manager for Jellyfish. You can also access Manager for Jellyfish at any time by navigating to jellyfish/ into your web browser. Additionally, you can access Manager for Jellyfish by entering your port IP address into your web browser.
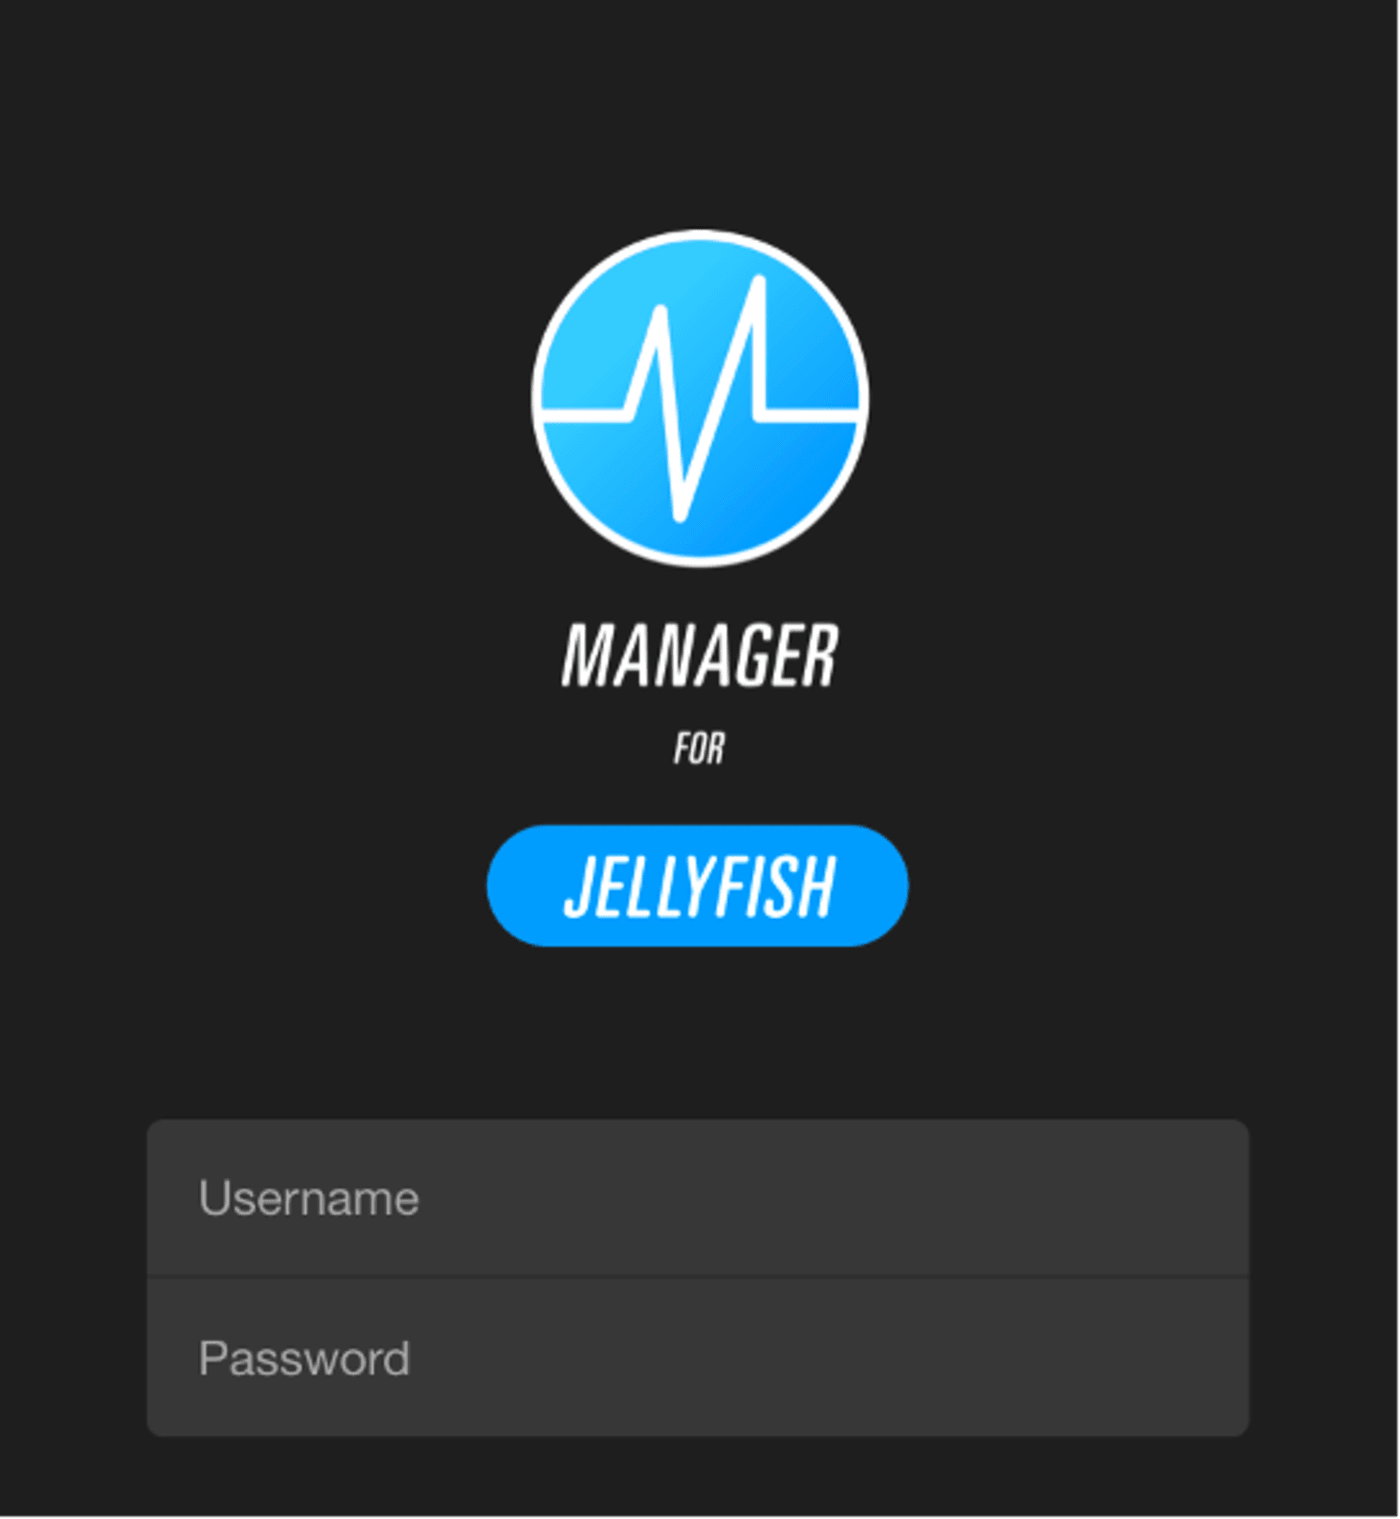
10. The main login will pop up and prompt you to enter your Manager for Jellyfish credentials. You may use the following for setup:
- Username: main
- Password: luma
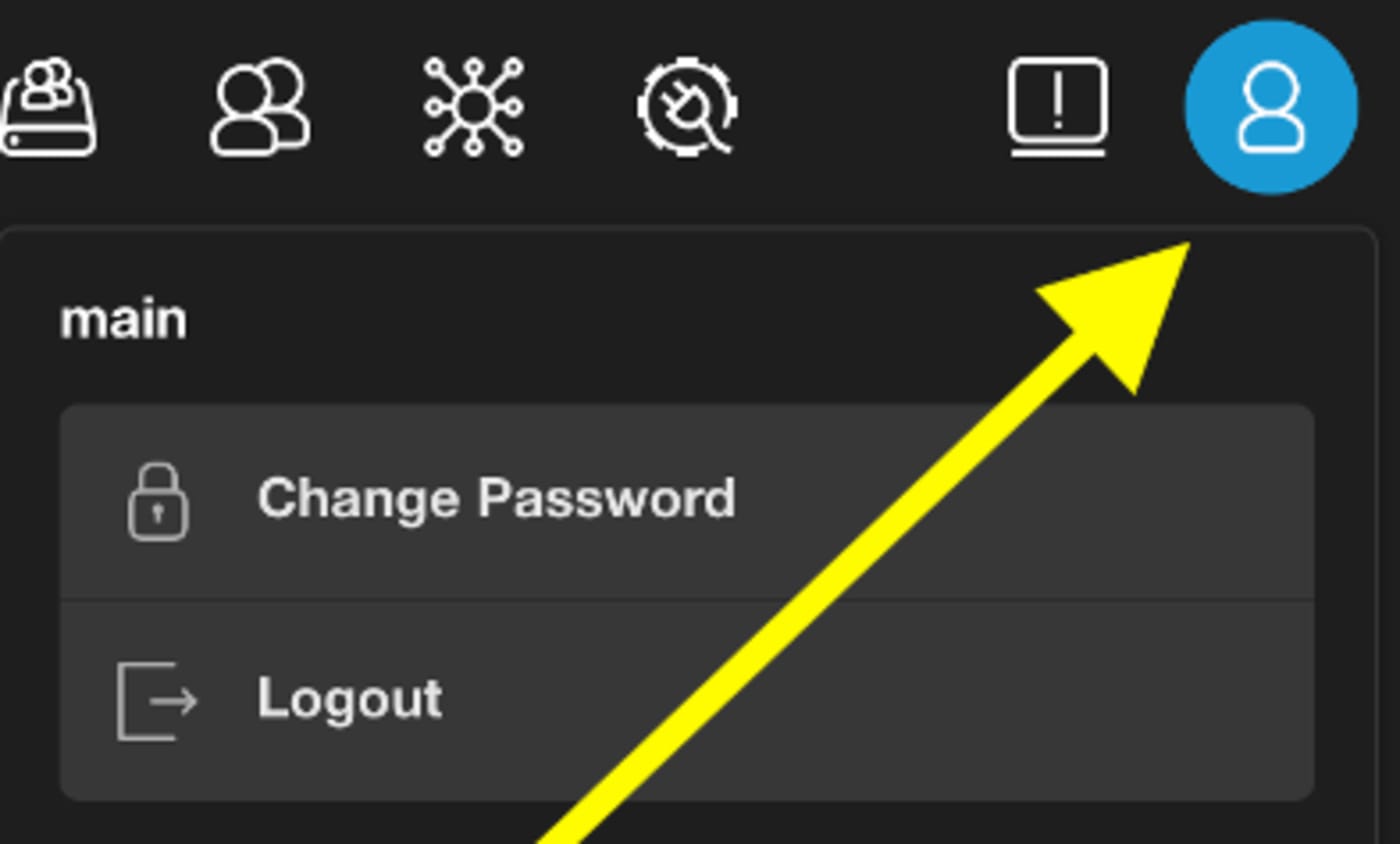
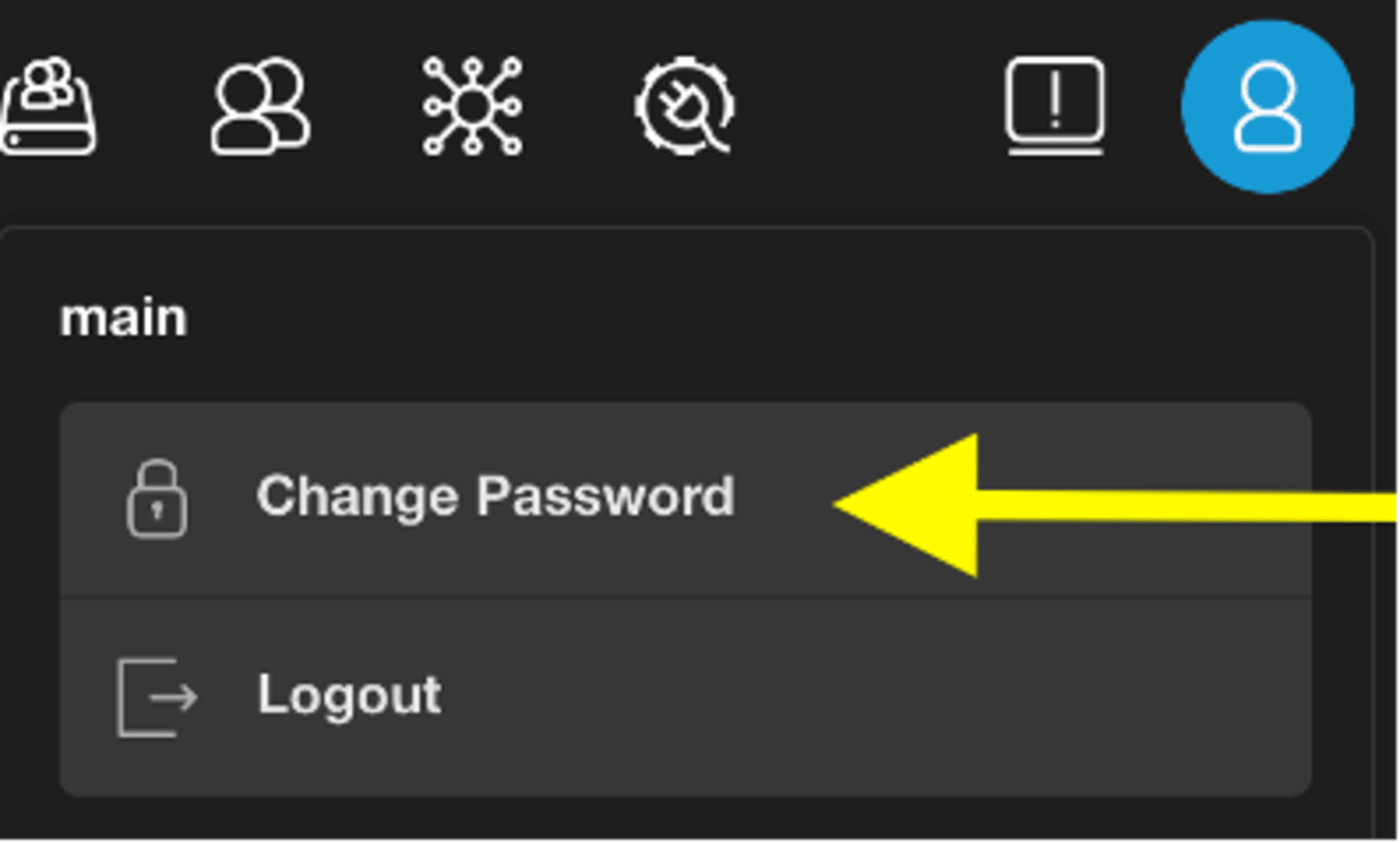
11. After your first login, you may want to change the password from the factory setting assigned above. To do so, click on the person icon in the top right corner and select “Change Password.”
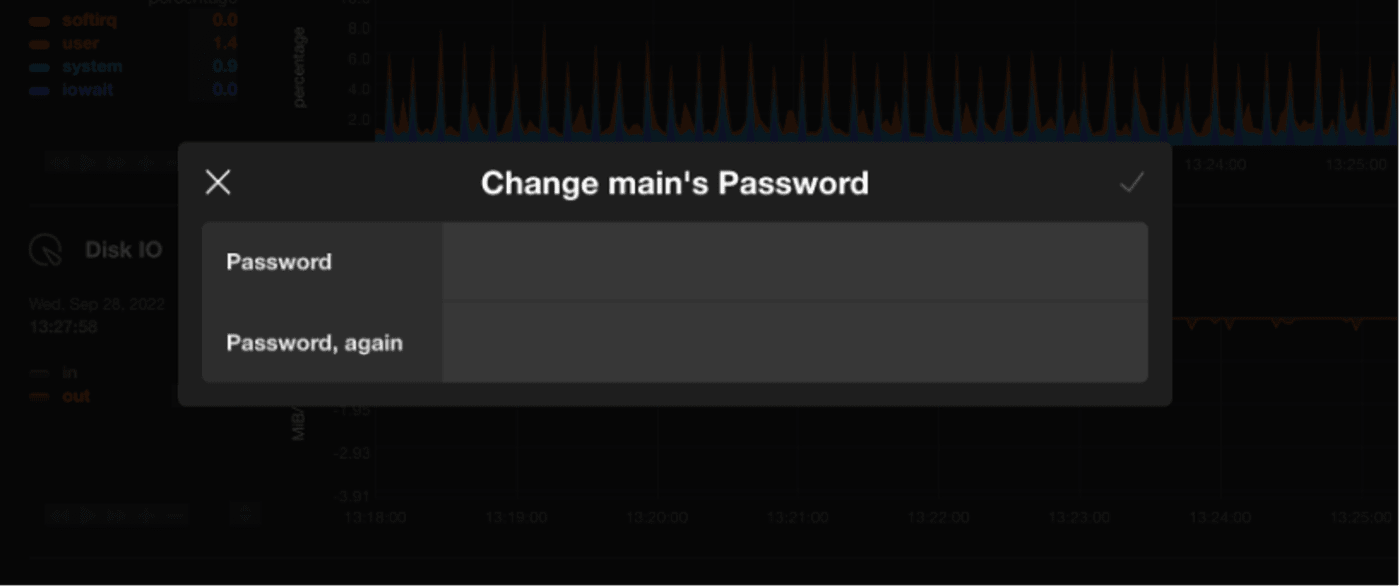
12. Enter the new password you’d like to use, and type it a second time to confirm. Be sure to not lose or forget this password.
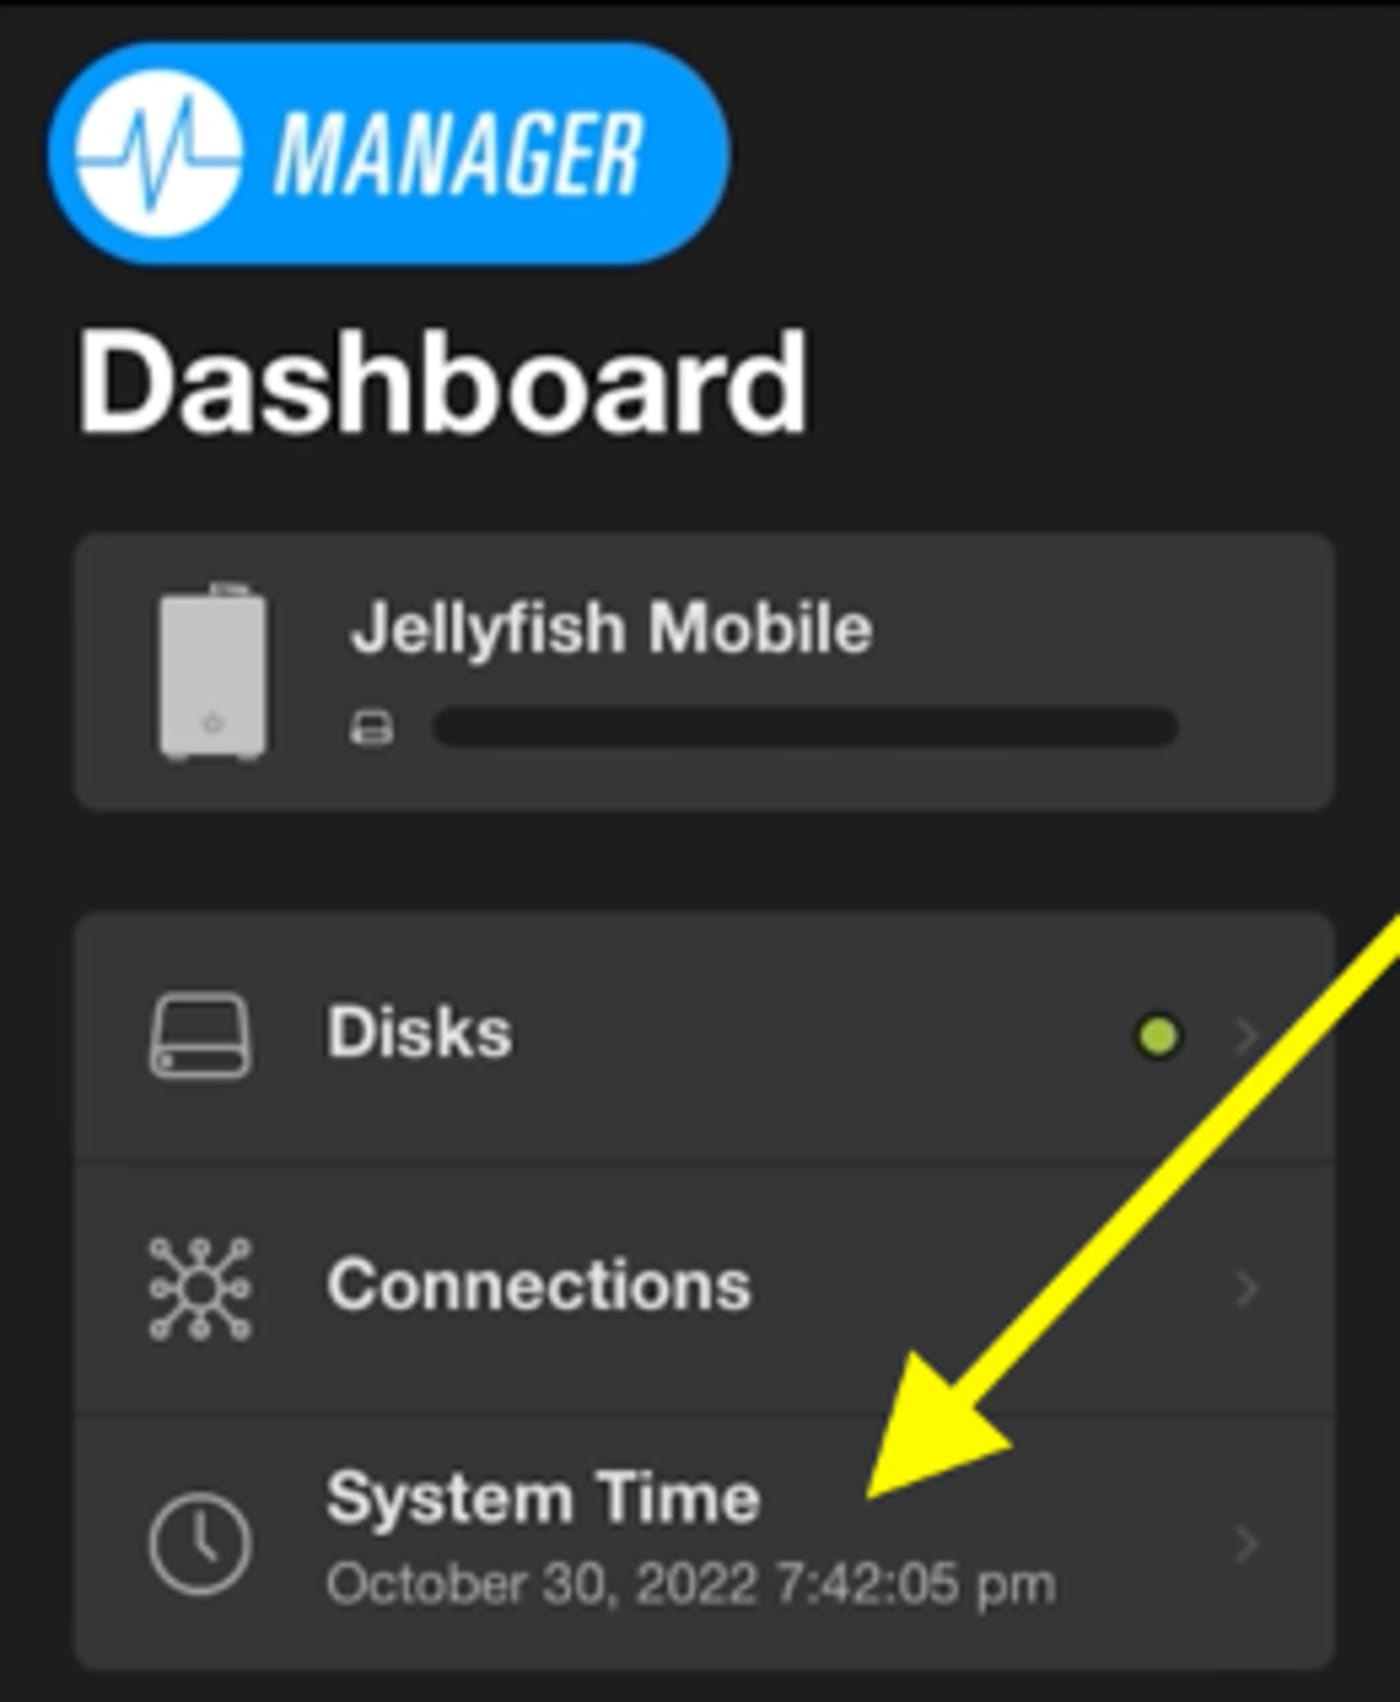
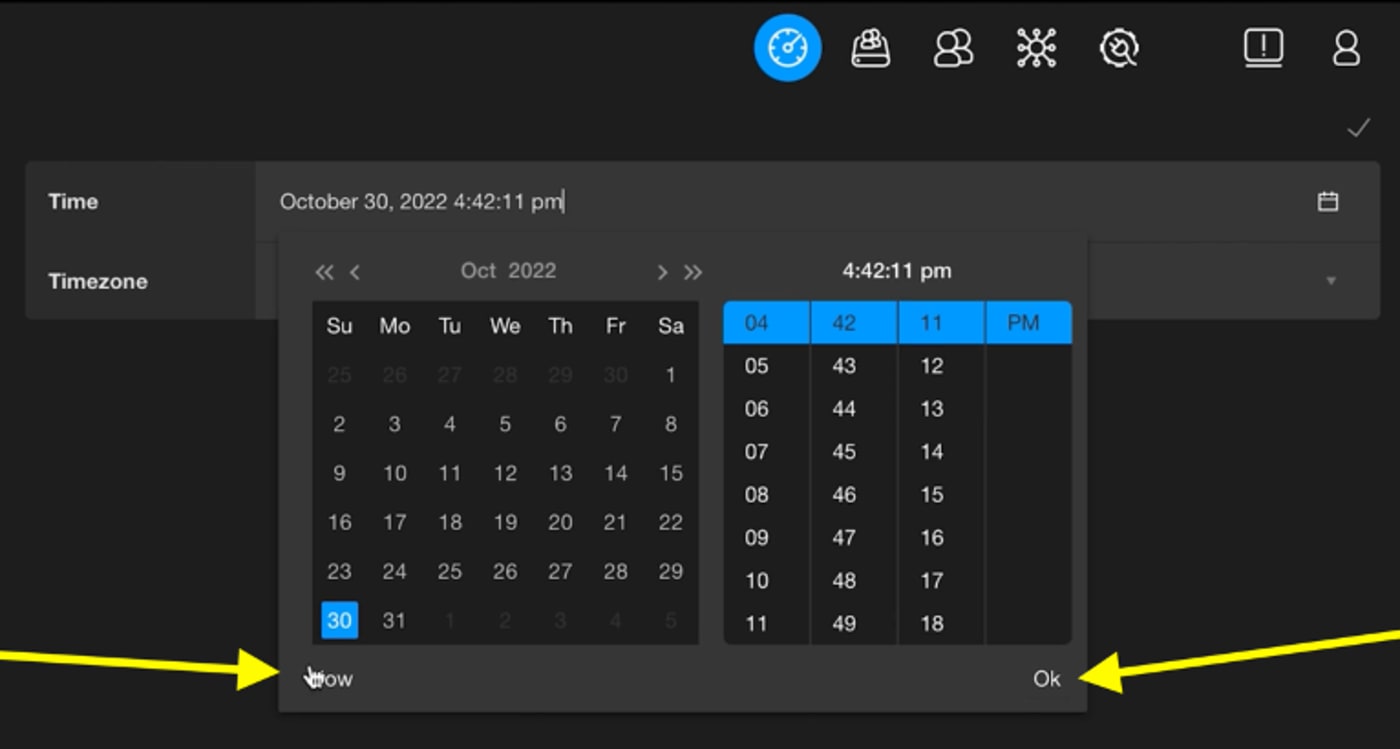
13. When you’ve successfully entered the credentials, your Manager for Jellyfish dashboard will load on your screen. Make sure to set up your system time on your jellyfish to match our time zone, that way all your files will have the correct time stamps. To do this, click on System Time under the Dashboard menu.
14. To the right of the Time column, click on the Calendar icon.

15. This will bring up a calendar where you can change the date and time. You can select manually or click “Now” in the bottom left corner to bring it to the current time on your computer. Click “Ok” when finished.
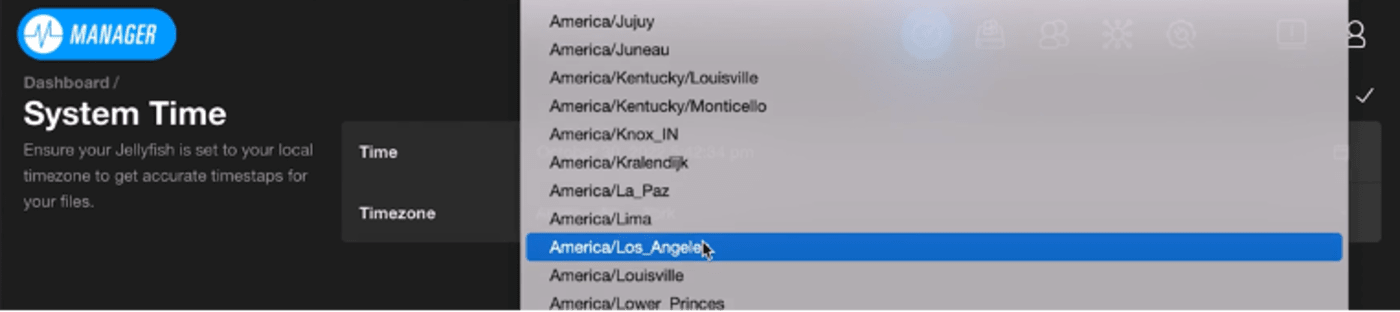
16. To change the time zone, click on the drop-down arrow on the far right of the Timezone column.

17. Click on the appropriate time zone.
18. When you are satisfied with the time and date settings, click on the white arrow in the top right corner to save your changes.

Users and Groups
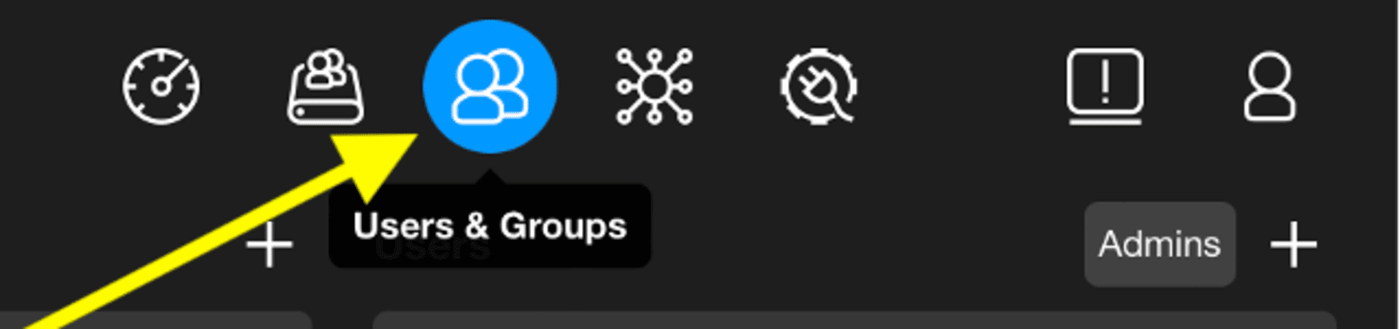
- Now that you’ve set up your date and time, let’s explore Manager for Jellyfish. In the upper right corner, you’ll see several icons.
1. Click on the Users and Groups tab. This is where you will create new users and passwords. Additionally, you can create groups of users that will share the same level of permissions, which is very useful if you have a lot of people on your team.
Creating Groups
1. To create a new group, click on the plus sign to the right of the Groups column.

2. Enter a name for the new group in the Name field. From here, you can add people in multiple ways.
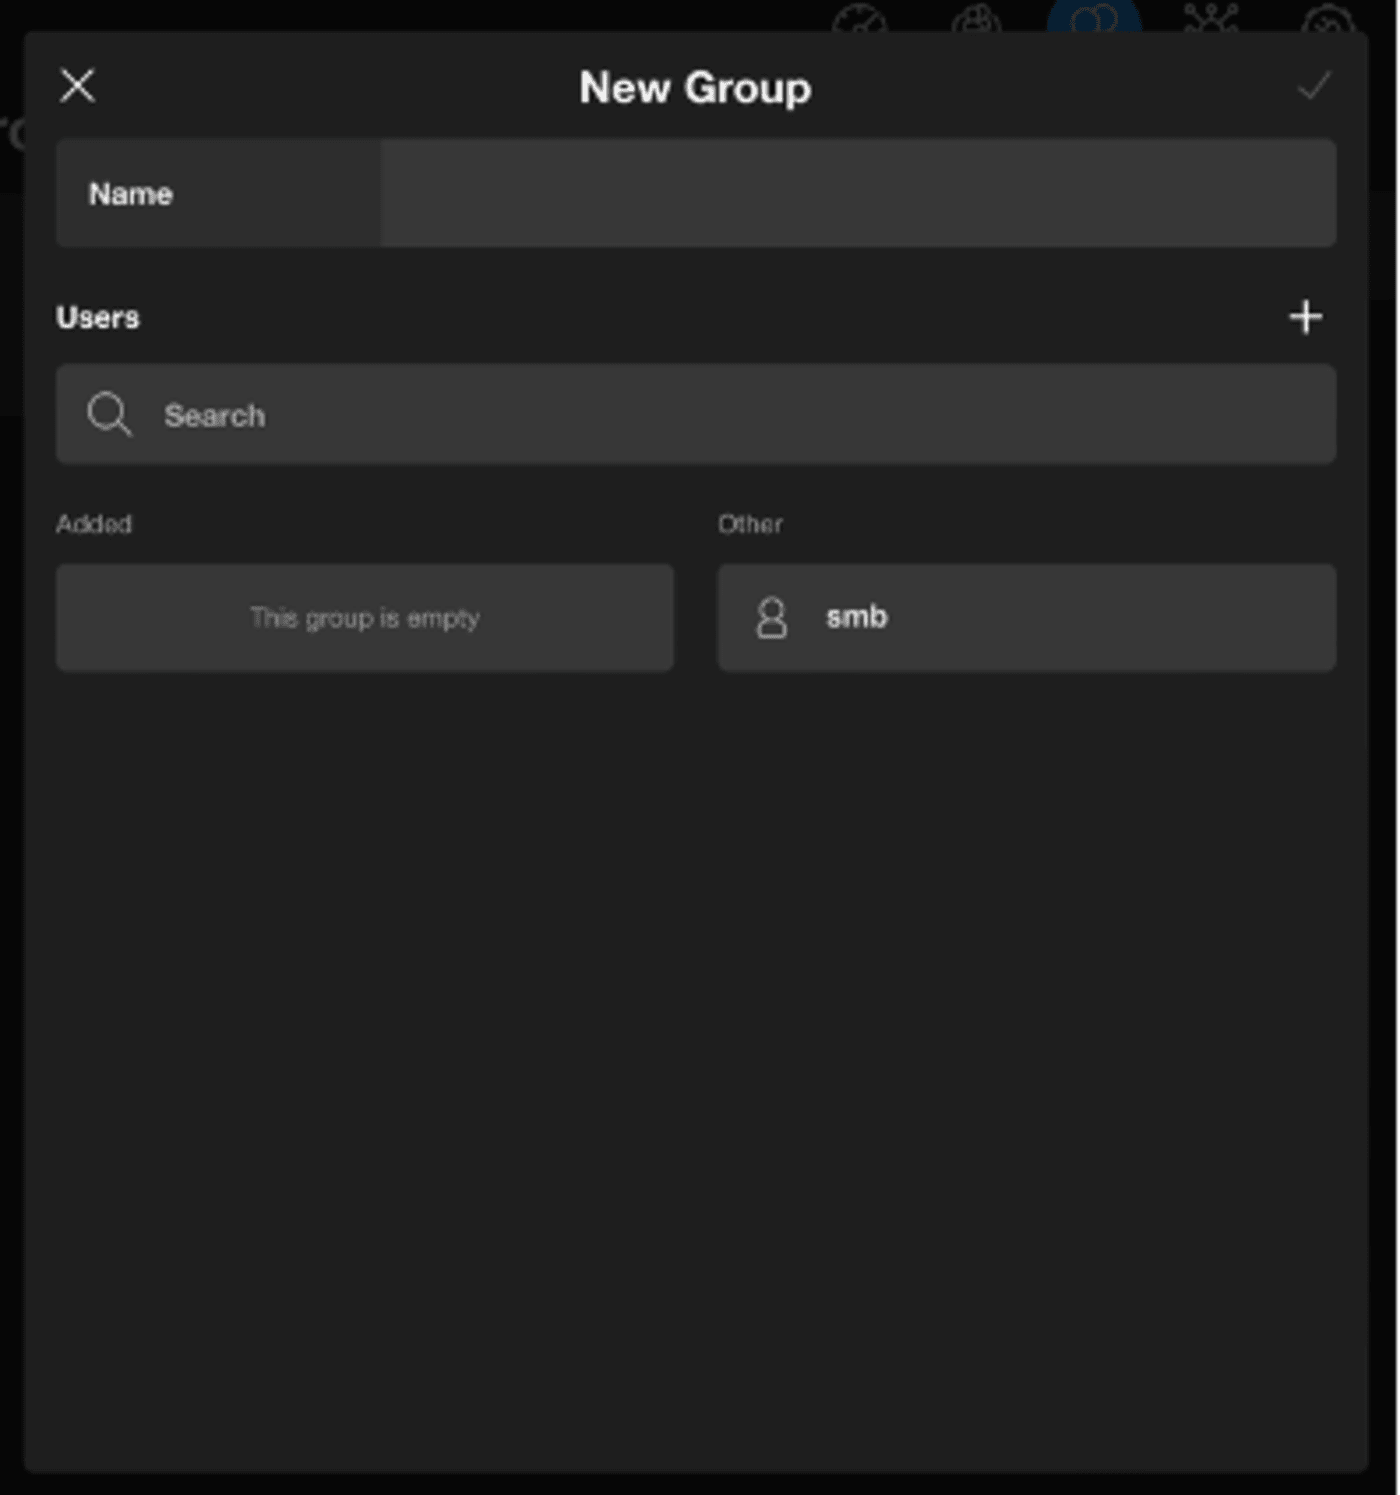
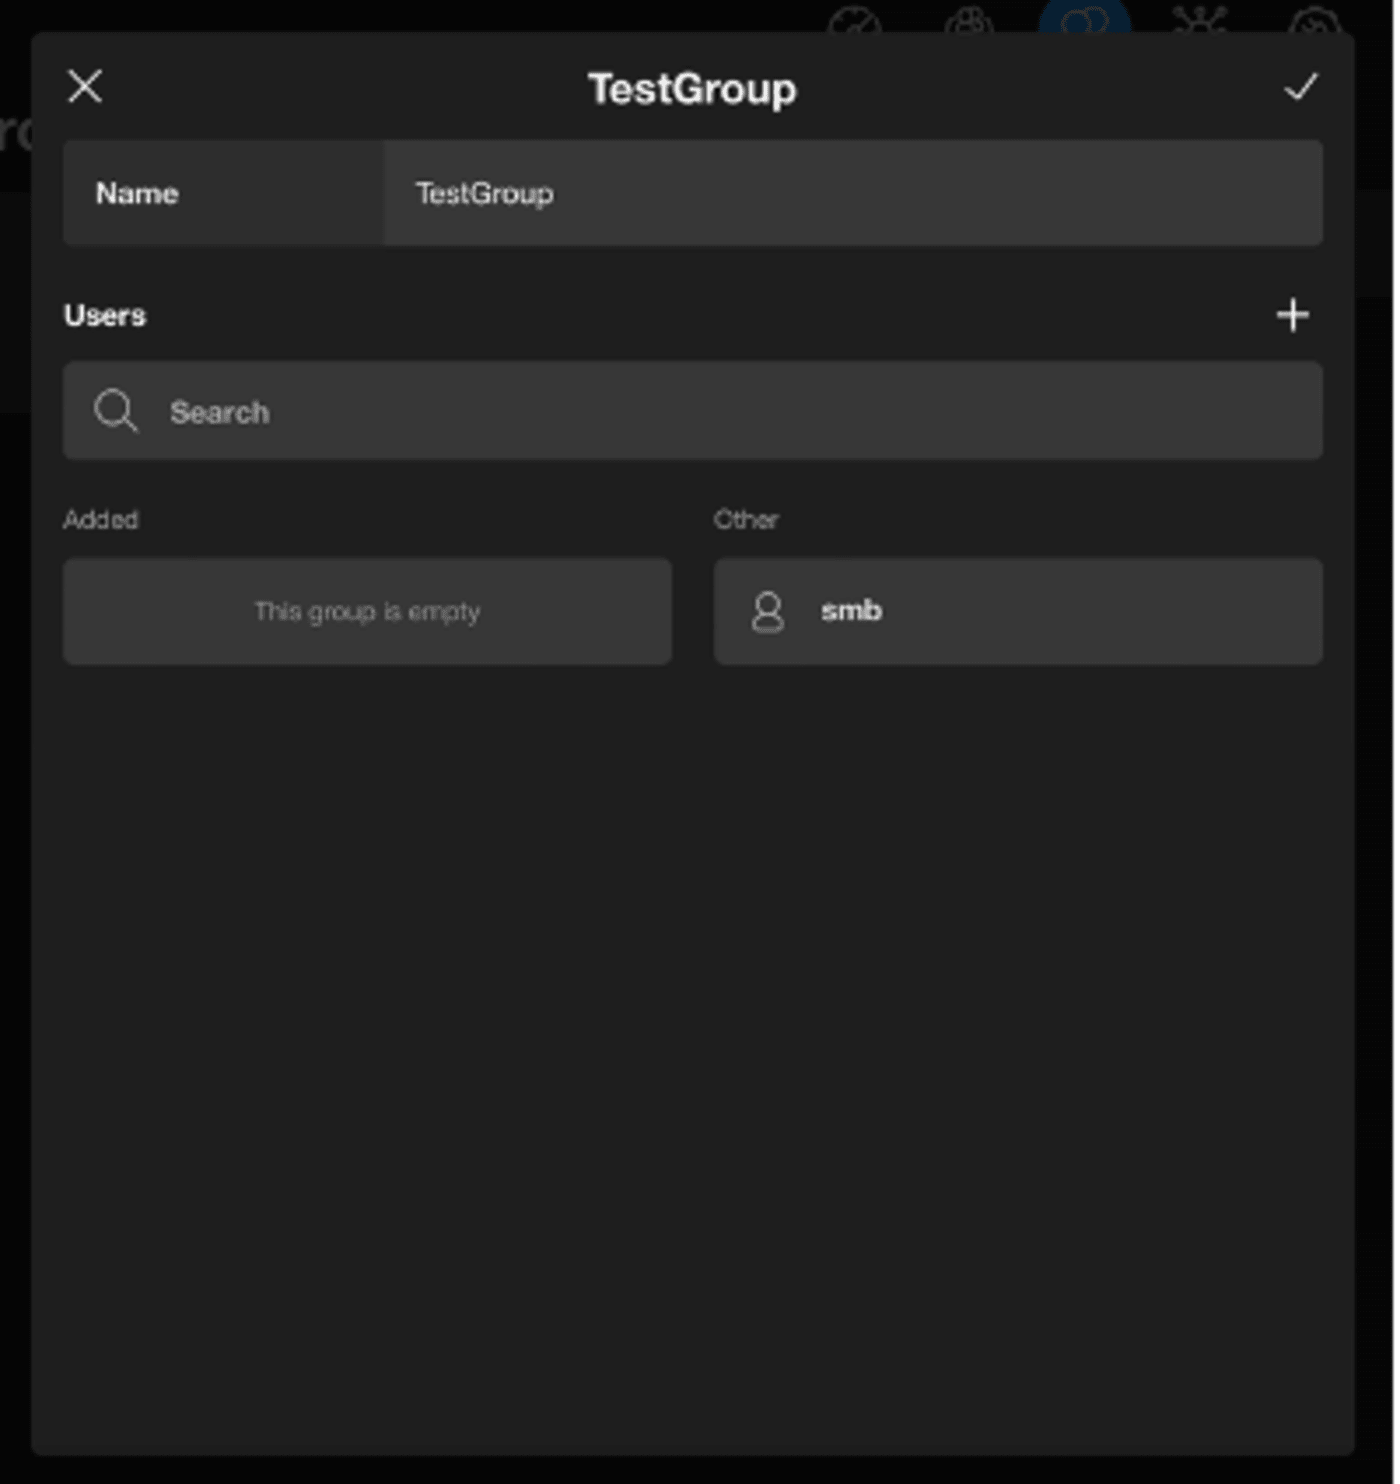
3. If you’ve already created users, you can use the search box by typing their names. Registered users in your system will begin to populate. You can also just scroll down the Other column and click on users that have already been created to add to your new group. If no users have been created, you can create them within this same window by clicking the plus sign next to the Users icon and registering them. Once you add a user to the group, you can assign permissions to this group by going back to the shares tab and adding the group to your designated share.
Creating New Users
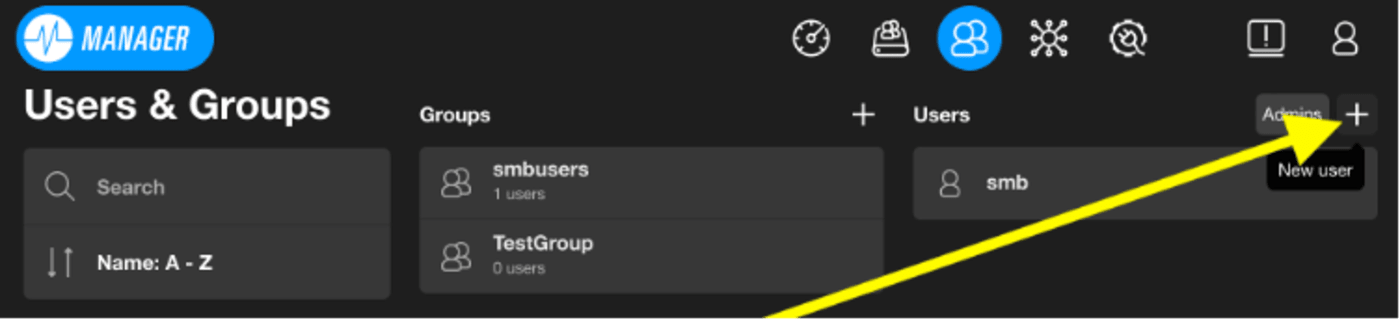
1. To create a new user, click on the plus sign on the far right in the Users column.
2. You will be prompted to create a username and password for yourself. Please note that these are case-sensitive.
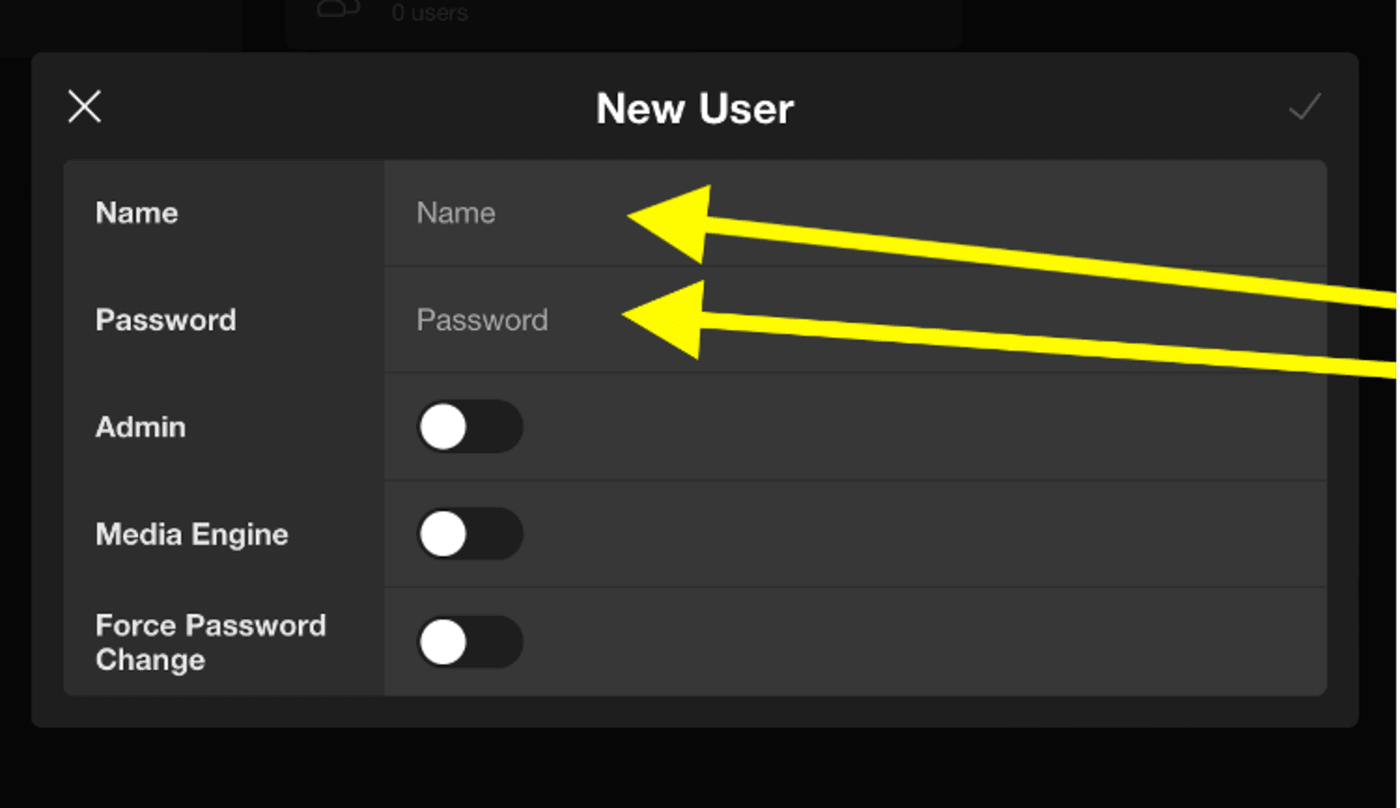
3. Before you hit the check mark on the top right of this box, be sure to toggle on the Admin button if you would like this Jellyfish user to be an admin. Admin users will have rights to add new users, create new groups, reset passwords, and create/delete shares.
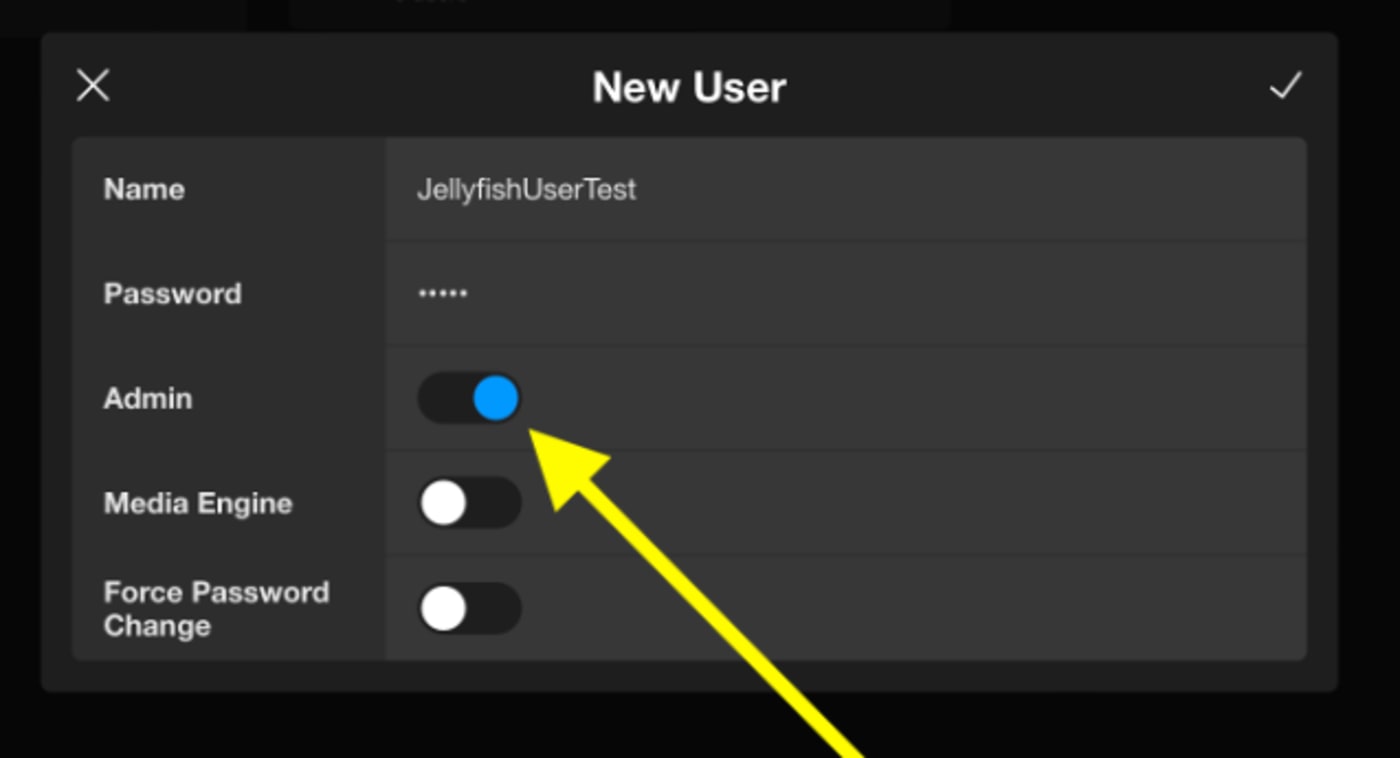
4. Toggle on the Media Engine button if you plan on using this tool to grant Media Engine access.
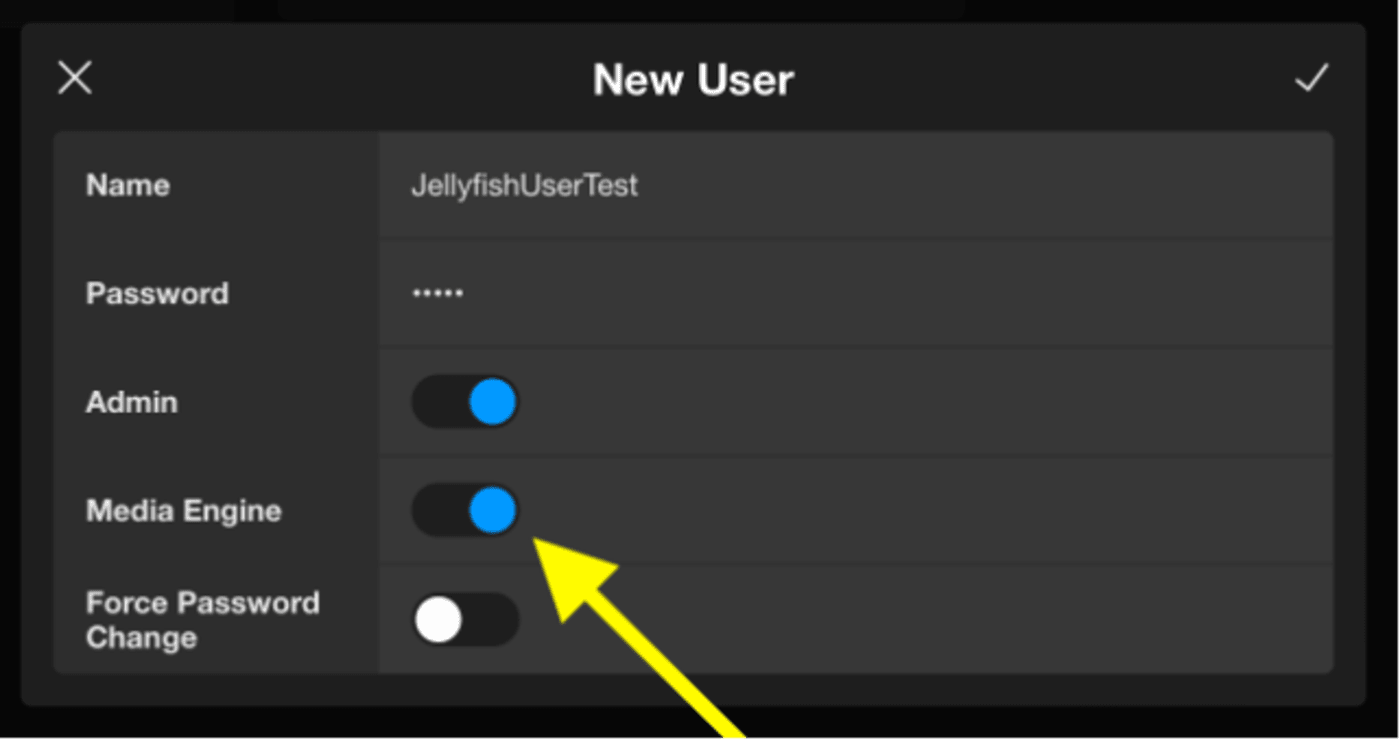
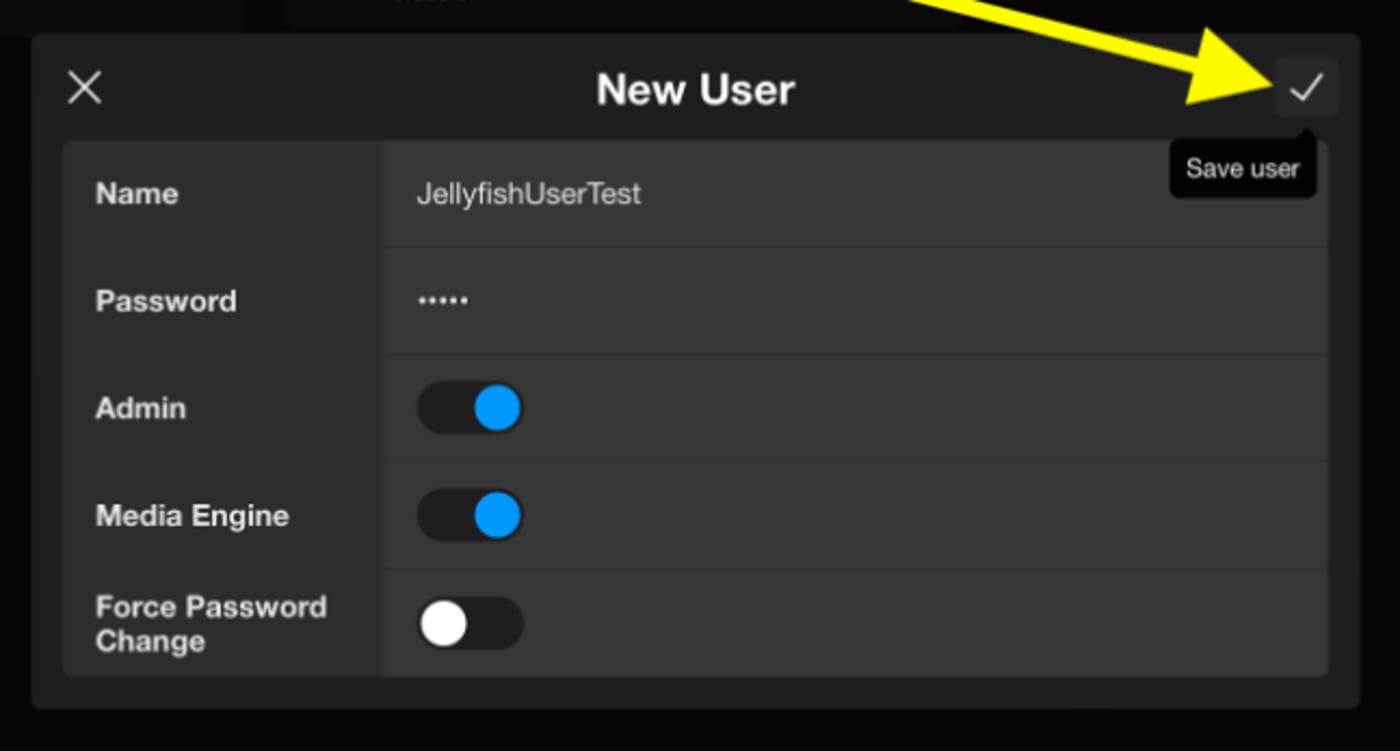
5. Lastly, if you’re creating a new username and password for someone on your team, you can toggle on Force Password Change. This will prompt the new user to create their own password after connecting to Manager for Jellyfish. Click the checkmark to save your changes.
6. You can repeat this process for any number of users for your Jellyfish and customize the individual settings based on each person’s needs and access permissions.
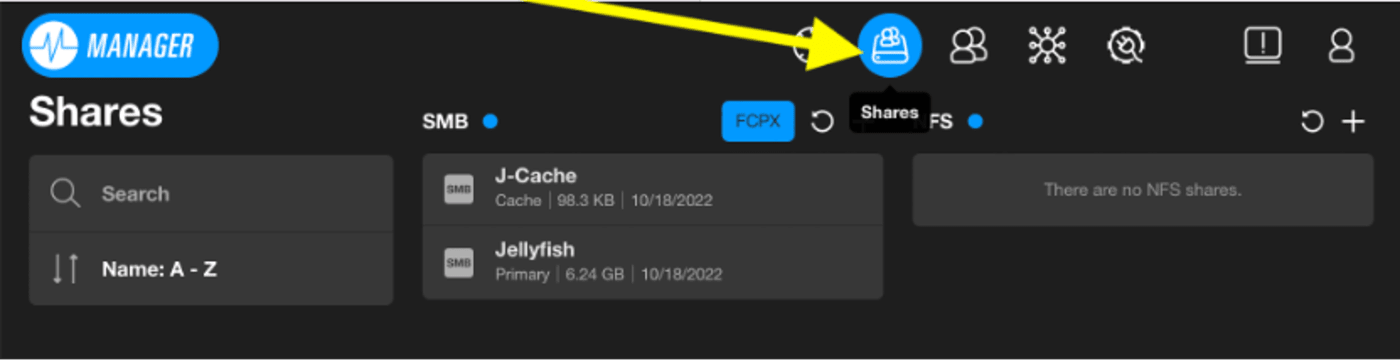
7. After you’ve created a new username and password for yourself and the users on your team, you are ready for the final step: granting access to your share spaces to your users. In the top right list of icons, click on the Shares tab, and you will see your pre-configured shares.
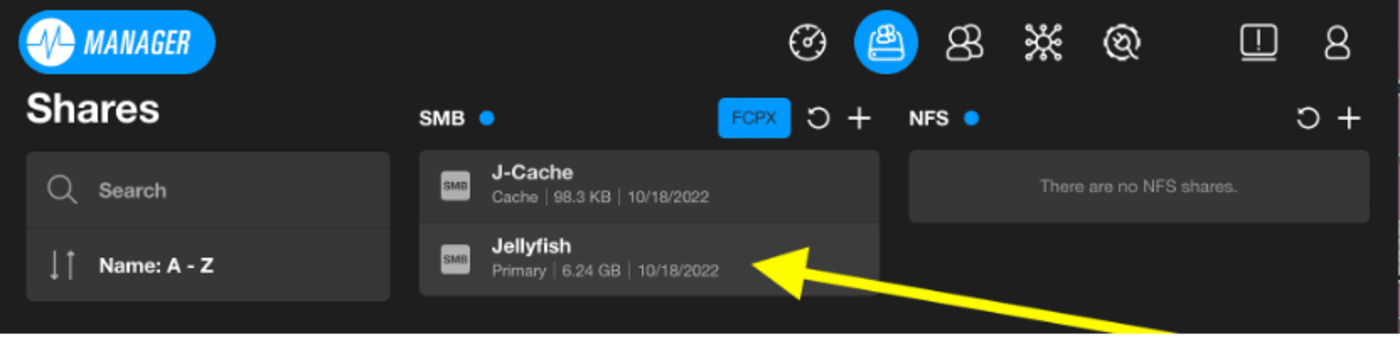
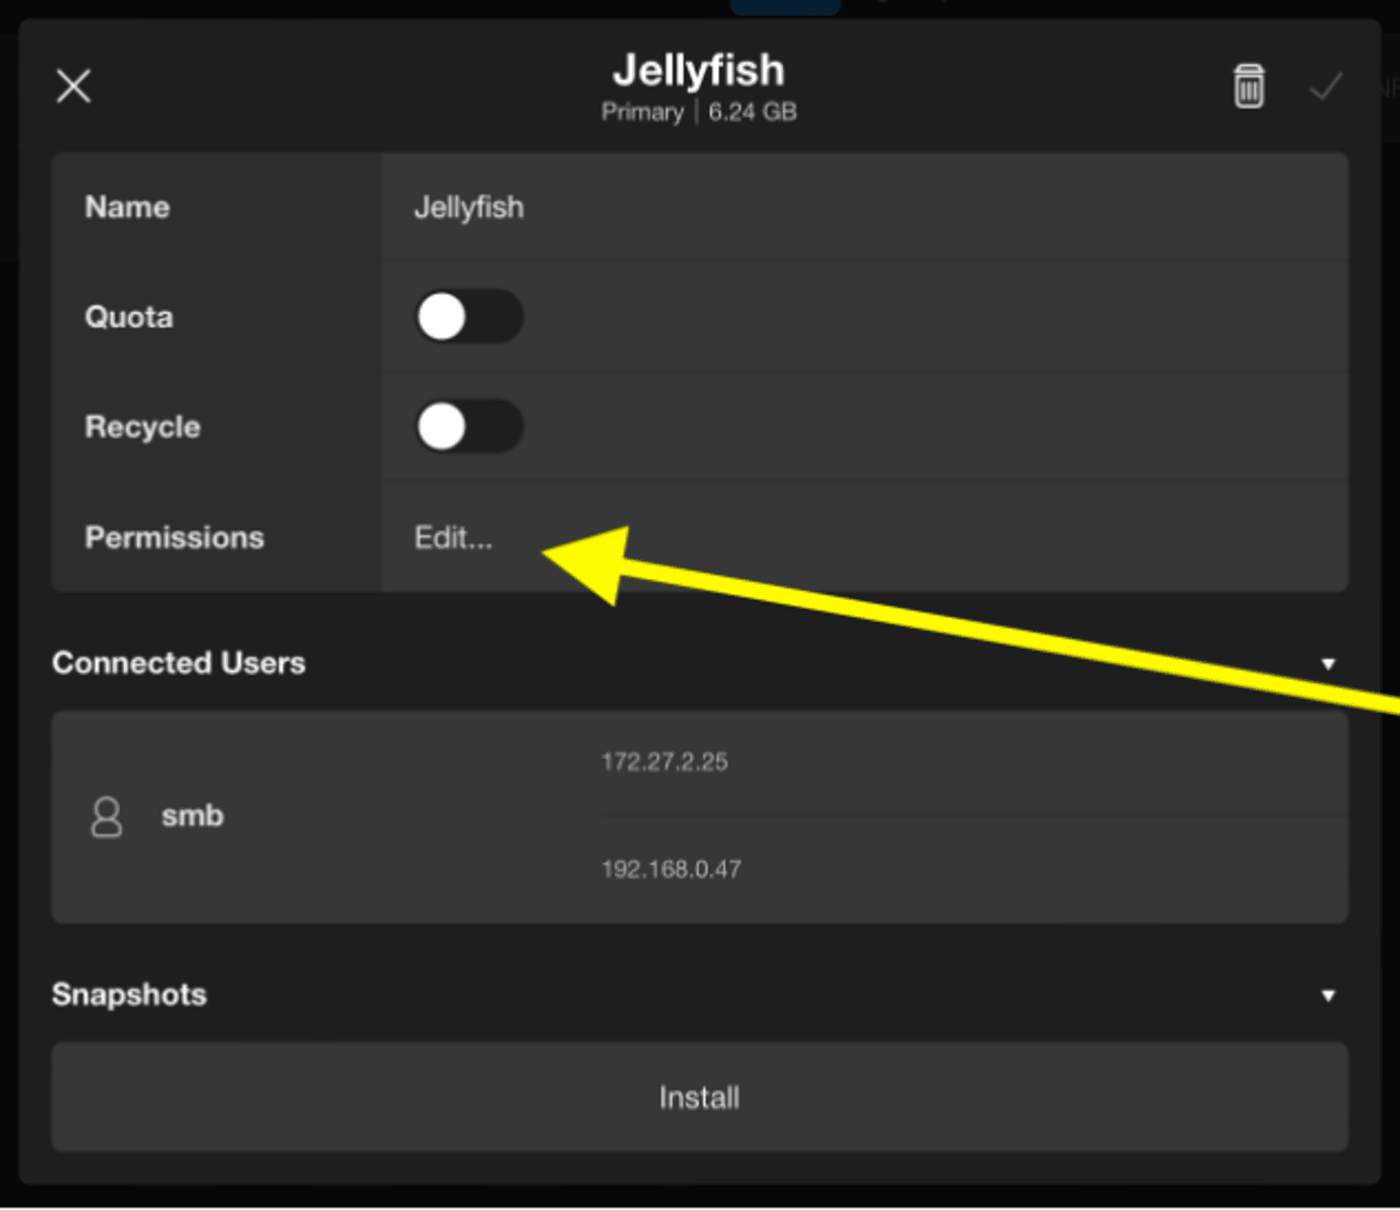
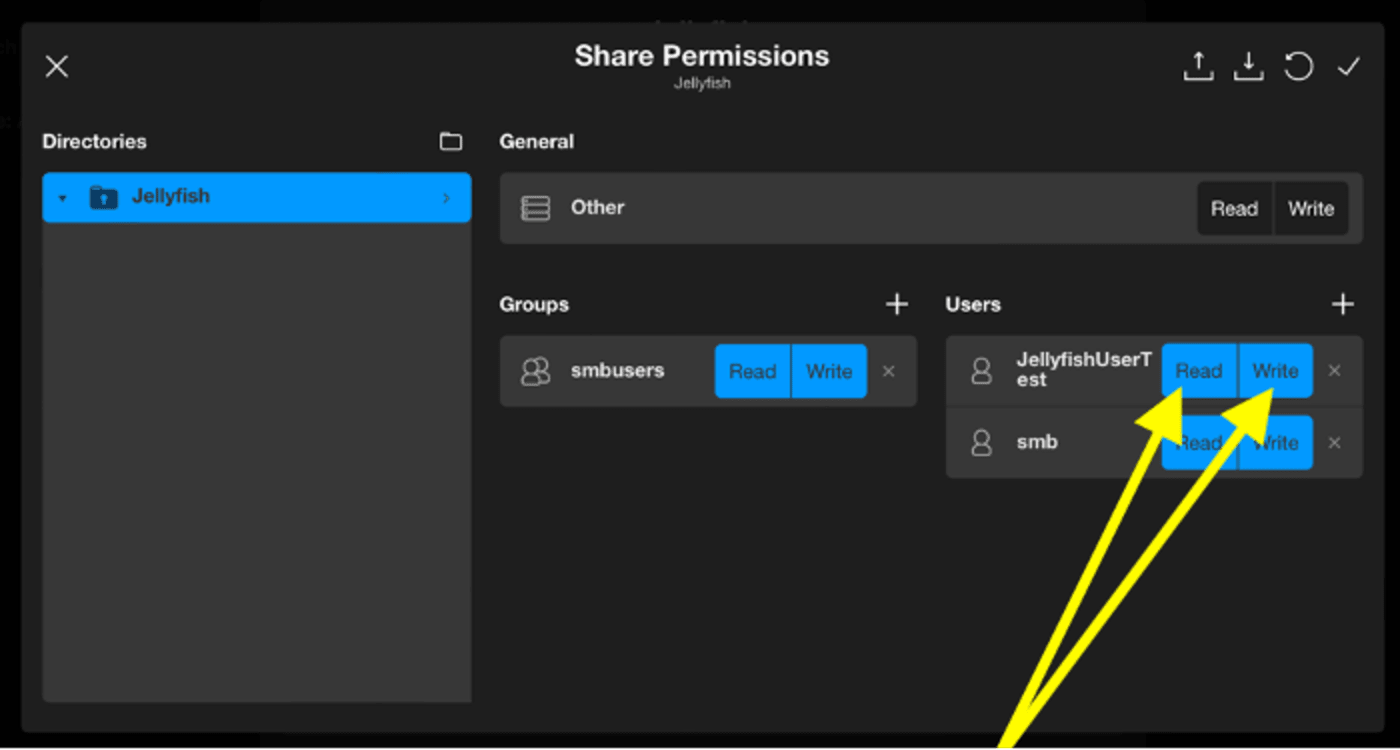
8. Here, you can grant your own access to the Jellyfish. Click on the Jellyfish share, then click on Edit next to Permissions.
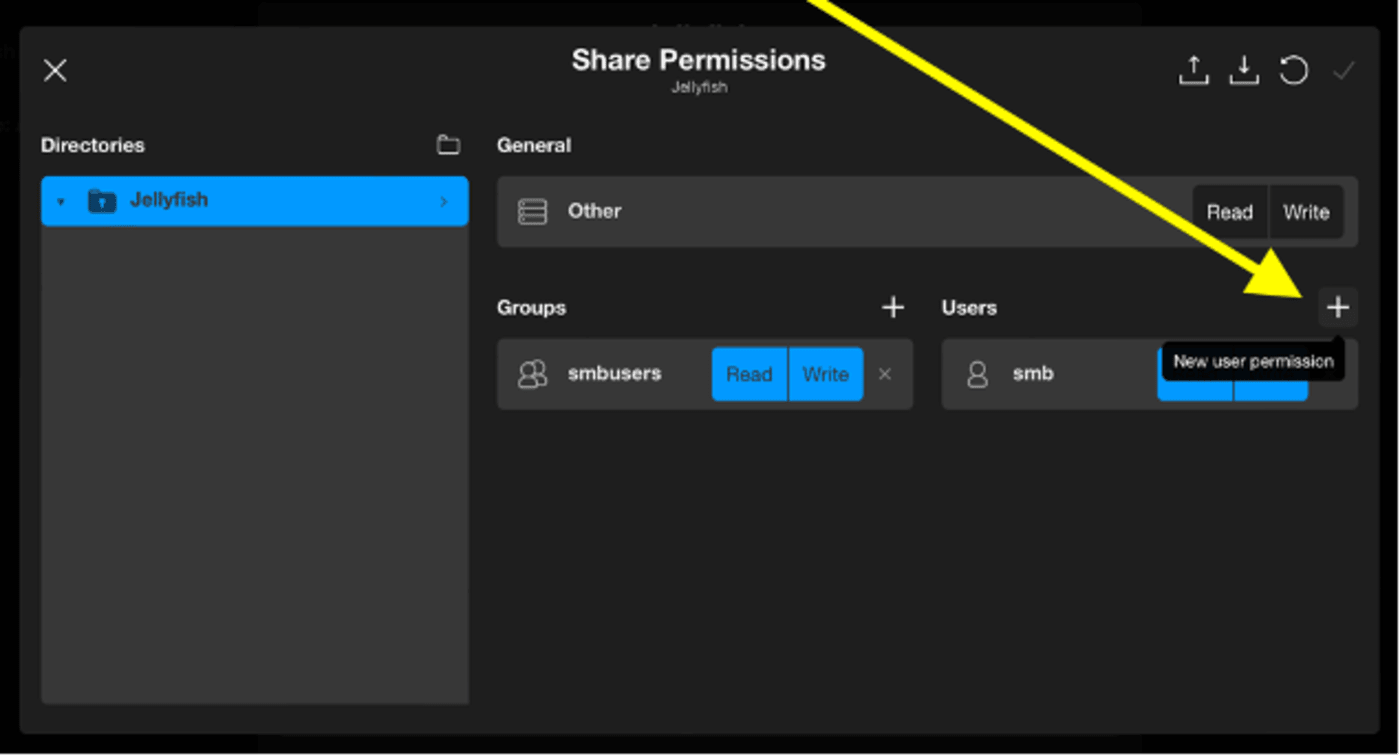
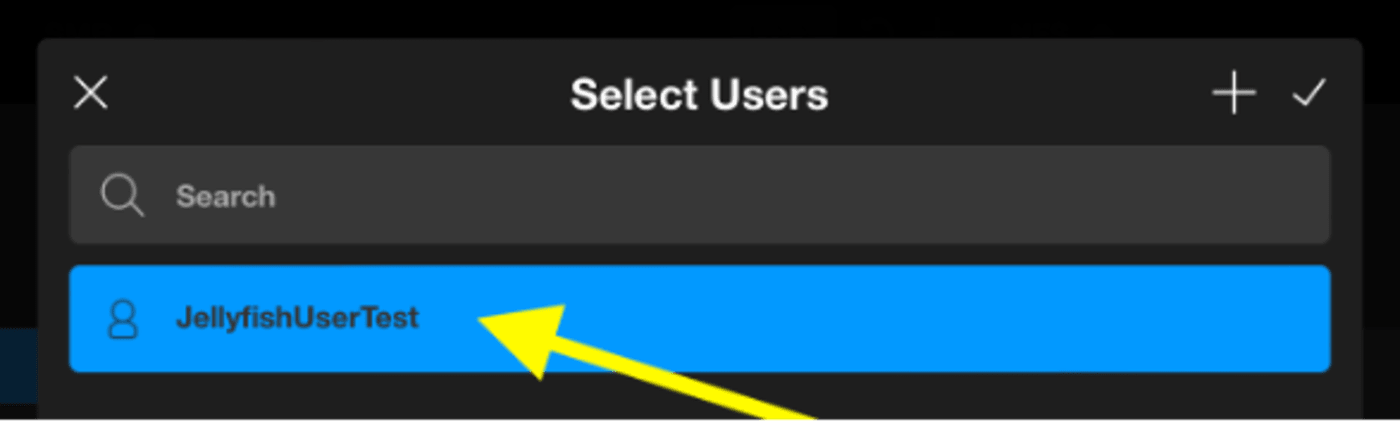
9. A window will pop open with a list of users that already have access to your share space. To add a new user, click the plus sign on the top right of the Users column. Remember: without granting user permissions to a share, they will not be able to access it.
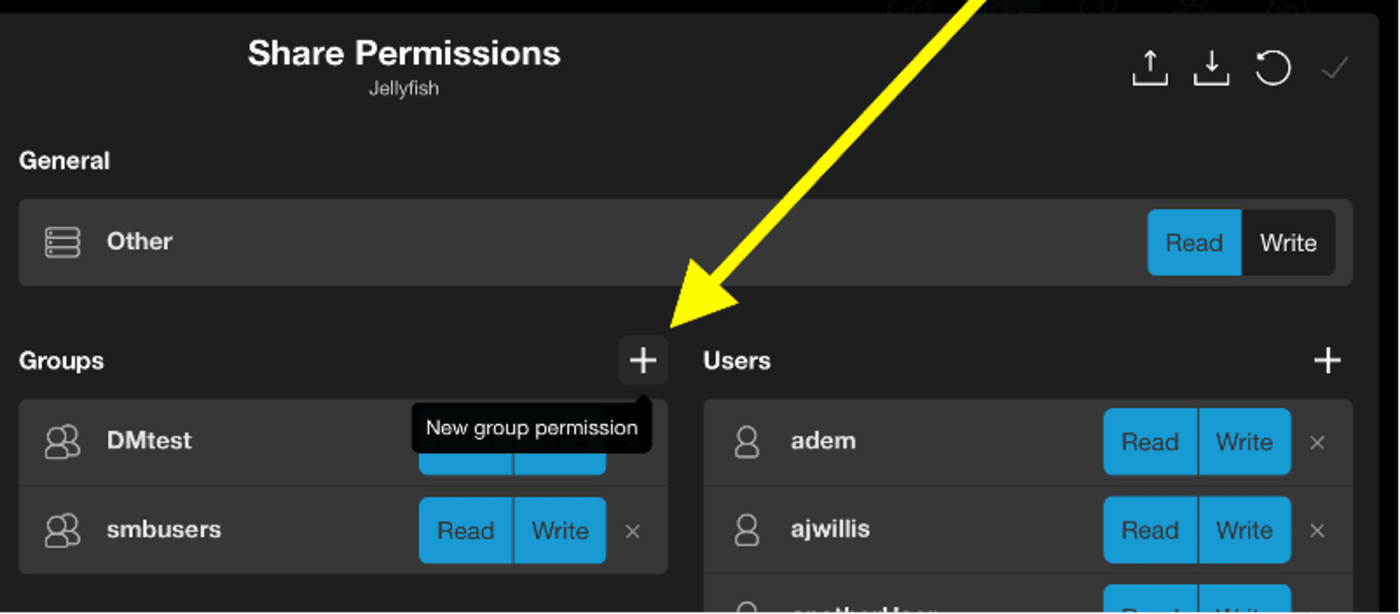
10. Alternatively, for setting permissions for users all at once, you can create a group. You can set Read and Write permissions for the group itself.
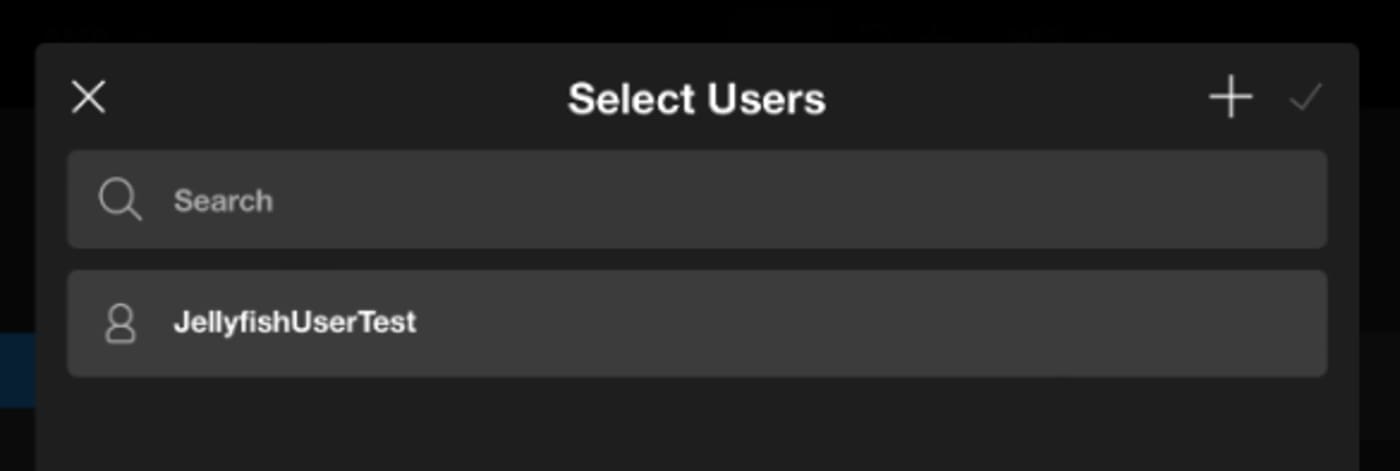
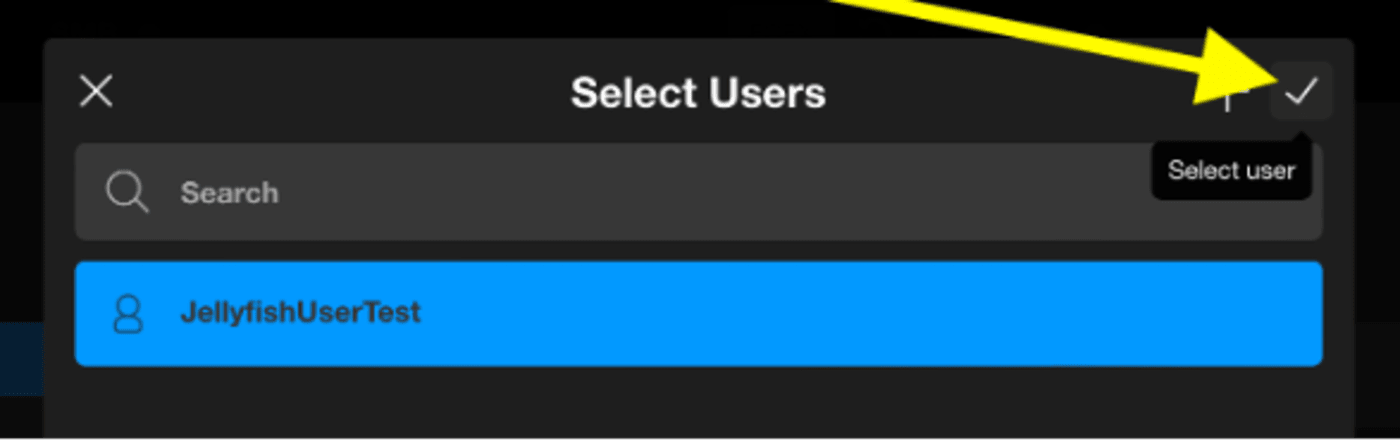
11. Click on all the users you want to have access to this share, then click the check mark in the top right corner of the window to add them.
12. Now assign what kind of access you’d like each user to have: Read, Write, or both. Read gives the user view-only permissions, while Write gives them permission and ability to edit files within this share space. Most users will have both Read and Write permissions.
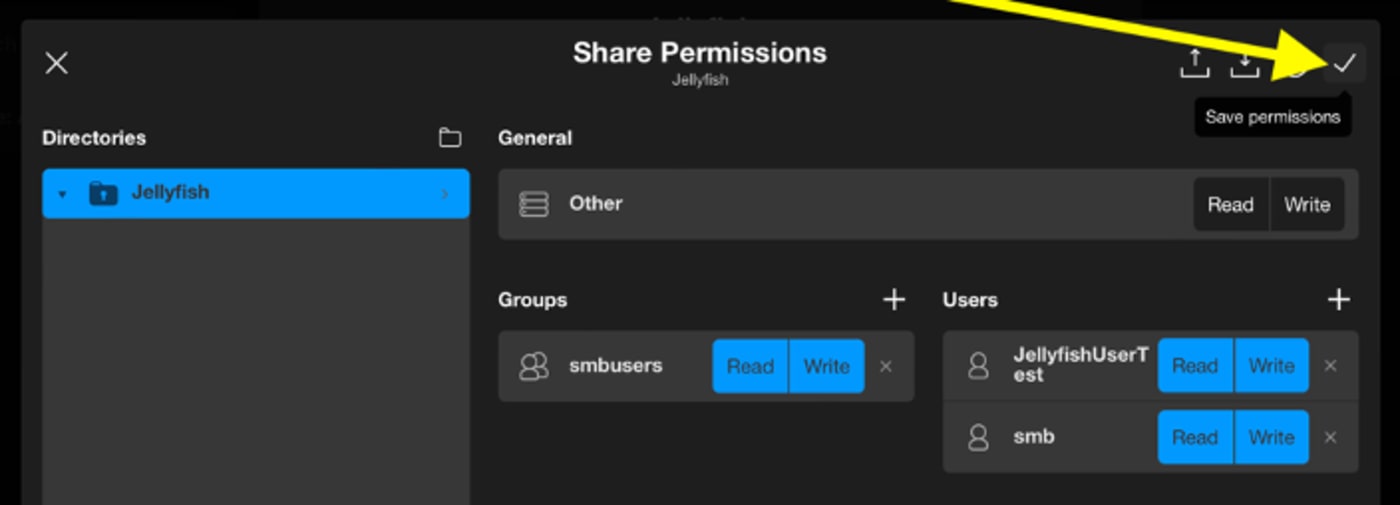
13. Once you’ve decided on your users’ settings, you can save these changes by clicking the check mark in the top right corner.
14. If you work in FCPX, toggle the FCPX button on to ensure share compatibility.

Additional Resources
- Want to know more? Check out our online resources at https://www.lumaforge.com/tutorials and https://jellyfish.support/.